Hollow World/Floors 41-50
WIP
Contents
General
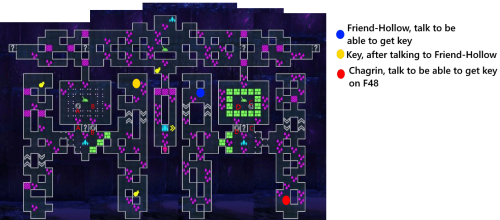
- M is Miniboss, K is Key.
Floor 41
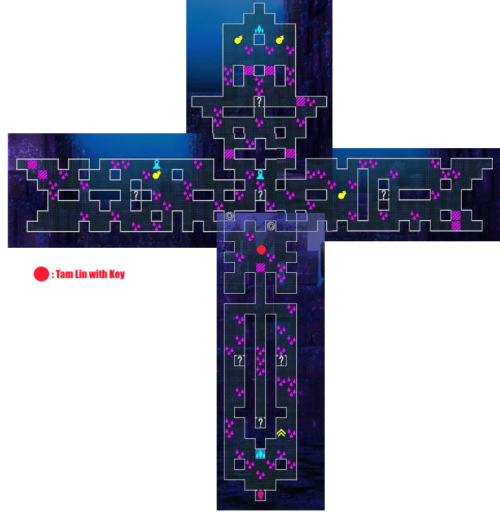
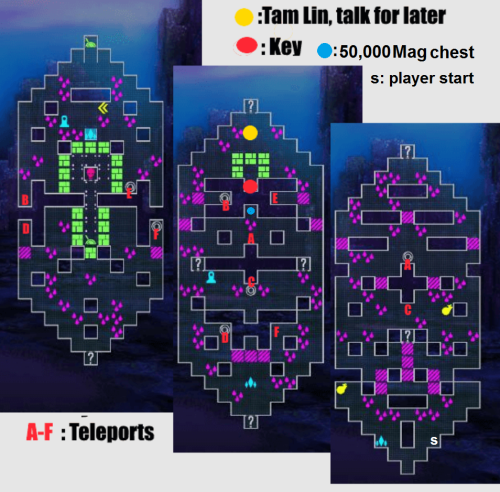
- Talk to Tam Lin to receive the key.
- Fight Berserker miniboss to advance further to the boss.
Boss
| Baphomet | Sandalphon | Koumokuten
|
|---|---|---|

|

|

|
| Resistances | |||||||
|---|---|---|---|---|---|---|---|
| Baphomet | - | Nu | - | - | - | Wk | Nu |
| Sandalphon | Rs | - | - | Rs | Nu | Rp | Nu |
| Koumokuten | - | - | Nu | Nu | Wk | Rs | - |
| Battle Speed | 21666 | ||||||
Note:
 Mag Reflector works perfectly
Floor 42
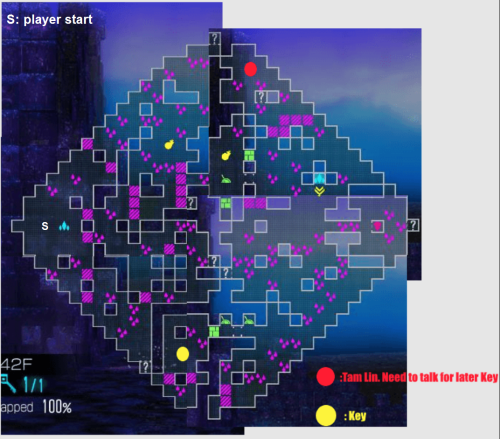
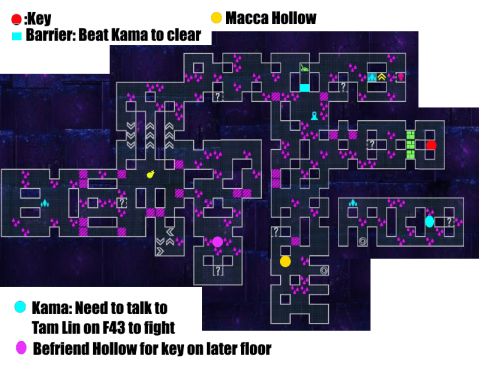
- Fight Tlaltecuhtli miniboss to get access to the switch. Go further and talk to the ghost to pick up the key.
- Be sure to talk to Tam Lin again
Boss
Floor 43
- Fight Sphinx to access the switch up top
- Switch to purple, warp back, and get the key
- Take a different warp to get to the second switch and switch to green. go up to access the boss door.
- Don't forget to talk to Tam Lin yet again.
Boss
| Titan | Pazuzu | Titan
|
|---|---|---|

|

|

|
| Resistances | |||||||
|---|---|---|---|---|---|---|---|
| Titan | Rs | - | Nu | - | - | - | - |
| Pazuzu | - | - | Wk | - | Nu | - | Nu |
| Titan | Rs | - | Nu | - | - | - | - |
| Battle Speed | 18166 | ||||||
Notes:
- Leave the Titans alive, and use
 Single Target attacks to take down Pazuzu.
 - With Repel/Drain Pierce + Repel/Drain Phys, and/or or sufficient Phys EV%, the Titans will keep missing and losing turns.
Floor 44
Boss
| Matador | Nidhoggr | Dionysus
|
|---|---|---|

|

|

|
| Resistances | |||||||
|---|---|---|---|---|---|---|---|
| Matador | Rs | - | Wk | - | - | Rs | Rs |
| Nidhoggr | Nu | - | Nu | Wk | - | Wk | - |
| Dionysus | - | Nu | Wk | Nu | - | - | - |
| Battle Speed | 35766 | ||||||
Tested Teams
Tested by Patfast
Party 1: ![]() Templar Dragon
Templar Dragon
Strategy: Rama dodges literally everything while Daisoujou clears charm and The Boys drain Phys attacks.
| Damage | Buff | Cleric | Damage |
|---|---|---|---|
 Asura Lord Asura Lord
|
 Rama Rama
|
 Daisoujou Daisoujou
|
 Masakado Masakado
|
| Great Aim | Dodge | Evade | Epitome of Aggression |
| Savage Glee | Evade | Epitome of Madness | Enduring Soul |
Notes:
- Slaughter All, Luster Candy, Cleansing Shout, and Occult Flash were all max level. It's particularly important that you max out Cleansing Shout, so that Daisoujou can use it every turn (in combination with divine brands).
- Templar Dragon's skill Speed Loader will make it so that items will only consume half a turn icon when used. This makes it so that you can revive at least 2 demons per turn, so long as one survives.
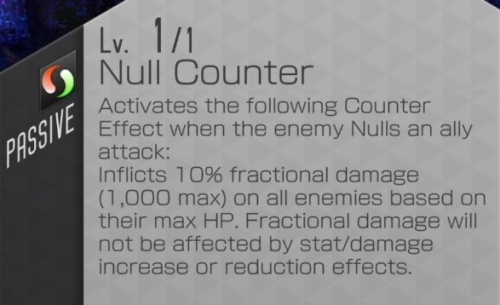
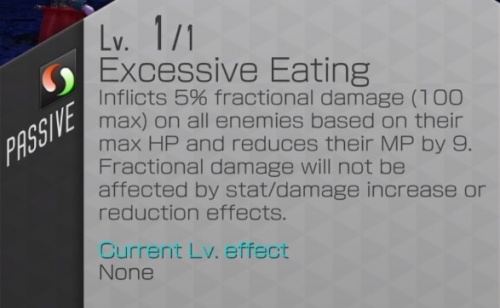
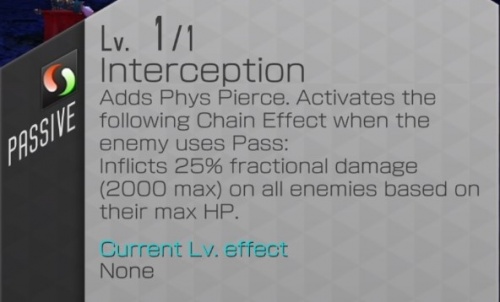
- Excessive Eating makes it so that your team's MP is reset to 0 at the end of every turn, and Interception will penalize you every time you pass. Therefore, the best strategy here is to use strong demons with Phys Pierce, so that you can simply spam normal attacks to win the fight.
- Nidhoggr and Dionysus don't have particularly high AGI, so you won't have to worry about Rama being killed by them. However, Matador is extremely fast and strong, so make him your highest priority target. None of the demons here have revival skills, so you don't have to worry about
 Revive Sealing any of them.
 - Dionysus's Euphoric Frenzy will charm you any time you hit him with a physical attack, which is why we're bringing along Daisoujou.
- Make sure that Daisoujou is faster than the other team members; naturally, he has 164 AGI, which is more than anyone else, but given that these are popular PvP demons, check to make sure their AGI mitama doesn't exceed his.
- Rama should have life and dodge brands to maximize his evasion, and to give him a plan B in case he does take a hit. Asura Lord and Masakado should have war and aim brands for obvious reasons, while Daisoujou should have divine and dodge brands.
- Rama had Panel 2 unlocked and Masakado has panels 1 & 2 unlocked.
---
Tested by Cyberknight
General strategy: Party 1 outspeeds the enemies and kills both sidekicks, so it won't be necessary to cleanse Ailments. Party 2 comes in and do Piercing Normal Attacks, while Erlkonig heals everybody between turns with Passive Alder King.
|
|
|
|
Notes:
- Nidhoggr's Interception will cause Fractional Damage every time a turn is passed, so the speedy Demons have to be able to attack or cast Skills that won't cause activation of the Chain Effect or Press Turn loss (e.g., by missing a Phys Attack or hitting NDR without Piercing.)
- Sonic was chosen to meet the Battle Speed requirement and to attack first with his Force (Phys) Piercing Spin Dash, which has a high chance of Crit, spending just half Press Turn. He may be of any Archetype and have any Skills, although Agility Amp I (or superior) helps increase Battle Speed and Hit Rate, Good Aim (or superior, like Great Aim) helps increase hit rate (Accuracy), Luck Amp I (or superior) helps increase Hit Rate and Crit Rate, and Bloody Glee (or superior, like Savage Glee) helps increase Crit Rate. Wear Speed Brands and/or Brands with Speed% to reach necessary Battle Speed, Aim to increase Accuracy (and lowering the risk of missing), and/or with Critical% to increase chance of critical hits.
- Huang Long can cast Luster Candy if
 Yellow, or Five Elements after Sonic's attack, so it also won't need to Pass (both Skills are irrelevant, they are only used to Pass the half-turn left by Sonic, because Nidhoggr's Nastrond will heal it after its sidekicks are killed, undoing all extra damage brought by Luster Candy, and none of the enemies have any Magic Skills, so Five Elements will never be triggered.)
 - Any other speedy Demon or Demons may be used, like
 Kartikeya and
  Hresvelgr. Usually, there won't even be a problem regarding taking damage for passing Turns, as long as the sidekicks are killed.
- Alice and Masakado were chosen for their Mortal Skills, Die for Me! and Occult Flash, respectively.
- Mortal Skills are not strictly necessary, as long as the pesky sidekicks are eliminated before Party 2 engages.
- It's important that Dionysus is killed first, because if something goes wrong, it's still possible for Party 2 to kill Matador later on (he will Mute everybody, but that's not a big problem, as there won't be enough MP to cast any Skills, anyway,) while the same may not be said about Dionysus, who will annoyingly Charm everyone.
- Alice's and Masakado's Archetypes are not really important, as their purpose is to cast their Mortal Skills to remove the sidekicks, but resistance against Ailments or Physical attacks may help. They'll probably need Divine Brands to cast their Mortal Skills T1. Because of Nidhoggr's Excessive Eating, if they can't cast them T1, then they won't have a chance to cast them at all.
|
|
|
|
Notes:
- Due to Nidhoggr's Excessive Eating Passive, the Demons won't be able to cast most Skills after T1, and because of its Null Phys Attribute, the Demons must have innate Phys Pierce, instead of Attack Skills with Piercing Effects, so their Normal Phys Attacks will pass through. Any Demons with innate Phys Piercing will do (from Passives or Panels), as long as they are bulky enough to survive Nidhoggr's attacks and Fractional Damage every time Erlkonig passes his Turn.
- Erlkonig was chosen due to his Passive Healing Skill Alder King, which will heal the whole Party at the beginning of his Turn without needing MP, despite not being able to attack, forcing him to pass his Turns and, consequently, triggering Interception and bringing Fractional Damage to the Party. Due to that, it's essential that the total healing is greater than the total damage taken per Turn.
- Guts gets Phys Piercing with P2 unlocked. Having P1 unlocked may also help, causing even more damage if his HP falls below 50% every Turn.
- Erlkonig works much better with P3 unlocked, what's not so difficult to get, as it can be fused relatively cheap.
 Purple Kali has Phys Amp (Awaken Skill), as does
  Yellow Guan Yu (gacha Skill), what helps with the Normal Phys Attacks, but any Archetypes would do (as well as Skills).
- If you don't have enough Demons with innate Phys Piercing, leave the slots empty, because Erlkonig and one Phys Attacker is enough to kill Nidhoggr. Allocating Demons that cannot attack will force you to pass their Turns, activating Interception and eventually getting the whole Party killed (remember that Erlkonig will already have to pass his Turns).
- Because all damage will come from the Strength Stats, Demons should primarily wear War Brands to enhance their Normal Phys Attacks, except Erlkonig, who should wear Heal (to restore HP of the whole Party), Dodge (to make the enemy lose Press Turns) and/or Guard (to take less damage, mainly if P3 is not unlocked).
- This configuration works even in Auto-Fighting mode, as long as the sidekicks are properly killed by the first Party.
- Erlkonig could benefit from Phys Pierce (weak), but it isn't necessary for this strategy to work (besides, it could induce him to attack and miss instead of passing the Turn, as he's not exactly a very nimble Demon).
Floor 45
Boss
| Beiji-Weng | Cu Chulainn | Prometheus
|
|---|---|---|

|

|

|
| Resistances | |||||||
|---|---|---|---|---|---|---|---|
| Beiji-Weng | - | Wk | Nu | - | - | Rs | Nu |
| Cu Chulainn | Rs | - | - | - | Nu | Nu | - |
| Prometheus | - | Nu | Wk | Nu | - | Rs | - |
| Battle Speed | 20966 | ||||||
Floor 46
Boss
| Anubis | Michael | Dantalian
|
|---|---|---|

|

|

|
| Resistances | |||||||
|---|---|---|---|---|---|---|---|
| Anubis | - | - | - | - | - | Nu | Nu |
| Michael | - | - | Nu | Nu | - | Rp | Wk |
| Dantalian | - | Rs | Rs | Wk | Nu | Wk | Rs |
| Battle Speed | 22066 | ||||||
Notes:
- Mortal the sides with team 1, then have team 2 enter with Repel/Drain Pierce + Repel/Drain Light.
- Ensure that team 2 has some
 Almighty skills - it's the only way you're able to do damage in this fight.
 - Use
 Templar Dragon in team 2 for half-press-turn healing items.
  Almighty cannot be boosted by Berserk levels, so this fight is going to be long.
Notable demons:
 Samael has Repel Light, an Almighty skill, and Infinite Chakra in
  Purple. He's also fusible for cheap, by 4x4 fusion paths.
 Demiurge punishes the enemy with an Almighty attack whenever an attack is repelled, speeding up the fight a bit.
Floor 47
Boss
| Gremlin | Ananta | Gremlin
|
|---|---|---|

|

|

|
| Resistances | |||||||
|---|---|---|---|---|---|---|---|
| Gremlin | - | Wk | Rs | Rs | Nu | - | - |
| Ananta | - | Nu | Nu | Nu | Wk | Nu | - |
| Gremlin | - | Wk | Rs | Rs | Nu | - | - |
| Battle Speed | 27600 | ||||||
Notes:
- If you can
 Revive Seal both Gremlins, then the boss is effectively harmless. It heavily prioritizes healing (until it runs out of charges) and debuffing over its basic attack.
 - The boss's fractional damage cannot kill you if you're already at 1 HP, so you don't need to heal at all if the side enemies have already been sealed.
- Ananta will fully buff himself at the start of his turn, and at the start of your turn. If you plan to make use of debuffs, you will need to attack right after using the debuffs, while it is still your turn - if you wait for your next turn, Ananta will already be fully buffed again.
 Xi Wangmu's Goddess' Fan removes Ananta's buffs + applies full debuffs. Cast this towards the start of your turn for the max benefit.
Floor 48
Notes:
- To start the second Hecatoncheires fight, you must have talked to Chagrin on every floor that he appears on before this point. If you missed one, check the pause menu when you try to switch floors to see where Chagrin is.
Boss
| King Frost | Baal | Abaddon
|
|---|---|---|

|

|

|
| Resistances | |||||||
|---|---|---|---|---|---|---|---|
| King Frost | - | Wk | Nu | - | - | Nu | - |
| Baal | - | - | Wk | Nu | Dr | Rs | - |
| Abaddon | - | Rp | - | Wk | - | - | - |
| Battle Speed | 21533 | ||||||
Notes:
- If you can
 Revive Seal one enemy with team 1, then have team 2 consist of Repel/Drain Pierce + Repel/Drain Force, the boss is effectively harmless.
 - Transfer some
 Ice spells onto team 2 to take down the boss quickly.
Floor 49
Fastest route:
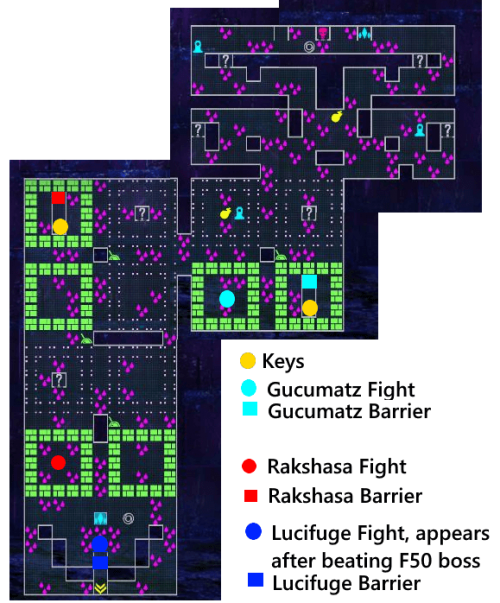
- Go south towards Gucumatz's key and flip the switch just north of it. Defeat Gucumatz to the west, and then get the key.
- Go west and flip the switch at the dead end.
- Go south, then east to get around the wall, then south as far as you can go, and west to the switch. Flip it.
- Go south then west and fight Rakshasa. Go back the way you came to the switch and flip it again. (Tip: If possible, try to NOT use the save point here. See next point for why)
- Go west and north, and flip the switch in the corner. Go far north and collect Rakshasa's key, then return to the switch and flip it back. (Tip: If you did NOT save at the southernmost save point, then as soon as you get Rakshasa's key, leave the floor and come back to be teleported next to the boss room).
- You don't need to flip any more switches now. Make the long walk back up to the boss room at the north-east end of the map (or do the save warp mentioned above).
Boss
Floor 50
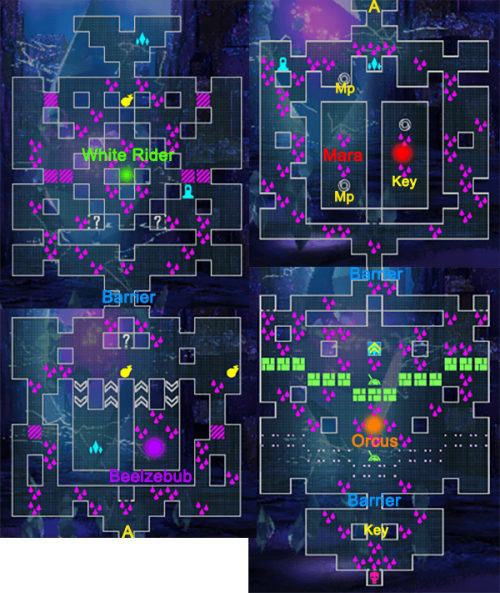
Notes:
- Straight-forward last floor: defeat the bosses from F10, F20, F30, and F40 to advance.
- Defeat White Rider > go through Barrier > defeat Beelzebub > go through barrier > defeat Mara > collect 1st key and go through barrier > defeat Orcus > collect 2nd key and go through barrier > final boss time
Final Boss
| Rama | Seraph | Alilat
|
|---|---|---|

|

|

|
| Resistances | |||||||
|---|---|---|---|---|---|---|---|
| Rama | Dr | Dr | Dr | - | - | - | - |
| Seraph | Rs | Rs | Rs | Rs | Rs | Rs | Rs |
| Alilat | Rs | - | - | Rp | Rp | Rp | Rp |
| Battle Speed | 25433 | ||||||
Final Boss Reloaded
Notes:
- The name of the game here is
 Single Target attacks of specific elements: Rama can only be damaged by Elec/Force/Light/Dark, while Alilat can only be damaged by Phys/Fire/Ice.
 - There are no weaknesses here, so try to bring skills that can crit or skills that have Remnants for extra press turns. Alternatively, attribute affinity down can be used to open up a weakness.
- Seraph will take effectively no damage until you've dealt with at least one of the side enemies.
Tested Teams
Tested by Boblers
Party 1: ![]() Kangaroo Boxer
Kangaroo Boxer
Strategy: Go first and try to deal some damage to Rama and Alilat. This is basically just fodder so team 2 doesn't have speed problems, so don't think too hard about it.
| Speedster | Speedster | damage | damage |
|---|---|---|---|
 Kartikeya Kartikeya
|
 Hresvelgr Hresvelgr
|
 Mastema Mastema
|
 Mahakala Mahakala
|
| Speedster | Light Boost | ||
| Resist Phys | Hamadyne |
Brands:
- War, PAtk % on Kartikeya
- Spell, MAtk% on others.
Party 2: ![]() Templar Dragon
Templar Dragon
Strategy: take down Alilat and Rama with the proper elements. Barong provides healing + full buffs, OseH + Seth get crits for extra turns and ensure the boss stays fully debuffed.
| Heal + Buffs | Damage + crits + debuffs | Damage | Damage + crits |
|---|---|---|---|
 Barong Barong
|
 Ose Hallel Ose Hallel
|
 Alice Alice
|
 Seth Seth
|
| Death Blow | Dark Boost | ||
| Phys Boost |
Brands:
- Divine on Barong
- Divine, PAtk% on OseH and Seth
- Spell, MAtk% on Alice (Divine works too)
Panels:
- Alice is P2.
Notes:
- Barong should refresh buffs and heal as needed. Keeping up heal demands will get easier as the fight progresses.
- Have OseH spam Heavenly Sword on Alilat as much as possible. If he doesn't have enough MP, pass the turn (do not use his normal attack).
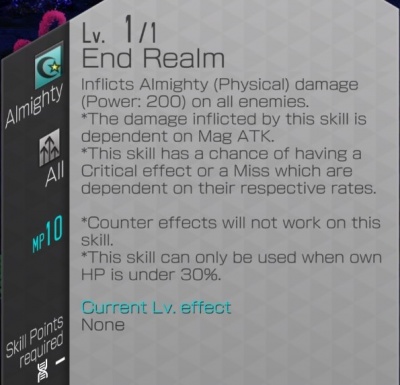
- Once Alilat is down, OseH can start attacking Seraph to get in some damage and extra press turns. Try to damage Seraph as much as possible without passing the 30% HP threshold for End Realm.
- Alice and Seth should focus their damage on Rama.
- Once OseH's boost level is high enough, he will fully debuff the boss at the start of your turn.
- The boss will fully buff itself at the start of its turn, effectively meaning the boss is neutral on your turn and full-buffed on its turn.
- Have Seth cast Debilitate once. This will shift the buff cycle so the boss is full-debuffed on your turn and neutral on its turn. After this, Seth doesn't need to cast debilitate again for the rest of the fight - go back to spamming Ouas.
- Once Seraph is alone, try to set up his HP such that the team can finish him in one turn. It's recoverable if you mess up, but we want to avoid him casting End Realm if possible (happens if he survives below 30% HP).
Encounters
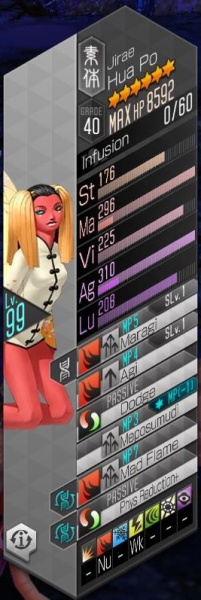
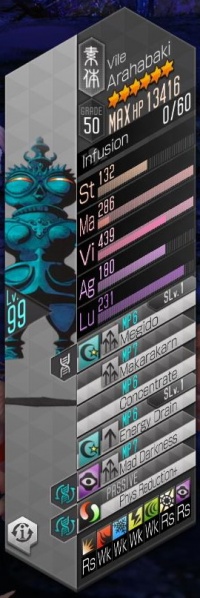
Hua Po Phys Reduction+
| Unicorn | Hua Po | Arahabaki
|
|---|---|---|

|
|
|
| Resistances | |||||||
|---|---|---|---|---|---|---|---|
| Unicorn | - | - | - | Wk | - | Nu | Nu |
| Hua Po | - | Nu | - | Wk | - | - | - |
| Arahabaki | Rs | Wk | Wk | Wk | Wk | Rs | Rs |
| Battle Speed | 22133 | ||||||
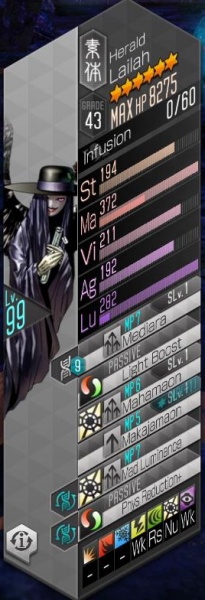
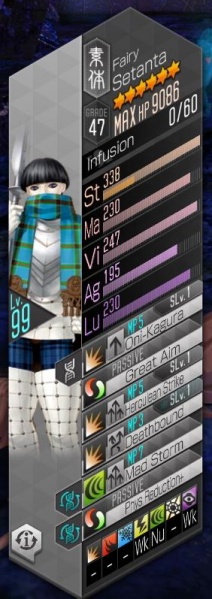
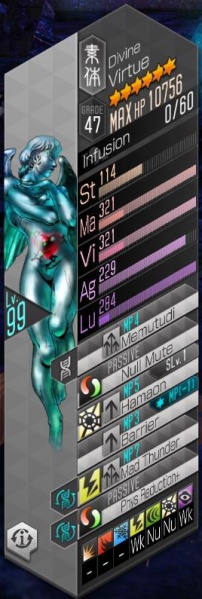
Setanta Phys Reduction+
| Lailah | Setanta | Virtue
|
|---|---|---|
|
|
|
| Resistances | |||||||
|---|---|---|---|---|---|---|---|
| Lailah | - | - | - | Wk | Rs | Nu | Wk |
| Setanta | - | - | - | Wk | Nu | - | Wk |
| Virtue | - | - | - | Wk | Nu | Nu | Wk |
| Battle Speed | 20533 | ||||||
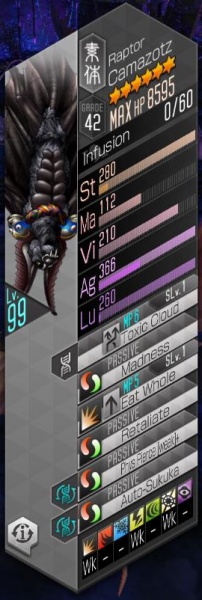
Forneus Final Measure
| Forneus | Camazotz | Forneus
|
|---|---|---|

|
|

|
| Resistances | |||||||
|---|---|---|---|---|---|---|---|
| Forneus | - | - | Dr | Rs | - | - | Nu |
| Camazotz | Wk | - | - | Wk | - | Wk | - |
| Forneus | - | - | Dr | Rs | - | - | Nu |
| Battle Speed | 21800 | ||||||
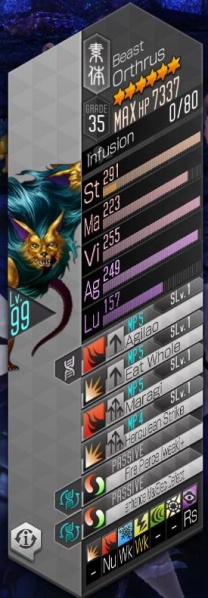
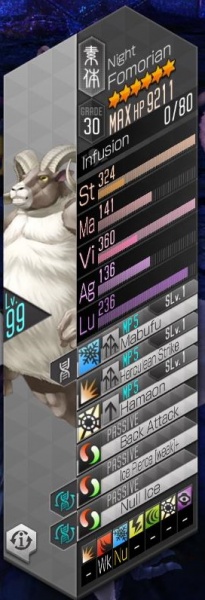
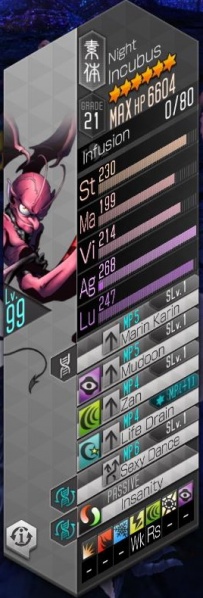
Orthrus + Nights
| Orthrus | Fomorian | Incubus | Fomorian |
|---|---|---|---|
|
|
|

|
| Resistances | |||||||
|---|---|---|---|---|---|---|---|
| Orthrus | - | Nu | Wk | Wk | - | - | Rs |
| Fomorian | - | Wk | Nu | - | - | - | - |
| Incubus | - | - | - | Wk | Rs | - | - |
| Fomorian | - | Wk | Nu | - | - | - | - |
| Battle Speed | 19725 | ||||||
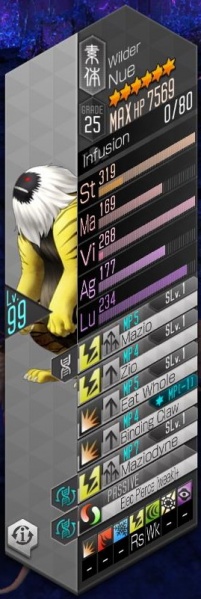
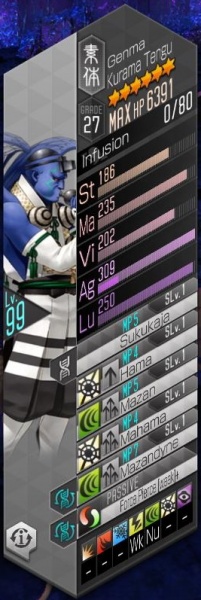
Kurama Tengu + Incubuses
| Incubus | Nue | Kurama Tengu | Incubus |
|---|---|---|---|

|
|
|

|
| Resistances | |||||||
|---|---|---|---|---|---|---|---|
| Incubus | - | - | - | Wk | Rs | - | - |
| Nue | - | - | - | Rs | Wk | - | - |
| Kurama Tengu | - | - | - | Wk | Nu | - | - |
| Incubus | - | - | - | Wk | Rs | - | - |
| Battle Speed | 25550 | ||||||
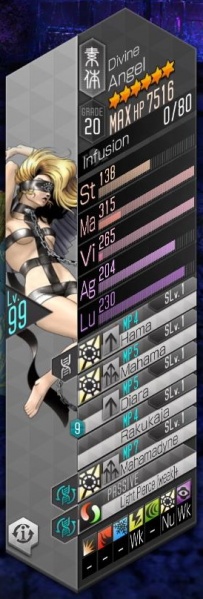
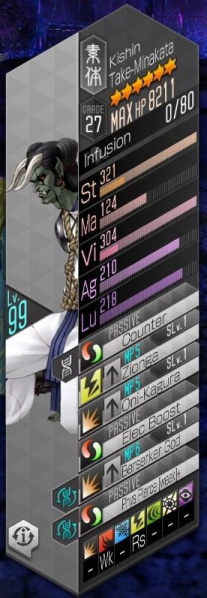
Take-Minakata + Angels
| Angel | Take-Minakata | Shadow | Angel |
|---|---|---|---|
|
|

|

|
| Resistances | |||||||
|---|---|---|---|---|---|---|---|
| Angel | - | - | - | Wk | - | Nu | Wk |
| Take-Minakata | - | Wk | - | Rs | - | - | - |
| Shadow | Rs | - | - | - | Wk | Wk | Nu |
| Angel | - | - | - | Wk | - | Nu | Wk |
| Battle Speed | 22150 | ||||||
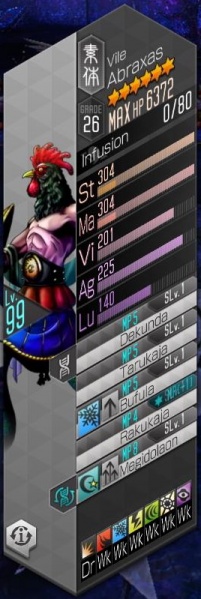
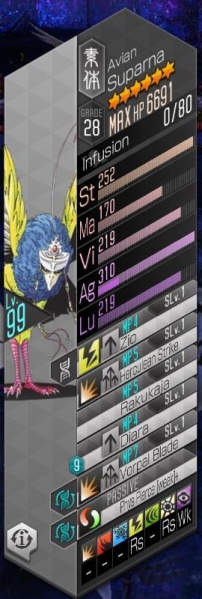
Suparna + Abraxas
| Abraxas | Suparna | Abraxas
|
|---|---|---|
|
|

|
| Resistances | |||||||
|---|---|---|---|---|---|---|---|
| Abraxas | Dr | Wk | Wk | Wk | Wk | Wk | Wk |
| Suparna | - | - | - | Rs | - | Rs | Wk |
| Abraxas | Dr | Wk | Wk | Wk | Wk | Wk | Wk |
| Battle Speed | 25333 | ||||||
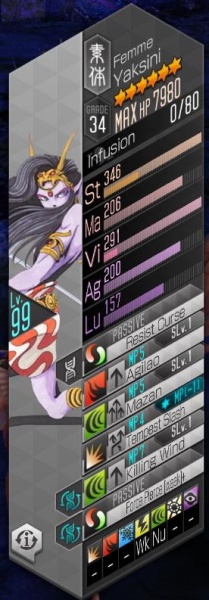
Yaksinis + Shadows
| Shadow | Yaksini | Yaksini | Shadow |
|---|---|---|---|

|
|

|

|
| Resistances | |||||||
|---|---|---|---|---|---|---|---|
| Shadow | Rs | - | - | - | Wk | Wk | Nu |
| Yaksini | - | - | - | Wk | Nu | - | - |
| Yaksini | - | - | - | Wk | Nu | - | - |
| Shadow | Rs | - | - | - | Wk | Wk | Nu |
| Battle Speed | 23400 | ||||||
Variety Fight
| Angel | Raijuu | Oni | Shiisaa |
|---|---|---|---|

|

|

|

|
| Resistances | |||||||
|---|---|---|---|---|---|---|---|
| Angel | - | - | - | Wk | - | Nu | Wk |
| Raijuu | - | - | - | Rs | Wk | - | - |
| Oni | - | - | - | Wk | - | - | - |
| Shiisaa | - | Rs | - | - | Rs | Rs | - |
| Battle Speed | 23350 | ||||||
Farming Teams
Budget
|
|
|
|
- Many elemental
 All Targets attacks must be covered, not just
  Elec for this particular team to work.
 - Forneus are not beaten by this team. The team actually does not (must not) do too much damage to Forneus.
- They will suicide themselves with Final Measure (Inflict fractional 25% HP ). If their HP were to be too close to 0, they would kill you instead.
- Barong is destined to heal the team.
- Having him with Support AI instead of Heal is a good option so he would constantly use 1 Dance per battle... However you will need to reduce his MAtk, 900 was the threshold with a
 Purple Barong and 80 Berserk lvl, else he will rarely dance.
 - Heal AI has also its pros/cons. But the frequency at which he will Dance still depend on his MATK, which needs to be somewhat low.
- Having him with Support AI instead of Heal is a good option so he would constantly use 1 Dance per battle... However you will need to reduce his MAtk, 900 was the threshold with a
- The Team was tested in a 80+ Berserk lvl on all elements-condition.
Expensive
|
|
|
|
- Garuda/Baal/Izanami is a very effective core to build an AG2 farming team around. The fourth demon doesn't need to be Gabriel;
 Black Frost and
  Mastema (with light pierce [weak] or panel 4) can work just as well.
 - If you use Black Frost, consider giving Deadly Curse to your other
 All Targets sweepers for extra damage.
 - With the listed MATK values and skills (as well as 80+ Berserk), this team clears the Forneus encounter in one turn. See here for a video example. It's important that the demons in slots 1 and 3 can hit Camazotz's weaknesses in order to generate enough press turns.
- It can be difficult to hit the required battle speed without Speedster or Panel 3 on Garuda, but it is possible (maxing out Agility mitamas on everyone helps).
Alice A cheese team
Example team
|
|
- The gist of this team is to have a Demon apply curse on the enemy, while Alice A kills them on the next press turn with Do Me A Favor
- The demon that goes first should:
- be a fast to go first in each battle (BS=25550 required)
- have a high ailment infliction rate to make sure that curse sticks on the enemy
- Popular choices for the first demon are Nekomata A,
 Gurr, or any Speedster demon, really
 - Even the infamous AG50 Forneus encounter is cleared in two press turns using this strategy
