Difference between revisions of "Demon Alliance Invasion"
(→Tips: rewording vince) |
m (→details) |
||
| Line 58: | Line 58: | ||
LAST ATTACK BONUS = 3 if boss is killed during run, 1 otherwise | LAST ATTACK BONUS = 3 if boss is killed during run, 1 otherwise | ||
DISCOVERY BONUS = 4 if boss is discovered by you, 1 otherwise | DISCOVERY BONUS = 4 if boss is discovered by you, 1 otherwise | ||
| − | BUFF BONUS = 1 + X * (0.15), where X is the amount of times a buff effect was used while one of the corresponding buffs was already active | + | BUFF BONUS = 1 + X * (0.15), where X is the amount of times a buff effect was used while one of the corresponding buffs was already active (max X = 40) |
| − | DAMAGE BONUS = 0.5 + Y * (0.005), | + | DAMAGE BONUS = 0.5 + Y * (0.005), Y increases by 1 for every 0.33% of boss health you do in damage (max Y = 300) |
Further explanations: | Further explanations: | ||
| − | * '''Battle Points''' varies depending on the boss, in general the rarer the boss the higher the Battle Points you receive. | + | * '''Battle Points''' varies depending on the boss, in general the rarer the boss the higher the Battle Points you receive. Increases with Bonus SP demons |
* '''Buff Bonus''' only looks if one of the stats is already buffed, meaning if you have both DEF, and ATK up and cast [[War Dance]], the factor X will still just go up by 1. This means you want as many chain effects/separate skills that apply buffs as possible | * '''Buff Bonus''' only looks if one of the stats is already buffed, meaning if you have both DEF, and ATK up and cast [[War Dance]], the factor X will still just go up by 1. This means you want as many chain effects/separate skills that apply buffs as possible | ||
* '''Damage bonus''' scales linearly, meaning if you did the entire boss health as damage, damage bonus will be 2x on the other hand if your run deals less than 0.33% of the bosses health it will be 0.5x | * '''Damage bonus''' scales linearly, meaning if you did the entire boss health as damage, damage bonus will be 2x on the other hand if your run deals less than 0.33% of the bosses health it will be 0.5x | ||
| Line 71: | Line 71: | ||
* Always fight your own bosses to make use of the discovery multiplier. | * Always fight your own bosses to make use of the discovery multiplier. | ||
* Having a team that can apply buffs while also still dealing damage is optimal, to also make use of the buff multiplier as much as possible. | * Having a team that can apply buffs while also still dealing damage is optimal, to also make use of the buff multiplier as much as possible. | ||
| + | * The buff bonus has a cap of being increased 40 times, meaning that at some point you will get no more score increases from buffs during your run. Since this is after at least 41 instances of applying buffs, this will rarely happen during a single run. The damage/defense multiplier will still increase though, so it's usually still effective to get as many ways to buff your team as possible | ||
* You want to deal most of the damage in the same run that you finish off the boss, to combine the final blow multiplier with the damage multiplier. Finishing off a boss with just a sliver of health will generally give very little points. | * You want to deal most of the damage in the same run that you finish off the boss, to combine the final blow multiplier with the damage multiplier. Finishing off a boss with just a sliver of health will generally give very little points. | ||
* Use [[File:silveruniticon.png|32px|link=]][[File:golduniticon.png|32px|link=]]Bonus SP demons whenever possible. | * Use [[File:silveruniticon.png|32px|link=]][[File:golduniticon.png|32px|link=]]Bonus SP demons whenever possible. | ||
Revision as of 03:51, 22 March 2023
Due to the ongoing nature of this event, information posted on this page will be expanded and updated as learn more. In addition, due to this being a beta version we can expect significant changes to the functioning of the event. Feel free to discuss strategies and information on discord or reddit.
Contents
Getting Boss Spawns
Bosses may spawn from most mission types.
- Brands of Sin, Strange Signal and Leveling quests are the most convenient, since they are commonly farmed for other stuff, letting you make the most of your stamina.
- Hell's Park can also spawn bosses, convenient if you've not completed it yet for the month.
Bosses will NOT spawn from the following:
- Story quests that play cutscenes after the fight. Seemingly, ones that play the cutscene before the fight will spawn the bosses normally.
- Alter-World quests.
Battle Basics
These boss fights will allow you to field two parties, similarly to Leveling Quests or Aura Gate exploration parties. Important to note that the party configurations are saved independently from Dx2 selected, so you may form a party, decide that a different Dx2 would be a better match, and change them without needing to re-select your demons once again.
- Both fights have a 2-turn limit
- If your first team can't defeat the boss in time, the battle will progress to its second phase, with your second team.
- If your first team dies to the boss, the battle will simply move to the next phase.
- If the second team also can't beat the boss within the turn limit, the battle will end inconclusively, and you will request an S.O.S. from a group of random players.
- This SOS will target 10 players who have played within the last 3 days, divided into: 4 friends, 4 faction users, and 2 random players. You can also send friend requests if the player in question isn't already a friend.
- If the boss's HP reaches 0, the battle will end immediately, regardless of which team is currently fighting.
Buff Stacking
One player's buffs will carry over to other players' fights, stacking to high numbers, allowing the participants to deal increasing amounts of damage to high level bosses. This is necessary to even be able to survive high level boss attacks.
There doesnt seem to be a cap to attack and defense buffs, however the ![]() Sukukaja buffs cap out at +100%, likely to avoid instances where the boss is completely unable to hit any player demon and maintain a certain level of difficulty.
Sukukaja buffs cap out at +100%, likely to avoid instances where the boss is completely unable to hit any player demon and maintain a certain level of difficulty.
Liberator effects (such as ![]() Chalk Eater) also count for this.
Chalk Eater) also count for this.
However, debuffs will NOT stack. Only buffs will stack!
BP and Attack Modes
With this new event comes a new form of Stamina, called BP. These are used exclusively on this kind of battle, and recovers independently from normal Stamina, Duel Stamina, or Aura Gate Steps. 1 BP recovers every 10 minutes.
BP has its own refill drinks as well, called ![]() Rader Pepper and
Rader Pepper and ![]() Time-Limited Rader Pepper.
Time-Limited Rader Pepper.
When selecting a fight, three options are available, each with a different cost and different boost to the team's damage output:
| Option | Cost | ATK boost |
|---|---|---|
| Attack | 1 BP | 1x |
| Strong Attack | 2 BP | 3x |
| Full Power | 3 BP | 5x |
Point Calculation
After each run you are awarded points depending on your performance. There are two types of scores awarded:
- If you did not kill the boss, and nobody killed the boss while you were running your attempt, you will just get points based on your current run.
- Else if the boss did die, you will also get an additional set of points for your total performance in that boss fight.
The general formula for score calculation is the following:
BATTLE POINTS * DISCOVERY BONUS * LAST ATTACK BONUS * BUFF BONUS * DAMAGE BONUS
LAST ATTACK BONUS = 3 if boss is killed during run, 1 otherwise
DISCOVERY BONUS = 4 if boss is discovered by you, 1 otherwise
BUFF BONUS = 1 + X * (0.15), where X is the amount of times a buff effect was used while one of the corresponding buffs was already active (max X = 40)
DAMAGE BONUS = 0.5 + Y * (0.005), Y increases by 1 for every 0.33% of boss health you do in damage (max Y = 300)
Further explanations:
- Battle Points varies depending on the boss, in general the rarer the boss the higher the Battle Points you receive. Increases with Bonus SP demons
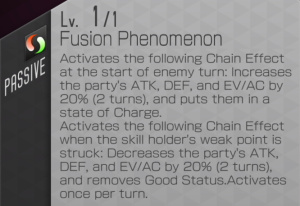
- Buff Bonus only looks if one of the stats is already buffed, meaning if you have both DEF, and ATK up and cast War Dance, the factor X will still just go up by 1. This means you want as many chain effects/separate skills that apply buffs as possible
- Damage bonus scales linearly, meaning if you did the entire boss health as damage, damage bonus will be 2x on the other hand if your run deals less than 0.33% of the bosses health it will be 0.5x
- Total Score when the boss is killed is calculated using the same formula, only using the total amount of damage you did across all runs of the boss for the Damage Bonus and the total amount of times you triggered the Buff Bonus
General Pointers
When looking at the formula, the following guidelines appear for maximizing your own points:
- Always fight your own bosses to make use of the discovery multiplier.
- Having a team that can apply buffs while also still dealing damage is optimal, to also make use of the buff multiplier as much as possible.
- The buff bonus has a cap of being increased 40 times, meaning that at some point you will get no more score increases from buffs during your run. Since this is after at least 41 instances of applying buffs, this will rarely happen during a single run. The damage/defense multiplier will still increase though, so it's usually still effective to get as many ways to buff your team as possible
- You want to deal most of the damage in the same run that you finish off the boss, to combine the final blow multiplier with the damage multiplier. Finishing off a boss with just a sliver of health will generally give very little points.
- Use

 Bonus SP demons whenever possible.
Tips
- Once you start fighting higher level bosses, the damage you can deal during your first battle will be very low compared to their scaling HP stat. It's best to do one or two battles using the standard 1 BP attack option to build your buff stock, then use the 3 BP option to attack for massive damage.
- You may be able to kill the first or second boss quickly enough to not worry about their damage, but in time you will have to bring healer/tank units to keep your team alive.
- Do not neglect
 Sukukaja buffs. They may not increase your damage but a lucky dodge may well save your team from death to let them fight another turn.
Useful Liberators
Utility
 Chalk Eater is the man to use if you find yourself fighting a boss with an exploitable weakness. He will repeatedly provide you with buffs of all 3 types, MP recovery, and occasionally extra press turns. If no weaknesses are present, he can still give your demons +7 MAG.
 Eileen will make
  Random Targets attacks have higher minimum hits, and will occasionally not use up any press turns when Passing. This is especially helpful as the fight drags on, as your demons might eventually not have enough MP to attack, making you Pass their turns. Getting that Pass for free could let you squeeze in a couple more skill uses.
Offensive
 Kangaroo Boxer boosts your physical attacks (+7 STR, +7 AGI), and casts
  Sukukaja and
  Sukunda to help with accuracy.
 Vince boosts physical attacks as well (+12 STR), while also boosting critical hit damage and casting
  Sukukaja and
  Sukunda when you land them. If you have demons that can cast
  Rebellion automatically through passives, Vince can also cast
  Rakunda.
 Templar Dragon will boost
  Concentrate and
  Charge effects, like those provided by
  Mahakala or Panel 2
  Cu Chulainn A. She also gives +5 STR/MAG, and improves healing.
 Shionyan grants +12 MAG to the party, improving magic damage. Good choice if you can't meet the conditions of other Liberators.
Defensive
 Meat Balloon fits more defensive parties (+12 VIT), and will cast
  Rakukaja when hit by magic or
  Tarunda when hit by a critical attack. Counter effects will have a higher chance to activate, and will deal more damage.
 Megakin supports NDR tanking by having a chance to cast
  Rakukaja when Nulling,
  Tarukaja when Repelling, or
  Sukukaja when Draining a boss's attack. Repels will deal more damage, while Drains will heal more. He also provides +5 VIT/AGI/LUK to slightly improve bulk and accuracy/evasion.
Useful Demons
These demons should work well against almost any boss, whereas other demons might be punished by the current boss's gimmick (for example, heavily reduced damage from certain elements)
 Erlkonig will consistently heal your party every turn, and cast
  Tarunda at the start of the enemy's turn (plus
  Rakukaja if panel 3) to lessen the boss's onslaught.
 Barong can cast Luster Candy in addition to healing, increasing your offensive power. If he's panel 4, he can also generate Bulwarks.
 Demeter can keep your party's Bulwarks topped off consistently, trivializing damage taken, as well as casting Luster Candy whenever any other party member receives an attack. My Harvest! additionally grants MP to party members, helping them to keep casting skills.
 Demiurge, if paired with "Drain <element> " party members corresponding to the boss, can both automatically heal and generate MP for the party - on top of making the boss lose turns, of course.
 Orcus reduces damage taken from AoE attacks for the party. If panel 2, he will also cast
  Tarukaja when a party member's weakness is exploited. This can let you stack attack buffs quickly.
 Ananta will cast Luster Candy automatically every player and enemy turn (effectively twice per turn), making him a good budget option for stacking buffs. If panel 4, he will also cast Debilitate at the start of the boss's turn, or whenever you use a skill or chain effect that heals.
 Elohim follows up every Solar Flare with an automatic Offensive Cry to stack up the
  ATK buffs, in addition to his massive damage.
 Uriel,
  Gabriel, &
  Raphael will cast each of the three buffs as part of their beginning-of-turn chain when 3 or more Divine/Herald demons are in the party.
 Ame no Uzume will cast
  Tarukaja after any skill heals the party - this includes not just heal skills, but also life-steal effects such as Ouas, and chain effects such as Blossoming Cyclone or Supreme Creator (but it does NOT count
  Lydia or Dx2 skills). If panel 2, she also casts
  Rakukaja.
"Chaos Dragon of the Abyss" event
Tiamat
First and easiest battle you will encounter.
Battle 1
| Tiamat | - | Nu | Nu | Wk | - | - | Rs |
Battle 2
| Tiamat | - | Nu | Nu | Wk | - | - | Rs |
Exactly the same as the first battle, even has the same skills.
Notes
- Boss has no pierce.
- Just hit her with
 Elec (or at least make sure you don't hit her nulls) and she should go down quickly.
Ym
Battle 1
| Ym | - | - | Nu | - | Wk | - | Rs |
Battle 2
| Ym | - | - | Nu | - | Wk | - | Rs |
Notes:
- Boss has no pierce.
- In phase 2, bringing a single NDR ice demon will cancel the boss's automatic Debilitate, which requires his automatic Ice AoE to land. After that, NDR will make him lose a turn when casting Mabufudyne, reducing his total AoE casts per turn from 4 to 3.
- Phase 1 inflicts ailments, and reduces Physical damage.
- Phase 2 no longer applies ailments (aside from Pass Punisher), but reduces Magic damage. A Hell Gongen team to spam crits is effective.
- To get around Pass Punisher, you should be hitting weakness (or using Remnants) repeatedly in phase 1, and hitting weakness or critting in phase 2.
- Run
 Chalk Eater in phase 1, since you'll want to hit weakness a lot anyway.
 - Run
 Carbon Black in phase 2, for more crit damage.
- Run
Recommended Demons:
- Phase 1 (gist: 1 ailment cleanser/blocker or ward brands on everyone + 3 magic attackers with
 Force or Remnants to avoid needing to pass):
 Demeter: Prevents ailments entirely when Bulwarks are up, and her skill to cast Bulwarks has Remnants. She can also squeeze in some more buffs during the boss's turn.
 Mahamayuri: Cleanses without using a press turn, and comes with Force magic as well as healing. Good synergy with
  Ame no Uzume to generate
  ATK buffs.
 Okuninushi: Cleanser with Remnants to compensate for no Force magic. He gives himself
  Concentrate after a cleanse for a bit more damage, and grants one
  ATK buff at the start of his team's turn. Also a
  bonus unit.
 Daisoujou: Cleanser, though will take 1 whole press turn to cleanse. Also a
  bonus unit. However, if only 2 teammates are ailmented instead of all 3, his AI won't cleanse them. He also will not cleanse if you give him an attack skill, so DO NOT give him an attack skill.
 Sabaoth: Careful turn ordering can grant you an extra press turn, plus he has Force magic to hit weakness.
 Susano-o: Force magic that also grants an
  ATK buff with every use.
 Elohim: Solar Flare is magic with Remnants that also grants an
  ATK buff and
  DEF Debuff with every use.
 Vishnu: Has Drain Ice to make the boss lose turns. He will need a Force skill transfer, though. Also a
  bonus unit.
- Could be combo'd with
 Demiurge for a team heal and MP recovery, if the boss happens to hit Vishnu. Demiurge is also a
  bonus unit, but only for part 1 of the event.
 - The heal can further combo into
 Ame no Uzume to generate
  ATK buffs.
- Could be combo'd with
- Phase 2 (gist: 1 defender + 3 physical attackers, physical force if possible. Crit spam to avoid needing to pass. NDR ice to prevent boss's debilitate.)
 Ananta: panel 3 can decrease Ice damage taken by the team. Also has Null Ice. However, note that the boss will remove all buffs/debuffs from the field at the start of the boss turn, and this happens after Ananta's chain effects.
 Demeter: Bulwarks help the team live through Ice AoEs, and she also casts buffs every time the boss casts an AoE.
 Barong: panel 4's bulwarks help the team to live through the Ice AoEs, though it's not as effective as Demeter.
 Seth: Ouas is a strong physical force attack with a high crit rate and self-heal. Since he's able to hit weakness, he doesn't actually need to crit to use only half a press turn. He's also a
  bonus unit, but only for part 1 of the event.
 Tokisada: Grants an
  ATK buff
  EVAC buff with every use of Amakusa Uprising, plus he can give himself infinite
  Rebellion if panel 2. Also a
  bonus unit.
 Kali: Grants herself
  Rebellion with every cast of Violent Dance. Also a
  bonus unit, but only for part 2 of the event. Be careful about her Ice weakness, though - have an NDR ice demon on the team to ensure the boss doesn't get turns off her.
 Zaou-Gongen: Infinite team-wide
  Rebellion to guarantee crits, if he's panel 3.
 Futsunushi: Gets the ball rolling for Zaou-Gongen, since Auto-Rebellion doesn't work in phase 2. Also increases the team's crit damage when in
  Rebellion.
 Gogmagog: Repel Ice to make the boss lose a turn, while still offering phys damage.
- Extra notes
 Frost Ace: Repel Ice is helpful, and Vengeful Frost Fist gives him
  Rebellion with every use. However, he MUST be panel 3 to have Ice Pierce!
Rahab
Battle 1
| Rahab | Nu | Rs | Wk | Rs | Rs | Wk | Rs |
Battle 2
| Rahab | Nu | Wk | Wk | Rs | Rs | Rs | Rs |
Notes:
- Do NOT try to revive spam with this guy.
- Phase 1 forces you to use
 Light or
  Ice.
Ice. - Phase 2 forces you to use
 Fire or
  Ice.
Ice. - When you hit a weak point in phase 1, the boss casts Luster Candy on you and gives your team 2 MP. This should make MP costs irrelevant in this phase, so bring your heaviest-hitting ice/light attackers.
- Chain effects in phase 1 count as separate weakness hits from skill casts. This can allow you to grind out more buffs and MP from the boss if you use chain-effect-heavy demons like
 Sukuna-Hikona or
  Mithras.
- Chain effects in phase 1 count as separate weakness hits from skill casts. This can allow you to grind out more buffs and MP from the boss if you use chain-effect-heavy demons like
- Hitting weakness in phase 2 at least once is important, to remove the boss's
 Charge before he can use it.
 - Phase 2's reaction AoE upon using a non-Fire/Ice attack can be exploited by
 Demeter to generate buffs.
- However, you should NOT attempt this in phase 1, where the punishment for an off-ele attack is a 50% fractional AoE, which Demeter's Bulwarks are not enough to stop.
 Chalk Eater performs well in both phases, since the main gimmick of this fight is hitting weakness as much as possible.
- He should probably go in phase 1, to make use of any chain effect attacks. If you're not triggering chains, then put him on whichever team you expect to deal more damage - that way you benefit more from any extra press turns that are generated.
- The other team can use a standard damage booster, such as
 Shionyan for magic.
Recommended Demons:
- Phase 1 (gist:
 Light/
 Ice spam, bring chain effect attacks if possible)
 Sukuna-Hikona: Chain effect attack upon an ally gaining
  Might,
  Charge, or
  Concentrate, and grants an
  ATK buff and
  EVAC buff on top of that (once per effect, per turn). He gives Might to himself as well, assuring you get at least one proc of this effect per team turn.
 Mithras: Chain effect attack upon any ally using a light attack, letting you farm buffs and deal more damage. Also a
  bonus unit.
 Tokisada: Gives an
  ATK buff and
  EVAC buff with every cast of Amakusa Uprising. Also a
  bonus unit.
 Vishnu: Comes with Light and Ice spells, as well as Drain Ice to make the boss lose turns. Also a
  bonus unit.
- Phase 2 (gist:
 Fire/
Fire/ Ice spam)
 Elohim: High damage and an
  ATK buff (plus
  DEF Debuff) with every cast of Solar Flare.
 Demeter: Intentionally baiting out the Ice AoE to generate more buffs.
 Cybele: Good damage, and an aura that improves team Fire damage. If panel 4, she grants an
  ATK buff at the start of her team's turn, and whenever she uses her innate Fire skills. Also a
  bonus unit, but only for part 2 of the event.
- Either phase:
 Anahita: Grants an
  ATK buff and
  DEF buff with every cast of Hell Stream. Also a
  bonus unit.
 Frost Ace: Good damage, gives himself
  Might with every cast of Vengeful Frost Fist after the first, and has an aura to improve team Ice damage. Also a
  bonus unit.
 Vasuki: Halahala is a random-targets attack, which does good damage against the lone boss, as well as repeatedly rolling Chalk Eater's effects. Also a
  bonus unit, but only for part 2 of the event.
 Seraph: Good damage, and an aura that improves team damage against weaknesses.
Archive
- For older events, see Demon Alliance Invasion/History
| Quest Areas | |
|---|---|
| Permanent Content | Story • Dx2 Quests • Alter-World • Aura Gate (1, 2, SP) |
| Farming Quests | Strange Signal • Brands of Sin • Wanted |
| Recurring Events | Eclipse • Hell's Park • Advent • Kiwami • Tokyo Abyss • Take Back Tokyo • Demon Alliance Invasion |
| Competitive | Democalypse • D2 Duel • Battle Tower |

