Demon Alliance Invasion
Due to the ongoing nature of this event, information posted on this page will be expanded and updated as learn more. In addition, due to this being a beta version we can expect significant changes to the functioning of the event. Feel free to discuss strategies and information on discord or reddit.
Contents
Getting Boss Spawns
Bosses may spawn from most mission types.
- Brands of Sin, Strange Signal and Leveling quests are the most convenient, since they are commonly farmed for other stuff, letting you make the most of your stamina.
- Hell's Park can also spawn bosses, convenient if you've not completed it yet for the month.
Bosses will NOT spawn from the following:
- Story quests that play cutscenes after the fight. Seemingly, ones that play the cutscene before the fight will spawn the bosses normally.
- Alter-World quests.
Once a boss appears, it will be available to fight for 8 hours, or until it is defeated - whichever happens first.
Up to 10 bosses discovered by the player can be stored in the battle menu at a time. Bosses discovered by other players are not subject to this limit.
Boss tiers
There are three tiers of bosses that can spawn:
- Normal Boss (tier 1)
- Superior Boss (tier 2)
- Ultimate Boss (tier 3)
When a boss spawns from completing quests, it can be any of the three tiers.
When a boss spawns from defeating another boss, it will be a Superior or Ultimate Boss (never a Normal Boss).
Higher-tier bosses have much more HP per level, and will give much more event points.
Battle Basics
These boss fights will allow you to field two parties, similarly to Leveling Quests or Aura Gate exploration parties. Important to note that the party configurations are saved independently from Dx2 selected, so you may form a party, decide that a different Dx2 would be a better match, and change them without needing to re-select your demons once again.
- Both fights have a 2-turn limit
- If your first team can't defeat the boss in time, the battle will progress to its second phase, with your second team.
- If your first team dies to the boss, the battle will simply move to the next phase.
- If the second team also can't beat the boss within the turn limit, the battle will end inconclusively, and you will request an S.O.S. from a group of random players.
- This SOS will target 10 players who have played within the last 3 days, divided into: 4 friends, 4 faction users, and 2 random players. You can also send friend requests if the player in question isn't already a friend.
- If the boss's HP reaches 0, the battle will end immediately, regardless of which team is currently fighting.
If a boss that you found dies (whether you killed it or someone else did), that boss's level will go up by +1 the next time you encounter one. (Example: You discover a level 2 Anat and it dies. The next Anat that you discover will be level 3.) At higher levels, bosses will gain higher stats and especially HP. Their skills will stay the same, though.
- However, if a boss someone else found dies, that does NOT affect your own boss levels.
- Bosses that escape due to a time-out will not count as killed, and therefore will not increase level.
All players' boss levels will reset once the second half of the event starts.
Buff Stacking
One player's buffs will carry over to other players' fights, stacking to high numbers, allowing the participants to deal increasing amounts of damage to high level bosses. This is necessary to even be able to survive high level boss attacks.
- Buffs you cast during a run will be added to your total buffs immediately.
- Buffs cast by other players will be applied to your total buffs only after the other player finishes their run.
There doesn't seem to be a cap to attack and defense buffs, however the ![]() Sukukaja buffs cap out at +100%, likely to avoid instances where the boss is completely unable to hit any player demon and maintain a certain level of difficulty.
Sukukaja buffs cap out at +100%, likely to avoid instances where the boss is completely unable to hit any player demon and maintain a certain level of difficulty.
Liberator effects (such as ![]() Chalk Eater) also count for this.
Chalk Eater) also count for this.
However, debuffs will NOT stack. Only buffs will stack!
BP and Attack Modes
With this new event comes a new form of Stamina, called BP. These are used exclusively on this kind of battle, and recovers independently from normal Stamina, Duel Stamina, or Aura Gate Steps. 1 BP recovers every 10 minutes.
BP has its own refill drinks as well, called ![]() Rader Pepper and
Rader Pepper and ![]() Time-Limited Rader Pepper.
Time-Limited Rader Pepper.
When selecting a fight, three options are available, each with a different cost and different boost to the team's damage output:
| Option | Cost | ATK boost |
|---|---|---|
| Attack | 1 BP | 1x |
| Strong Attack | 2 BP | 3x |
| Full Power | 3 BP | 5x |
When responding to another player's SOS call, the first run against that boss will have all BP options discounted by 1 BP.
Point Calculation
After each run you are awarded points depending on your performance. There are two types of scores awarded:
- If you did not kill the boss, and nobody killed the boss while you were running your attempt, you will just get points based on your current run.
- Else if the boss did die, you will also get an additional set of points for your total performance in that boss fight.
The general formula for score calculation is the following:
BATTLE POINTS * DISCOVERY BONUS * LAST ATTACK BONUS * BUFF BONUS * DAMAGE BONUS
LAST ATTACK BONUS = 1.5 if boss is killed during run, 1 otherwise
DISCOVERY BONUS = 1.2 if boss is discovered by you, 1 otherwise
BUFF BONUS = 1 + X * (0.15), where X is the amount of times a buff effect was used while one of the corresponding buffs was already active (max X = 40)
DAMAGE BONUS = (max value of 6 if you dealt 100% of the boss's health in damage. exact scaling needs testing)
Further explanations:
- Battle Points varies depending on the boss, in general the rarer the boss the higher the Battle Points you receive. Increases with Bonus SP demons
- Buff Bonus only looks if one of the stats is already buffed, meaning if you have both DEF, and ATK up and cast War Dance, the factor X will still just go up by 1. This means you want as many chain effects/separate skills that apply buffs as possible
- Total Score when the boss is killed is calculated using the same formula, only using the total amount of damage you did across all runs of the boss for the Damage Bonus and the total amount of times you triggered the Buff Bonus
General Pointers
When looking at the formula, the following guidelines appear for maximizing your own points:
- Having a team that can apply buffs while also still dealing damage is optimal, to also make use of the buff multiplier as much as possible.
- The buff bonus has a cap of being increased 40 times, meaning that at some point you will get no more score increases from buffs during your run. Since this is after at least 41 instances of applying buffs, this will rarely happen during a single run. The damage/defense multiplier will still increase though, so it's usually still effective to get as many ways to buff your team as possible
- You want to deal most of the damage in the same run that you finish off the boss, to combine the final blow multiplier with the damage multiplier. Finishing off a boss with just a sliver of health will generally give very little points.
- Use

 Bonus SP demons whenever possible. However, you're unlikely to have a full set of 8 that are actually functional. Aim for a balance between bonus demons, and demons that are good by their own merits.
| Icon | Bonus |
|---|---|
| Battle Certificate: 50% Greatly increased encounter rate with rare bosses when defeating bosses | |
| Battle Certificate: 12.5% Small increased encounter rate with rare bosses when defeating bosses |
Tips
BP management:
- Once you start fighting higher-level bosses, the damage you can deal during your first battle will be very low compared to their scaling HP stat. It's best to do one or two battles using the standard 1 BP attack option to build your buff stock, then use the 3 BP option to attack for massive damage.
- Normal-tier bosses have very low drops, so they're only worth fighting to spawn a Superior or Ultimate boss, if your SOS list has none at the moment. Be careful not to spend too much BP on Normal bosses.
- As boss levels increase, farming the event becomes more difficult. The discovery bonus multiplier also isn't very high. Therefore, you should prioritize fighting SOS bosses over your own bosses, especially Ultimate (tier 3) bosses for points.
- For SOS Ultimate bosses, do a couple 1 BP runs to set up buffs, then a bunch of 3 BP runs to grind out as much points as possible (getting a kill is great for the multiplier, but it's difficult as you're competing with other players to get it). Use

 Rader Peppers if you have any, as spending 3 BP on Ultimate boss runs in this way is the most-efficient use of BP.
- For SOS Ultimate bosses, do a couple 1 BP runs to set up buffs, then a bunch of 3 BP runs to grind out as much points as possible (getting a kill is great for the multiplier, but it's difficult as you're competing with other players to get it). Use
Team/in-battle:
- You may be able to kill the first or second boss quickly enough to not worry about their damage, but in time you will have to bring healer/tank units to keep your team alive.
- Do not neglect
 Sukukaja buffs. They may not increase your damage, but a lucky dodge may well save your team from death to let them fight another turn.
 - Remember that each team only gets to fight for 2 turns. Whether your team has the speed to go first or second, affects how much survivability you need to have:
- If you go first, then you need to tank 1 turn of the boss's attacks - if the boss kills someone on its second turn, it won't matter, as you'll automatically switch to the next team or finish the run anyway.
- If you go second, then you need to tank 2 turns of the boss's attacks.
Useful Liberators
Utility
 Chalk Eater is the man to use if you find yourself fighting a boss with an exploitable weakness. He will repeatedly provide you with buffs of all 3 types, MP recovery, and occasionally extra press turns. If no weaknesses are present, he can still give your demons +7 MAG.
 Eileen will make
  Random Targets attacks have higher minimum hits, and will occasionally not use up any press turns when Passing. This is especially helpful as the fight drags on, as your demons might eventually not have enough MP to attack, making you Pass their turns. Getting that Pass for free could let you squeeze in a couple more skill uses.
Offensive
 Kangaroo Boxer boosts your physical attacks (+7 STR, +7 AGI), and casts
  Sukukaja and
  Sukunda to help with accuracy.
 Vince boosts physical attacks as well (+12 STR), while also boosting critical hit damage and casting
  Sukukaja and
  Sukunda when you land them. If you have demons that can cast
  Rebellion automatically through passives, Vince can also cast
  Rakunda.
 Templar Dragon will boost
  Concentrate and
  Charge effects, like those provided by
  Mahakala or Panel 2
  Cu Chulainn A. She also gives +5 STR/MAG, and improves healing.
 Shionyan grants +12 MAG to the party, improving magic damage. Good choice if you can't meet the conditions of other Liberators.
Defensive
 Meat Balloon fits more defensive parties (+12 VIT), and will cast
  Rakukaja when hit by magic or
  Tarunda when hit by a critical attack. Counter effects will have a higher chance to activate, and will deal more damage.
 Megakin supports NDR tanking by having a chance to cast
  Rakukaja when Nulling,
  Tarukaja when Repelling, or
  Sukukaja when Draining a boss's attack. Repels will deal more damage, while Drains will heal more. He also provides +5 VIT/AGI/LUK to slightly improve bulk and accuracy/evasion.
Useful Demons
These demons should work well against almost any boss, whereas other demons might be punished by the current boss's gimmick (for example, heavily reduced damage from certain elements)
 Erlkonig will consistently heal your party every turn, and cast
  Tarunda at the start of the enemy's turn (plus
  Rakukaja if panel 3) to lessen the boss's onslaught.
 Barong can cast Luster Candy in addition to healing, increasing your offensive power. If he's panel 4, he can also generate Bulwarks.
 Demeter can keep your party's Bulwarks topped off consistently, trivializing damage taken, as well as casting Luster Candy whenever any other party member receives an attack. My Harvest! additionally grants MP to party members, helping them to keep casting skills.
 Demiurge, if paired with "Drain <element> " party members corresponding to the boss, can both automatically heal and generate MP for the party - on top of making the boss lose turns, of course.
 Kalki casts Luster Candy and a team heal when using Ratnamaru, which itself uses only half a press turn due to Remnants. This skill can also revive a fallen ally, and give them a Bulwark. To top it all off, Kalki also grants +1 MP recovery to the team, and Repel Pierce + Drain Pierce.
 Orcus reduces damage taken from AoE attacks for the party. If panel 2, he will also cast
  Tarukaja when a party member's weakness is exploited. This can let you stack attack buffs quickly.
 Ananta will cast Luster Candy automatically every player and enemy turn (effectively twice per turn), making him a good budget option for stacking buffs. If panel 4, he will also cast Debilitate at the start of the boss's turn, or whenever you use a skill or chain effect that heals.
 Elohim follows up every Solar Flare with an automatic Offensive Cry to stack up the
  ATK buffs, in addition to his massive damage.
 Uriel,
  Gabriel, &
  Raphael will cast each of the three buffs as part of their beginning-of-turn chain when 3 or more Divine/Herald demons are in the party.
 Ame no Uzume will cast
  Tarukaja after any skill heals the party - this includes not just heal skills, but also life-steal effects such as Ouas, and chain effects such as Blossoming Cyclone or Supreme Creator (but it does NOT count
  Lydia or Dx2 skills). If panel 2, she also casts
  Rakukaja.
"Offering of the Crow Queen" event
Normal: Suparna 
Battle 1
| Suparna | - | - | - | Rs | - | Rs | Wk |
Battle 2
| Suparna | - | - | - | Rs | - | Rs | Wk |
Notes
- Extremely simple fight. No gimmicks.
- Boss has no pierce.
- Simply bring your bonus demons to squeeze a few more points out of him.
- Hitting him with
 Dark will make him go down even faster.
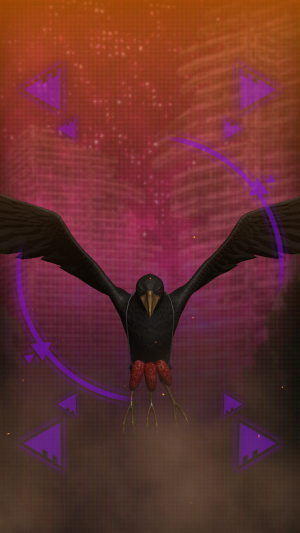
Superior: Yatagarasu 
Battle 1
| Yatagarasu | - | Wk | Wk | - | Wk | Rs | - |
Battle 1
| Yatagarasu | - | Wk | Wk | - | Wk | Rs | - |
Notes
- Another simple fight. Bring your strongest
 Force units and blow him away.
 - While Yatagarasu is also weak to both
 Fire and
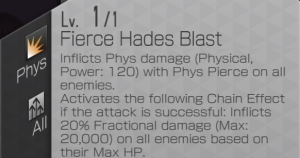
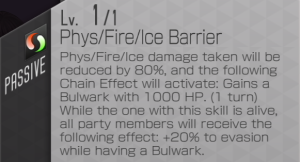
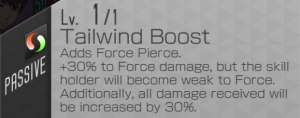
  Ice the 1st battle will auto cast a 1000 HP Bulwark when hit with these elements. The added 30% damage from Tailwind Boost makes this largely irrelevant since you can just punch through it, however if your demons or brands are lacking this might wall your damage somewhat. Simply utilize Force demons on the 1st fight and Fire or Ice ones on the 2nd fight.
Recommended demons:
In addition to the units detailed in the Useful Demons section of this guide:
Support:

 Mahamayuri: Blossoming Cyclone deals
  Force damage, and heals the party.
 Ame no Uzume: If an ally triggers a healing effect, then Ame grants an
  ATK buff (if panel 2, then also a
  DEF buff) - this combos well with demons like
  Mahamayuri or
  Seth.
Seth.
Damage:
- Any Affinity lowering demon will help greatly, since they can enable Chalk Eater teams:

 Lugh: crazy
  Force damage and
  auto-Charge after hitting a weakness once per turn.
 Samyaza: will cast a follow up hit after any ally, including himself, casts a
  Force (or Elec) attack. Additionally, he can lower MP cost of magic skills for the party.
 Nyarlathotep: will increase Magic damage taken by the enemy when under a state of
  Gloom, as well as supplying an
  ATK buff and
  DEF buff with Panel 2. However, he can only apply Gloom in phase 1.
 Mada: Deals
  Fire damage,
  Charm, and grants Bulwarks for the team to aid survival.
 Anahita: Hell Stream deals
  Ice damage, and grants an
  ATK buff and
  DEF buff with every cast. Synergizes well with
  Demeter's Bulwarks to grant +30% magic damage to the team.
 Baal: increases
  Force dealt by the party in addition to being a good DPS.
 Susano-o: Kusanagi deals
  Force damage, and each cast grants an
  ATK buff.
 Sabaoth: Sanction deals
  Force damage, and can potentially grant an extra press turn if used in the second half of a press turn.
 Seth: Ouas deals physical
  Force damage while healing the user. Can combo with
  Ame no Uzume to grant
  ATK buffs.
 Koga Saburo: Soaring Blades deals physical
  Force damage. Must be panel 2, or else he will run out of charges (with 2 turns, he will need 4, but without p2 he only has 3 charges).
Ultimate: Morrighan 
Battle 1
| Morrighan | - | - | - | - | Nu | Nu | Rs |
Battle 2
| Morrighan | - | - | - | - | Nu | Nu | Rs |
Notes:
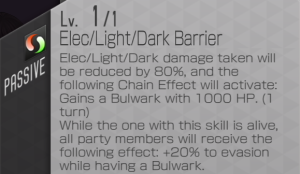
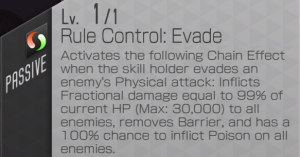
- Missing against Morrighan is deadly as she will leave your party at 1 HP, remove Barriers and inflict
 Poison.
- Luckily someone forgot to give her any evasion bonuses! So this is a non-issue unless your physical demons have accuracy issues in the first place.
- Spirit Chains: Corrosion - Your highest-HP unit will be hit with this at the beginning of each enemy turn, lowering both their Defense stats by 80%. While this might not be an issue at first, once you hit a high enough boss level it might make a significant difference in the damage they take.
- In Phase 1, be careful about bringing
 Force- or
  Phys-weak demons as this will trigger a follow up attack by the boss.
- Morrighan has no weaknesses! Until hit with a
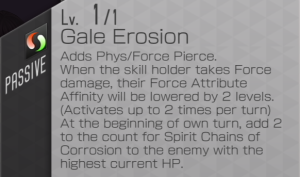
 Force attack, as Gale Erosion will drop her Force affinity by 2 stages up to twice every time she's hit with one. Use this to enable Chalk Eater teams to chew through her HP and spam free buffs.
- Whoever initiates this will need to have Force pierce (she starts at Null), or you'll need a team member to reduce Force affinity first.
- Unlike the previous event,
 Force has few units that trigger a free attack at the beginning of turn to speed up the process, forcing you to take 2 turns to make her weak.
  Samyaza can follow up an ally's attack with Thunderforce to drop her resistance all the way down.
 - Your own
 Morrighan or
  Lugh can also reduce Force affinity.
- Liberators:
 Chalk Eater - Grants buffs or more press turns when hitting weaknesses.
 Shionyan - Grants +12 Mag for magic teams.
 Carbon Black - Crit damage and +12 Str for physical teams.
 Templar Dragon - Boost damage of demons that use
  Charge or
  Concentrate.
Recommended demons:
In addition to the units detailed in the Useful Demons section of this guide:
Support:

 Mahamayuri: Blossoming Cyclone deals
  Force damage, and heals the party.
 Ame no Uzume: is particularly relevant for this event since she is Weak to Force, baiting the boss into using her attacks and triggering Demeter or Orcus as detailed above. Additionally, if an ally triggers a healing effect, then Ame grants an
  ATK buff (if panel 2, then also a
  DEF buff) - this combos well with demons like
  Mahamayuri or
  Seth.
Seth.
 Hecatoncheires fills a similar niche, baiting with his Force weakness and lowering
  All Targets /
  Random Targets attacks.
Damage:
- Any Affinity lowering demon will help greatly, since they can enable Chalk Eater teams:

 Lugh: crazy
  Force damage and
  auto-Charge after hitting a weakness once per turn. He will also lower Force affinity to make the boss Weak faster.
 Samyaza: will cast a follow up hit after any ally, including himself, casts a
  Force (or
  Elec) attack. Additionally, he can lower MP cost of magic skills for the party. Samyaza can guarantee a Force weakness after only one attack.
 Nyarlathotep: will increase Magic damage taken by the enemy when under a state of
  Gloom, as well as supplying an
  ATK buff and
  DEF buff with Panel 2. However, he can only apply Gloom in phase 1.
 Mada: Deals
  Fire damage,
  Charm, and grants Bulwarks for the team to aid survival.
 Anahita: Hell Stream deals
  Ice damage, and grants an
  ATK buff and
  DEF buff with every cast. Synergizes well with
  Demeter's Bulwarks to grant +30% magic damage to the team.
 Baal: increases
  Force dealt by the party in addition to being a good DPS.
 Susano-o: Kusanagi deals
  Force damage, and each cast grants an
  ATK buff. Be careful that he cannot pierce until panel 4 though, so you may need another Force caster to hit the boss first.
 Sabaoth: Sanction deals
  Force damage, and can potentially grant an extra press turn if used in the second half of a press turn.
 Seth: Ouas deals physical
  Force damage while healing the user. Can combo with
  Ame no Uzume to grant
  ATK buffs.
 Koga Saburo: Soaring Blades deals physical
  Force damage. Must be panel 2, or else he will run out of charges (with 2 turns, he will need 4, but without p2 he only has 3 charges).
Archive
- For older events, see Demon Alliance Invasion/History
| Quest Areas | |
|---|---|
| Permanent Content | Story • Dx2 Quests • Alter-World • Aura Gate (1, 2, SP) |
| Farming Quests | Strange Signal • Brands of Sin • Wanted |
| Recurring Events | Eclipse • Hell's Park • Advent • Kiwami • Tokyo Abyss • Take Back Tokyo • Demon Alliance Invasion |
| Competitive | Democalypse • D2 Duel • Battle Tower |

