Digest Apr 2
Welcome to the second issue of the Dx2 Digest! This is going to be EXTREMELY packed week, we apologize in advanced for the long article!
All times and dates mentioned are in JPT.
- Issue: 2
- Date: 2021/04/22 - 2021/04/28
- Written by User:Reika
Contents
Featured Banner
Dimensional Banner is getting rerun with two new demon additions! For an in-depth analysis of them, scroll down below.
- New Demons: Thor A, Surt A
- Also Featured: Shiva A, Susano-o A, Garuda A, Quetzalcoatl A, Lakshmi A
Most of the Dimensionals are pretty useful for PVP, consider rolling one of the banners if you want to shake up your PVP teams. Check Tier List for an idea of how they can be used.
There are four different type of banners this time, make sure you don't end up accidentally rolling the wrong one! An important note is there are no single-demon guarantees this time. This means you could theoretically roll an infinite times and never get a Surt A. If you are chasing a specific demon, you might want to reconsider.
Featured Dimensional Step-up Summons
Brief Description: 9,000 gems for a Guaranteed Surt A or Thor A at the end, and bonus 100 Dimensional Tomes. Limited to one cycle, this banners will refresh next week when Part 2 of the event commences. This means it will be made available again if you exhausted it, and more crucially your step progress will be reset!!
Verdict: This is the best banner to roll if you are chasing after either of the new demons. Doing this twice will net you at least two copies of either new demon, while giving enough Tomes to perform an Absolute Summon.
Special Dimensional Step-up Summons
Brief Description: 5,500 gems for a Guaranteed Dimensional Demon, and bonus 60 Dimensional Tomes. Limited to one cycle.
Verdict: This is a good banner to roll for if your roster lacks Dimensionals (or simply for Dimensional panels). Note that this banner does not have boosted rates for Surt A and Thor A, all dimensionals share the same rate for this banner.
Dimensional Step-up Summons
Brief Description: 9,000 gems for 100 Dimensional Tomes. Limited to two cycles.
Verdict: This banner is purely for those who have exhausted all the other banners and need more Dimensional Tomes. You should stay far away from this one, though doing just the discounted step 1 isn't a bad idea.
Dimensional Gem Summons
Brief Description: 100 gems for 1 try and 1 Dimensional Tome.
Verdict: This is for those who have exhausted every single step-up available. Avoid this like 16 Scourges.
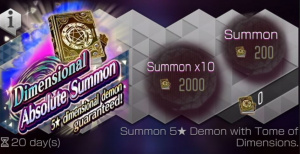
Dimensional Absolute Summons
Brief Description: 200 Dimensional Tomes for 1 random Dimensional.
Verdict: Remember that Dimensional Tomes have no Expiry. Thor A and Surt A have 33% rates each, if you are chasing either of them consider cashing in your tomes here, otherwise you can save them for later when the Dimensional you want goes on rate up.
Other Banners
Golden Week Gem Summons
This banner is only available for 100 pulls, and contains the regular gem pool demons + several banner ones. The biggest draw for this banner is a doubled rate for 5★ demons (6%), though it is shared across the entire pool which is like 50+ demons at this point. As a bonus, you also get 2x Parchment Pieces per summon.
- Highlight Demons: Masakado A, Xi Wangmu
- Also Featured: Tokisada, Kali, Maya, Demonee-Ho, Frost Ace, Mother Harlot, Guan Yu, Daisoujou
Verdict: This is a highly divisive banner. While you can potentially get a lot of 5★ demons from it due to the increased rate, the chances of getting good 5★ demons are rather low due to the large pool. Since there is no incentive to do a 10 pull (same rates regardless), you could treat this as a "scratch the gacha itch" banner and do YOLO 100 gems rolls whenever you feel the urge to.
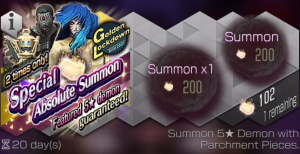
Golden Week Absolute Summons
200 parchments gets you one of the following demons.
- Highlight Demons: Masakado A, Xi Wangmu
- Also Featured: Tokisada, Kali, Maya, Demonee-ho, Frost Ace, Mother Harlot, Guan Yu, Daisoujou
Verdict: This is a great banner! These demons are either banner-only, Abs only or flat out unavailable elsewhere like Xi Wangmu, if you have saved up Parchment Pieces consider using them here!
New Demon Analysis
COMING SOON
Events
100 Free Summons
We are getting 10 summons each day for 10 days total! The free summons will also have Masakado A in the pool, so cross your fingers and hope you get lucky!! Template:Strikethrough
Black Sun AGSP Event
AG SP returns, with a new reward introduced: A clear Selector! This allows you to pick one demon to summon in a Clear archetype, which should greatly help with multifusions, Kartikeya especially.
- Part 1 Starts: 22 April 2021, 3 pm
- Part 1 Ends: 28 April 2021, 11.59 pm
- Part 2 Starts: 29 April 2021, 12 midnight
- Part 2 Ends: 6 May 2021, 2 pm
Democalypse
Democalypse is ON this week, with Force as the bonus area.
- Season: 36
- Elements: Light, Phys, Force
- Before Cull: 19 April 2021, 12 noon
- During Cull: 23 April 2021, 12 noon
This will be the first Democalypse to remove the Prelim modifier cap. As such, expect optimal Prelim teams to change.
The optimal Force Boss teams should remain the same as the previous Force bonus cull, as none of the demons released since then are related to Force.
|
|
|
|
|
|
Battle Tower
- Season: 4
- Round: 2
Round two of Battle Tower begins this week!
List of handicaps:
- Attack first at start of battle (-30%)
- Party immune to ailments (-30%)
- +15% to enemy damage output (+20%)
- +25% to enemy damage output (+20%)
- -80% to party Phys damage output (+20%)
- +50% to enemy Fire/Force damage output (+20%) This display is bugged on the Global client, the damage increase is to Force, not Elec!!
- Enemy nulls mortal (+20%)
- +50% to enemy HP (+20%)
List of sidegoals:
- Activate an Almighty skill (+1500)
- Perform a Physical attack (normal attack included) (+1500)
- Win without ally being downed (+1500)
Meta Analysis
This section attempts to analyze the Tower meta. All teams are assumed to be running full debilitating handicaps (+120%) and trying to clear all 3 side goals (+4500).
- Some notes on the damage reduction handicap: The handicap interacts additively with any boosts you have, instead of being a flat out reduction of final damage. This makes it a lot less painful than one would think.
- Let's take Ardha for example, with Phys Amp and Master Assassin transfer. Sahasvara (10%) + innate Epitome of Carnage (15%) + transferred Phys Amp (25%) + Master Assassin (20%) = 70% boost
- So in reality you are going from 170% down to 90%, which is slightly less than half of your "usual" damage. The more damage boosts you can stack, the lesser the effect of the handicap.
- Defense:
- Bulky Slow IS Teams: A combination of Null Mortal, +50% HP and -80% reduced Phys damage dealt means they will likely survive the first turn, especially if double Intimidating Stance is included.
- Surt A looks to be perfect for this: Not only does he have Intimidating Stance in Purple, he also gets to abuse the +50% Fire damage handicap.
- Moirai Sisters: In addition to all the points covered above, Atropos also gets a whopping +90% to the second part of her chain. You can also forgo Atropos for the bulky Xi Wangmu + Lachesis + Clotho core and have the MC solo carry DPS with +40% damage, but this is not recommended unless you have a P3 Rama shield and good Ailment Resist Demonites, as the team is otherwise prone to getting shut down by Ailments like 16 Scourges.
- Fast teams: These teams can very likely deny the third goal, especially if Huang Di sword is not used (so players can't cheese it with Double Stance + Repel shield tricking the AI into Yinglong Flash) and/or if Masakado A is included. On the flip side, getting outsped will likely mean conferring full points to the attacker.
- Everyone's favorite purple bug Angra Mainyu is of course unaffected by any of the handicaps, and 16 Scourges is still as strong as ever. The Daisoujou + Xi Wangmu + Angra Mainyu works just as well this season, so you should definitely prepare for this.
- Bulky Slow IS Teams: A combination of Null Mortal, +50% HP and -80% reduced Phys damage dealt means they will likely survive the first turn, especially if double Intimidating Stance is included.
- Offense:
- With slow teams looking to be a popular defense, an anti-slow team core should be greatly considered.
- Skull Knight is a clear winner this season. Not only will he net you two goals on his own, his damage is unaffected by handicaps and will allow you to quickly assassinate dangerous targets, especially if supported by Masakado A. The last slot can be something like Asura Lord or Shiva A who can serve as extra DPS, or an ailment demon like Angra Mainyu or Motoko Kusanagi to lock down the rest of the team (specifically the MC!) while you mop up key threats.
- Demiurge + Angra Mainyu is a great counter to Moirai, as it stops the second half of Passionate Rage from firing (haha get it, fire), while also netting you the first goal for free thanks to False God (chain effects count towards side goals). If you pair him with a Drain Elec demon like Mother Harlot or the upcoming Thor A, his heal might be enough to keep everyone alive for the third side goal.
- Ward brands work again this season, making splashed Angra Mainyu a bit easier to deal with. If this catches on though, expect to start seeing Barrier Break on their Daisoujou again.
- A fast team should also be considered, though you will probably need some sort of Ailment control to keep everyone alive for the third goal. With 80% reduced Phys damage and +50% HP (mainly concerns their MC), it will be difficult to sweep them in one turn, before their MC inevitably kills your Hresvelgr or Kartikeya on the swingback. Transfer Drain or some cheap Almighty spell to Hresvelgr, and remember to Mortal Jihad once with Kartikeya to complete all side goals.
- Risky Picks:
- Even though Ailments are unaffected by the handicaps, team-wide Null Mortal means a single cleric like Daisoujou will instantly hard-counter your entire team, as you cannot simply mortal him to solve the problem. In addition, panelled Moirai sisters also hard-counter Ailments, making dedicated Ailments a very risky pick this season. On the flip side, they completely trivialize slow teams without Daisoujou, so weigh your options carefully.
