Brands of Sin: Sloth
Contents
Stages
 Kikuri-Hime (Stage 1~5)
Stage 1-3
Wave 1
| Raijuu | Cu Sith
|
|---|---|

|

|
| Resistances | |||||||
|---|---|---|---|---|---|---|---|
| Raijuu | - | - | - | Rs | Wk | - | - |
| Cu Sith | - | - | - | - | - | Nu | - |
| Battle Speed | ? | ||||||
Wave 2
| Black Ooze | Raijuu
|
|---|---|

|

|
| Resistances | |||||||
|---|---|---|---|---|---|---|---|
| Black Ooze | Rs | - | - | Wk | - | Wk | Nu |
| Raijuu | - | - | - | Rs | Wk | - | - |
| Battle Speed | ? | ||||||
Boss
| Kikuri-Hime
|
|---|

|
| Resistances | |||||||
|---|---|---|---|---|---|---|---|
| Kikuri-Hime | - | - | - | Wk | Nu | - | Wk |
| Battle Speed | ? | ||||||
Stage 4~5
Wave 1
| Demon | Phys | Fire | Ice | Elec | Force | Light | Dark |
|---|---|---|---|---|---|---|---|
| Incubus | - | - | - | Weak | Resist | - | - |
| Marin Karin, Mudoon, Zan, --- | |||||||
| Black Ooze | Resist | - | - | Weak | - | Weak | Null |
| Ju, Poisma, Charm Bite, --- | |||||||
| Blob | Resist | - | Weak | - | - | Weak | Null |
| Poisma, Zan, Mazan, --- | |||||||
Wave 2
| Demon | Phys | Fire | Ice | Elec | Force | Light | Dark |
|---|---|---|---|---|---|---|---|
| Mermaid | - | - | Resist | Weak | Resist | - | - |
| Ice Breath, Wind Breath, Media, --- | |||||||
| Black Ooze | Resist | - | - | Weak | - | Weak | Null |
| Ju, Poisma, Charm Bite, --- | |||||||
| Blob | Resist | - | Weak | - | - | Weak | Null |
| Poisma, Zan, Mazan, --- | |||||||
Wave 3
| Demon | Phys | Fire | Ice | Elec | Force | Light | Dark |
|---|---|---|---|---|---|---|---|
| Mermaid | - | - | Resist | Weak | Resist | - | - |
| Ice Breath, Wind Breath, Media, --- | |||||||
| Kikuri-Hime (Boss) | - | - | - | Weak | Null | - | Weak |
| Redia, Maragion, Marin Karion, --- | |||||||
| Black Ooze | Resist | - | - | Weak | - | Weak | Null |
| Ju, Poisma, Charm Bite, --- | |||||||
 Trumpeter (Stage 6~9)
Stage 6~7
Wave 1
| Demon | Phys | Fire | Ice | Elec | Force | Light | Dark |
|---|---|---|---|---|---|---|---|
| Black Ooze | Resist | - | - | Weak | - | Weak | Null |
| Ju, Poisma, Charm Bite, Disturbance | |||||||
| Silky | - | Weak | Null | - | - | - | - |
| Meweakdi, Null Weak, Bufudyne, Mediara | |||||||
| Mad Gasser | - | - | - | - | - | Weak | Resist |
| Mapoisma, Poison Pursuit, Mudodyne, Hellish Mask | |||||||
Wave 2
| Demon | Phys | Fire | Ice | Elec | Force | Light | Dark |
|---|---|---|---|---|---|---|---|
| Shiki-Ouji | Null | Weak | Weak | - | - | Resist | Resist |
| Resist Mute, Hama, Mudo, Dekaja | |||||||
| Silky | - | Weak | Null | - | - | - | - |
| Meweakdi, Null Weak, Bufudyne, Mediara | |||||||
| Mad Gasser | - | - | - | - | - | Weak | Resist |
| Mapoisma, Poison Pursuit, Mudodyne, Hellish Mask | |||||||
Wave 3
| Demon | Phys | Fire | Ice | Elec | Force | Light | Dark |
|---|---|---|---|---|---|---|---|
| Shiki-Ouji | Null | Weak | Weak | - | - | Resist | Resist |
| Resist Mute, Hama, Mudo, Dekaja | |||||||
| Silky | - | Weak | Null | - | - | - | - |
| Meweakdi, Null Weak, Bufudyne, Mediara | |||||||
| Trumpeter | - | - | - | - | - | Null | Null |
| Concentrate, Soul Drain, Apocalypse, Mamakajaon | |||||||
Stage 8~9
Wave 1
| Demon | Phys | Fire | Ice | Elec | Force | Light | Dark |
|---|---|---|---|---|---|---|---|
| Shiki-Ouji | Null | Weak | Weak | - | - | Resist | Resist |
| Resist Mute, Hama, Mudo, Dekaja, Mamarin Karion | |||||||
| Lilim | - | - | Weak | - | Null | - | - |
| Resist Charm, Mazanma, Marin Karin, Spirit Drain, Mamarin Karion | |||||||
| Lailah | - | - | - | Weak | Resist | Null | Weak |
| Mediara, Light Boost, Mahamaon, Makajamaon, Mamarin Karion | |||||||
| Battle Speed (10000 / 11234) |
Wave 2
| Demon | Phys | Fire | Ice | Elec | Force | Light | Dark |
|---|---|---|---|---|---|---|---|
| Dakini | Resist | Drain | Weak | - | - | - | - |
| Barrier Break, Agilao, Berserker God, Poismaon, Mamarin Karion | |||||||
| Lilim | - | - | Weak | - | Null | - | - |
| Resist Charm, Mazanma, Marin Karin, Spirit Drain, Mamarin Karion | |||||||
| Lailah | - | - | - | Weak | Resist | Null | Weak |
| Mediara, Light Boost, Mahamaon, Makajamaon, Mamarin Karion | |||||||
| Battle Speed (10967 / 12300) |
Wave 3
| Demon | Phys | Fire | Ice | Elec | Force | Light | Dark |
|---|---|---|---|---|---|---|---|
| Dakini (2.1k HP / 2.3k HP) | Resist | Drain | Weak | - | - | - | - |
| Barrier Break, Agilao, Berserker God, Poismaon, Mamarin Karion | |||||||
| Lilim (1.9k HP / 2.1k HP) | - | - | Weak | - | Null | - | - |
| Resist Charm, Mazanma, Marin Karin, Spirit Drain, Mamarin Karion | |||||||
| Trumpeter (3.5k HP / 4k HP) | - | - | - | - | - | Null | Null |
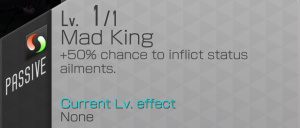
| Concentrate, Mad King, Apocalypse, Mamakajaon, Ceaseless Mute, Mamarin Karion | |||||||
| Battle Speed (13134 / 14734) |
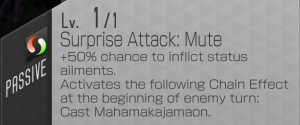
- A Ward Brand Set is mandatory as this stage is full of status ailment users.
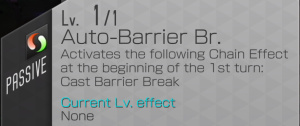
- Try to finish each battle within 3 turns before Auto Barrier wears off.
- Trumpeter will combo Concentrate with Apocalypse, so be wary of how much damage it can do. Apocalypse can also mute your entire party, so bring Phys attackers.
- Recommended Demons: 3★
 Ose, 3★
  Horus, 4★
  Sandalphon, 5★
  Surt, 5★
  Vishnu, 5★
  Yoshitsune
 Lucifer (Stage 10)
Wave 1
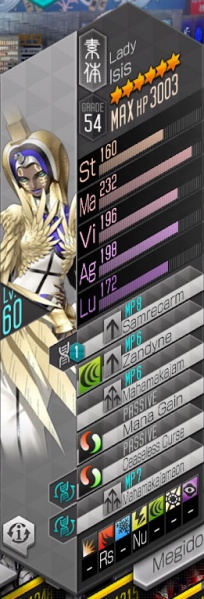
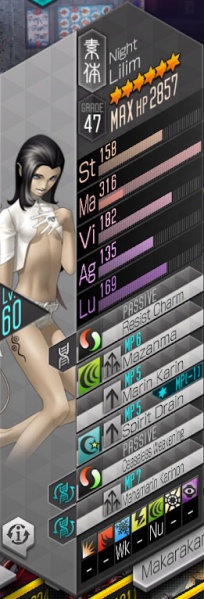
| Girimekhala | Isis | Lilim
|
|---|---|---|
|
|
|
| Resistances | |||||||
|---|---|---|---|---|---|---|---|
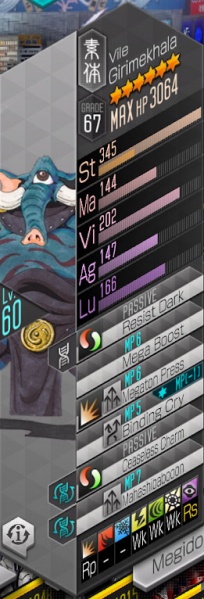
| Girimekhala | Rp | - | - | Wk | Wk | Wk | Rs |
| Isis | - | Rs | - | Nu | - | - | - |
| Lilim | - | - | Wk | - | Nu | - | - |
| Battle Speed | 16,000 | ||||||
Wave 2
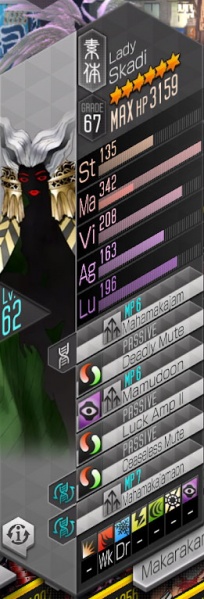
| Skadi | Girimekhala | Isis
|
|---|---|---|
|

|

|
| Resistances | |||||||
|---|---|---|---|---|---|---|---|
| Skadi | - | Wk | Dr | - | - | - | - |
| Girimekhala | Rp | - | - | Wk | Wk | Wk | Rs |
| Isis | - | Rs | - | Nu | - | - | - |
| Battle Speed | 16,933 | ||||||
Wave 3
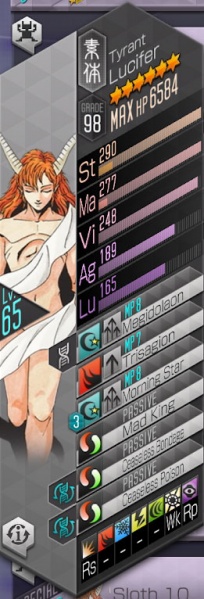
| Skadi | Lucifer | Girimekhala
|
|---|---|---|

|
|
|
| Resistances | |||||||
|---|---|---|---|---|---|---|---|
| Skadi | - | Wk | Dr | - | - | - | - |
| Lucifer | Rs | - | - | - | - | Wk | Rp |
| Girimekhala | Rp | - | - | Wk | Wk | Wk | Rs |
| Battle Speed | 16,733 | ||||||
Auto-Battle Party
Explanation
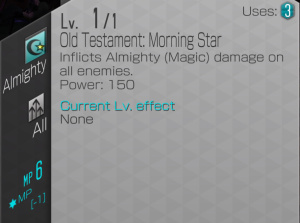
- Almost all of the demons in this node are weak to Light. The goal is to go first, and get your demons to spam Hama to get extra press turns and easily kill the demons. They all need the Ward set because without it, they will get statused when it's the enemy's turn to act. There's a timer of 3 turns per wave that you need to hit, and the timer for the last wave is a lot shorter due to Lucifer being a threat with Morning Star and Megidolaon spam.
Demons:
- Sleipnir is used because of innate Light Boost + Speedster as well as access to Mahamaon.
- Horus is used because of high Agility + Light Boost on awakening.
- Sandalphon is used because of Null Dark that saves us a Resist Dark transfer on Horus, as well as having access to Hamadyne and Hamamaon.
- Mermaid is used because she's the most budget Infinite Chakra user -
 Tsukuyomi/
 Prometheus are too slow and do not have two free slots for Light magic.
Example Party
| Sweeper 1 | Sweeper 2 | Sweeper 3 | Sweeper 4 |
|---|---|---|---|
 Sleipnir Sleipnir
|
 Horus Horus
|
 Mermaid Mermaid
|
 Sandalphon Sandalphon
|
| Resist Fire | Hama | Hamaon | Light Boost |
| Hama | Mahama | Hama |
- Battle Speed should be 17,000+. MATK should be 1,100+.
- Light Boost can be dropped if you feel that you have enough MATK to kill the waves within 3 turns without dying. Alternatively, take Light Boost if you're lacking in damage.
- Alternatives include: Red

 Kushinada, Red
 Feng Huang, Purple
 Kresnik, Red
 Lailah
 - Purple

 Mastema is an extremely powerful Light element attacker. It's overkill, but if you do happen to have access to a Mastema of any archetype, use it.
 - Brands should be Divine + Ward, prioritize MATK then Speed. You can take Hama instead of Hamaon on Mermaid if you run Spell Brands.
- Judgement Light can work as better replacement of Hama when the Dx2 is Eileen due to her skills Fragant Lily, Lucky Press II, Post Script and Happy Ending. However, getting Judgement Light and leveling it tends to be uncommon and difficult.
- Mana Aid is a skill that sometimes appears as a featured Skill Extraction skill. It's not very useful in general, but this is one of the few situations in which it comes in handy - one of the common ways to lose this fight when auto-battling is to run out of MP just before the Lucifer fight and be unable to kill him before dying to Almighty spells.
Videos of clears:
Additional discussion:
 Lucifer (Stage 11)
Wave 1
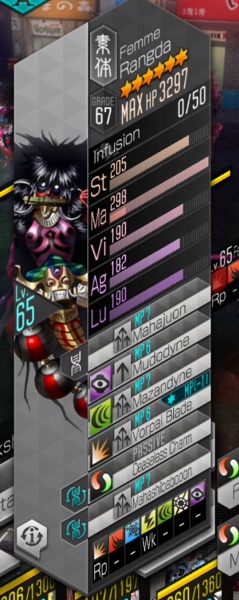
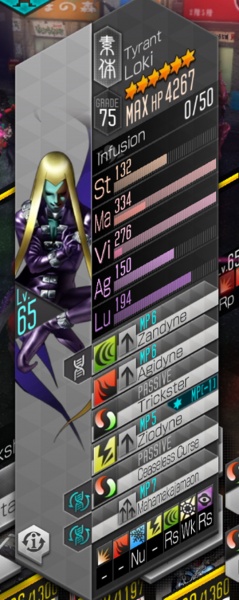
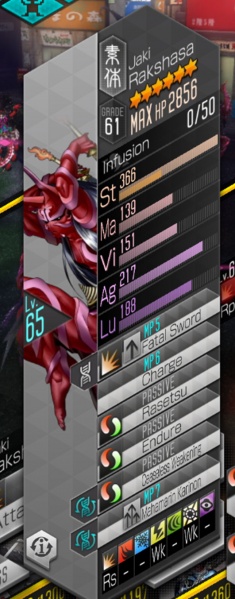
| Rangda | Loki | Rakshasa
|
|---|---|---|
|
|
|
| Resistances | |||||||
|---|---|---|---|---|---|---|---|
| Rangda | Rp | - | - | Wk | - | - | - |
| Loki | - | - | Nu | - | Rs | Wk | Rs |
| Rakshasa | Rs | - | - | Wk | - | Wk | - |
| Battle Speed | 18300 | ||||||
Wave 2
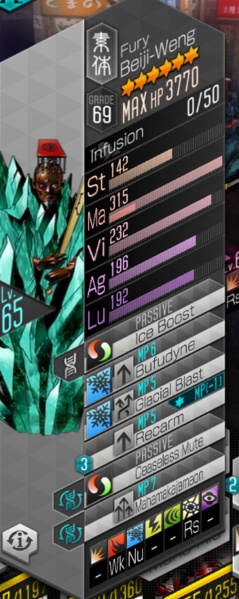
| Rakshasa | Loki | Beiji-Weng
|
|---|---|---|

|

|
|
| Resistances | |||||||
|---|---|---|---|---|---|---|---|
| Rakshasa | Rs | - | - | Wk | - | Wk | - |
| Loki | - | - | Nu | - | Rs | Wk | Rs |
| Beiji-Weng | - | Wk | Nu | - | - | Rs | - |
| Battle Speed | 18766 | ||||||
Wave 3
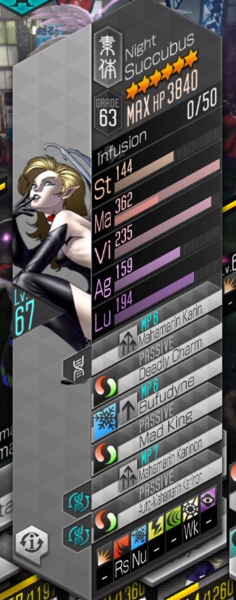
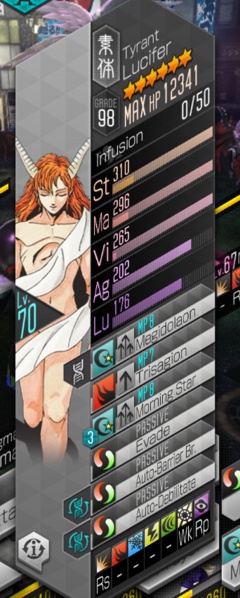
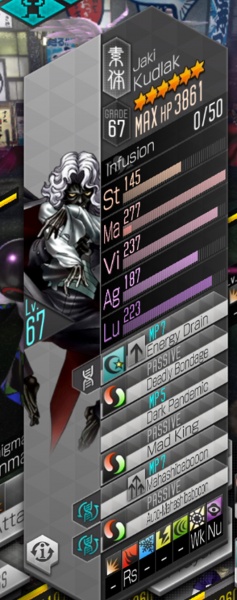
| Succubus | Lucifer | Kudlak
|
|---|---|---|
|
|
|
| Resistances | |||||||
|---|---|---|---|---|---|---|---|
| Succubus | - | Rs | Nu | - | - | Wk | - |
| Lucifer | Rs | - | - | - | - | Wk | Rp |
| Kudlak | - | Rs | - | - | - | Wk | Nu |
| Battle Speed | 18266 | ||||||
Auto-Battle Party
| Ailment Cleanse | 5Elements | Light Damage | Light Damage |
|---|---|---|---|
 Daisoujou Daisoujou
|
 Huang Long Huang Long
|
 Mastema Mastema
|
 Metatron Metatron
|
| Hamaon L | Endure | ||
| Prayer | Samrecarm | Light Boost | Light Boost |
Explanation
- As the enemies use Auto Ailment Skills and Auto-Barrier Break, an Ailment cleanse is needed.
- Daisoujou is the best ailment cleanser, but
 Kinmamon with Prayer and Divine brands can work too. Silent Prayer can work for manual play, but the AI can use up its MP and not be able to cast it when needed.
- Daisoujou is the best ailment cleanser, but
- Huang Long is needed to Repel incoming Spells, should you not kill each wave Turn 1. Recommended Speedster to hit speed needed to go first.
- If you have a lot of damage, you can substitute HL with another
 Light Attacker to kill everything Turn 1.
- If you have a lot of damage, you can substitute HL with another
- The last two slots are Light Attackers. Mastema and Red Metatron are the most used, though others such as
 Lailah or
  Uriel can work.
- Mastema can use Spell Brands if maxed Trial of Hate
- Metatron can use Spell Brands due to Infinite Chakra
Example Party
Nirvash
| Ailment Cleanse | 5Elements | Damage | Damage |
|---|---|---|---|
 Kinmamon Kinmamon
|
 Huang Long Huang Long
|
 Mastema Mastema
|
 Metatron Metatron
|
| Hama | Endure | Mana Aid | Back Attack |
| Prayer | Samrecarm | Light Boost | Light Boost |
- Mastema unmaxed ToH, Divine Brands, 1700Matk
- HL Speed & Divine Brands, 1.8k HP
- Kinmamon Divine Brands, 1.9k HP
- Meta Divine Brands 1.5k Matk
Urabe
| Ailment Cleanse | 5Elements | Damage | Damage |
|---|---|---|---|
 Daisoujou Daisoujou
|
 Huang Long Huang Long
|
 Mastema Mastema
|
 Metatron Metatron
|
| Auto-Tarunda | Speedster | Mana Aid | Back Attack |
| Hama | Tarunda | Resist Fire | Light Boost |
Party Explanation
- Daisoujou
- He can be
 Teal Or
  Purple
 - Divine brand and Lead Brand
- Cleansing Shout MUST BE level 4, you can use it always
- Why Auto-Tarunda? He borns as
 Red but I change it because the AI only used Mahamadyne
- He can be
- Huang Long
- Teal to focuse it on cast Five Elements
- Why Tarunda? He is reused from Deceit 10
- Divine brand
- Mastema
- He must have Resist fire because Lucifer has Trisagion
- Spell brand
- Mana Aid for Trial of Hate spam
- Trial of Hate MUST BE level 6, two uses per wave
- Panel 1 unlocked for extra damage
- 1.7k Matk
- Metatron
- Divine brand, extra uses of Mahamadyne
- 1.4k Matk
Fight Explanation
Daisoujou attacks first (lead brand) using Hama giving you an extra turn, this is essential for a constant use of Five Elements because Huang Long going to have 2 turn, Mastema and Metatron kill everyting on turn 1 in the first wave. In the second wave Beiji-Weng survives but he is not a real problem. Metatron need Divine brand to spamming Mahamadyne 2 waves and sometimes in the last wave. This alignment have a really hight percent of success.
- Extra tips
- No select a support demon
- Use
 Kangaroo Boxer or
  Chalk Eater as Dx2 for extra damage
 - On Auto Quest Settings check *Auto select Cheer in Battle Assists
- On Auto Quest Settings uncheck *Auto Select an available Support Demon
 Lucifer (Stage 12)
Wave 1
| Rangda | Loki | Rakshasa
|
|---|---|---|

|

|

|
| Resistances | |||||||
|---|---|---|---|---|---|---|---|
| Rangda | Rp | - | - | Wk | - | - | - |
| Loki | - | - | Nu | - | Rs | Wk | Rs |
| Rakshasa | Rs | - | - | Wk | - | Wk | - |
| Battle Speed | 18300 | ||||||
Wave 2
| Rakshasa | Loki | Beiji-Weng
|
|---|---|---|

|

|

|
| Resistances | |||||||
|---|---|---|---|---|---|---|---|
| Rakshasa | Rs | - | - | Wk | - | Wk | - |
| Loki | - | - | Nu | - | Rs | Wk | Rs |
| Beiji-Weng | - | Wk | Nu | - | - | Rs | - |
| Battle Speed | 18766 | ||||||
Wave 3
| Succubus | Lucifer | Kudlak
|
|---|---|---|

|

|

|
| Resistances | |||||||
|---|---|---|---|---|---|---|---|
| Succubus | - | Rs | Nu | - | - | Wk | - |
| Lucifer | Rs | - | - | - | - | Wk | Rp |
| Kudlak | - | Rs | - | - | - | Wk | Nu |
| Battle Speed | 18533 | ||||||
Explanation
- Same as S11, but with beefier demons
Example Party
The parties to use are the same as Sloth 11, but maybe a bit stronger/ better brands.
|
|
|
|
- Fast, consistent clears requires a good support demon, like another paneled Yoshitsune
- You can remove Speedster and Speed brands as long as you hit the BS>=18766
- If you don't run Mana Aid use Divine brands, if you do you can use another set like Life on Daisoujou, or War on Masakado A
- Divine on Zaou-Gongen so he can use God's Hand turn 1 on last wave. War brands are also viable; it shouldn't matter too much.
- If you have no Auto-Rebellion you can use the Savage Glee and Epitome of Carnage combo, and hope Zaou-Gongen crits in the 1st or 2nd wave
- Yoshitsune is the real damage dealer, so give him some good PATK brands
The rundown:
- 1st turn: Mahamadyne - Kuyo Flash - Herc Strike - Vorpal Blade
- 2nd turn: Mahamadyne - Kuyo Flash - Herc Strike - Vorpal Blade
- 3rd turn: Cleansing Shout - Kuyo Flash - Herc Strike - Vorpal Blade - Vorpal/HT - Mahamadyne - Myriad Arrows - God's Hand - HT - HT
By the end of your turn Lucifer should be dead
|
|
|
|
- Mahamayuri makes this stage extremely easy because, not only does Blossoming Cyclone heal most of the damage done by Lucifer, but Kujaku Myo-o automatically cleanses your team at the start of your turn for free, regardless of team order. This allows you to let Huang Long to go first and cast Five Elements without having to worry about losing 2 press turns due to status ailments.
- Basic turn order is as follows: Five Elements -> Herculean Strike -> Hassou Tobi -> Blossoming Cyclone. Kongo Zaou will allow everyone's basic attack to pierce, and Zaou-Gongen's P3 will allow you to crit-pass back to Huang Long so that he has enough MP to cast Five Elements the next turn. Lather, rinse, repeat.
- Yoshitsune's gonna be your main DPS here, so give him the best brands and transfers possible. If you don't have Death Blow, you could also give him Phys Boost, Epitome of Carnage, or Phys Survivor, since all of those increase his phys damage by 15%.
- Since Hassou Tobi pierces innately, you could probably get away with swapping out Zaou-Gongen for
 Hell Biker if you don't have a fully paneled Zaou-Gongen at your disposal. However, Zaou-Gongen has the bonus of repelling fire, and Lucifer does not have fire pierce for his Trisagion. Just make sure you have a way of taking down Rangda since she repels physical attacks.
 - If you have him unlocked and at level 50, I would STRONGLY recommend playing as
 Vince for this stage. Not only does he boost the strength of physical demons and their critical hits, but he also has a chance of casting tarukaja and sukukaja at the start of your turn. Additionally, he has a chance to cast rakunda when your demons enter a state of
  Might (which is every turn thanks to Zaou's P3), as well as a chance to cast sukukaja and sukunda upon landing a critical hit.
 Lucifer (Stage 13)
Wave 1
| Ym | Girimekhala | Gurr
|
|---|---|---|

|

|

|
| Resistances | |||||||
|---|---|---|---|---|---|---|---|
| Ym | - | - | Nu | - | Wk | - | Rs |
| Girimekhala | Rp | - | - | Wk | Wk | Wk | Rs |
| Gurr | Wk | - | - | - | Nu | Wk | - |
| Battle Speed | 24.066 | ||||||
Wave 2
| Gurr | Girimekhala | Odin
|
|---|---|---|

|

|

|
| Resistances | |||||||
|---|---|---|---|---|---|---|---|
| Gurr | Wk | - | - | - | Nu | Wk | - |
| Girimekhala | Rp | - | - | Wk | Wk | Wk | Rs |
| Odin | - | - | Rs | Rp | Wk | Rs | Rs |
| Battle Speed | 23.966 | ||||||
Wave 3
| Succubus | Lucifer | Kudlak
|
|---|---|---|

|

|

|
| Resistances | |||||||
|---|---|---|---|---|---|---|---|
| Succubus | - | Rs | Nu | - | - | Wk | - |
| Lucifer | Rs | - | - | - | - | Wk | Rp |
| Kudlak | - | Rs | - | - | - | Wk | Nu |
| Battle Speed | 18.733 | ||||||
Explanation
- In addition to enemies being considerably beefier than the ones in Sloth 12, all demons (except Succubus and Kudlak in the boss wave) have Phys Reduction+, which will reduce all
 Phys (not to be confused with Physical) damage by 80%, making most unga bunga phys attackers largely useless.
 - Wave 1 and 2 have Gurr, a demon weak to
 Phys. He exists to bait
  Lakshmi A into regular attacks instead of using Virtuous Prosperity. Be careful when using her, as she may end up not reaching boost level 1 in time for the Boss wave.
Example Party
Auto Party
|
|
|
|
- Huang Long blocks magical attacks.
 Purple is better, as it has Speedster, but it can be of any Archetype except
  Yellow , as its A.I. tends to waste time performing ineffective Normal physical attacks to save MP for Luster Candy instead of casting Five Elements, opening the whole Party's defences to Lucifer's Magical attacks.
 - Mahamayuri cleanses ailments at the beginning of the turn without wasting Press Turns. He can be of any Archetype, but
 Teal covers his Weakness (transfer Resist Elec or Null Elec if not Teal, as Odin has Bolt Storm).
 - Erlkonig heals the whole party without wasting Press Turns. He could be of any Archetype. Resist Fire (or Null Fire) is mandatory, as Lucifer has Trisagion.
- Seraph does most of the damage. It can be replaced by any other magical attacker, preferably with
 Light Skills to exploit Lucifer's Light Weakness.
The only non-fusable Demons in this Party are Seraph (but he's technically free from Democalypse) and Mahamayuri, but he could be replaced (e.g., ![]() Daisoujou with Lead Brands to cast Cleansing Shout before any
Daisoujou with Lead Brands to cast Cleansing Shout before any ![]() Charmed or
Charmed or ![]() Bound team member would have a chance to waste Press Turns), so it's reasonably cheap to build.
Bound team member would have a chance to waste Press Turns), so it's reasonably cheap to build.
Huang Long is the only mandatory Demon in this Party build, as Five Elements is one of few skills that can set up ![]() Repel Almighty Magic.
Repel Almighty Magic.
- Alternatively,
 Aniel's God's Grace auto-casts it if your team has 3 Herald/Divine demons.
  Lakshmi A's Virtuous Prosperity can cast it at Boost Level 2, but the Gurr in waves 1 and 2 can cause her to not reach that boost level by the boss wave.
 Indrajit's Lord of Clouds requires a kill for each cast, so it's unfit for this.
Except for Passives to cover Weaknesses, no Skills are mandatory, but some may make things easier:
- Evade (or even Dodge) may be transferred to raise the chances of the enemies missing physical attacks. Although that's not necessary, as Erlkonig is more than enough to heal the whole party throughout the battle, it speeds up farming.
- Speedster may be necessary to reach the required Battle Speed. Only the last wave's Battle Speed must be reached, so Huang Long's Five Elements is up against Lucifer.
 Lucifer (Stage 14)
Wave 1
| White Rider | Neko Shogun | Hecatoncheires
|
|---|---|---|

|

|

|
| Resistances | |||||||
|---|---|---|---|---|---|---|---|
| White Rider | - | - | - | Dr | Wk | - | - |
| Neko Shogun | Rs | - | - | Rp | Wk | - | - |
| Hecatoncheires | Nu | - | - | - | Wk | Wk | - |
| Battle Speed | 16,000 | ||||||
Wave 2
| Succubus | Lucifer | Man Eater
|
|---|---|---|

|

|

|
| Resistances | |||||||
|---|---|---|---|---|---|---|---|
| Succubus | - | Rs | Nu | - | - | Wk | - |
| Lucifer | Rs | - | - | - | - | Wk | Rp |
| Man Eater | - | - | - | Rs | - | Wk | Rp |
| Battle Speed | 18,300 | ||||||
Explanation
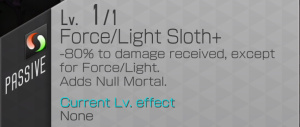
- Force/Light Sloth+ reduces all damage by 80%, except from
 Force and
  Light, so take Demons with Force and Light Skills into the battle.
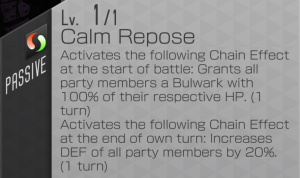
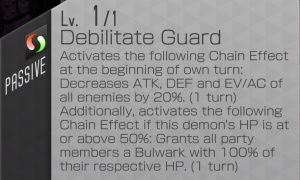
 - These enemies will spam massive 100% HP Bulwarks every turn, so you must bring Bulwark-piercing attacks to make progress.
- Ailment cleansing is still needed, as usual for Sloth.
- However, this time ailments get re-applied at the start of your turn. If you have start-of-turn chain effects and you outspeed the enemy, then your chains will trigger first. If you're slower than the enemy, then the enemy's chains happen first.
- This means that outspeeding with
 Mahamayuri makes him useless, as his cleanse chain will trigger before the enemy's ailment chain - meaning no cleanse for you.
 - Since Bulwarks wear off at the start of your turn, this also makes
 Demeter unreliable as an ailment guard, unless you have a chain to re-cast the Bulwarks at the start of your turn - such as from
  Anahita.
Example Party
Auto Party
|
|
|
|
Team notes:
- Dx2 is
 Chalk Eater for buffs and press turns, as we'll be hitting weakness constantly thanks to Lugh's Attribute affinity down.
- If buffs are already handled by someone like
 Morrighan, then we can run
  Templar Dragon instead to enhance Lugh's
  Charge each turn.
- If buffs are already handled by someone like
- Everyone except Idun has Bulwark pierce, to try and speed up the fight a bit. At time of writing, there are no fusible or otherwise cheap options for Force/Light Bulwark piercing, so you'll have to rely on gacha pulls until more older units receive it.
- Idun offers +2 MP regen to everyone so they can run War/Spell brands, as well as some bulk from Fortify and debuffs. The enemies actually don't hurt very much, so she's mainly here for the MP. She also doesn't need bulk from her brands, hence running Spell on her.
- Lugh is here to cleanse everyone of ailments, so he must act 1st in the party. Tathlum Strike is max level so it costs 5 MP and can consistently be cast. He also does great damage, reduces enemies' Force and Light affinity, and provides a weakness damage boost to the party.
- The 6th Angel is here for damage and debuffs. Last Nemesis is max level so it costs 5 MP, allowing for consistent casting.
- Narcissus deals damage through several chain effects, each of which count as separate rolls for Chalk Eater's buffs and press turns. Narcissus also offers Bulwarks to the party, increasing bulk just in case. In The 6th Angel's case, the Bulwarks also give it a 40% damage boost.
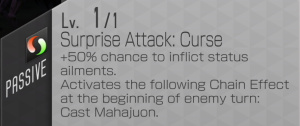
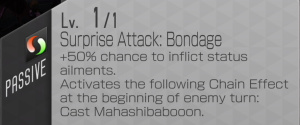
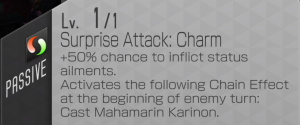
- Succubus and Man Eater in wave 2 will also trigger Narcissus to retaliate during the enemy turn, when Surprise Attack: Charm activates.
- Try to avoid running Narcissus with
 Demeter, as she'll make him immune to his own Charm and make him lose out on lots of DPS.
- This team clears in about 11-14 minutes, depending on the friend support.
Other notes:
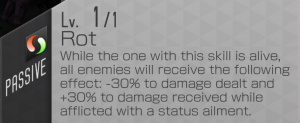
- In wave 1, the AI on auto tends to leave Hecatoncheires for last. Since Heca has passives that decrease damage from AoEs (see Guards of Tartarus) and from ailmented foes (Rot), those reductions are effectively active for the whole fight. If trying for a sub-5 minute clear (to unlock skip ticket usage), you may want to manually pilot the team to eliminate Heca first. Similar logic applies to Succubus in wave 2, as she also has Rot.
- Debilitate Guard stops granting Bulwarks at 50% HP, so the damage of your non-Bulwark-piercing units does eventually matter once that threshold is hit.


