Difference between revisions of "Hollow World/Floors 31-40"
(→Tested Teams) |
(key notes) |
||
| (22 intermediate revisions by 5 users not shown) | |||
| Line 24: | Line 24: | ||
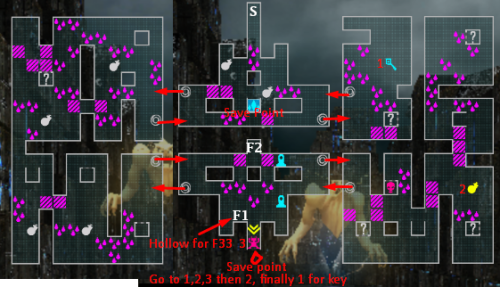
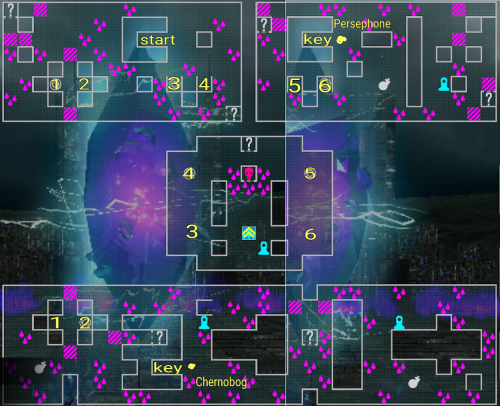
[[File:AG2Floor32.png|center|500px|thumb|Map Layout]] | [[File:AG2Floor32.png|center|500px|thumb|Map Layout]] | ||
| + | Notes: | ||
| + | * To get the key | ||
| + | ** Talk to the employee woman hollow (point 1) | ||
| + | ** Then talk to her hollow boss (point 2) | ||
| + | ** Defeat the enemy at the southern end of the map (point 3) | ||
| + | ** Report back to the boss hollow (point 2) | ||
| + | ** Talk to the employee woman hollow (point 1) | ||
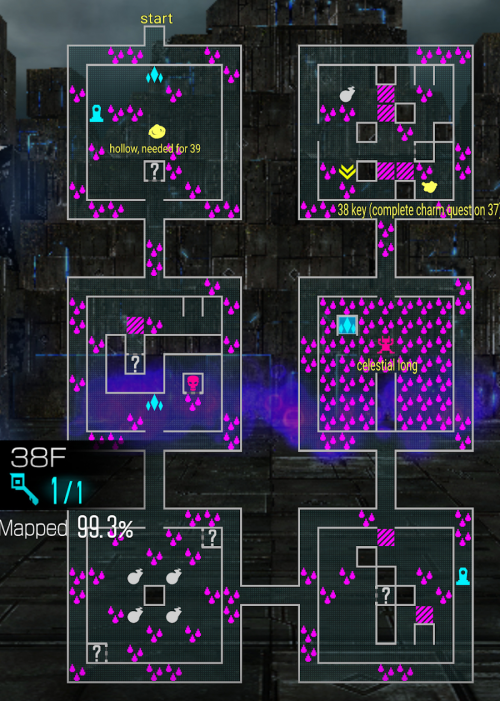
| + | * Before you leave the floor, make sure to talk to the father hollow (F1) near the southern miniboss. He will give you a package, which must be delivered to his son on 33F. | ||
| + | ** After delivering the package on 33F, come back to 32F and talk to the father hollow again (F2). He will give you the key for 33F. | ||
===Boss=== | ===Boss=== | ||
<div class="toccolours mw-collapsible mw-collapsed" style="overflow:auto;"> | <div class="toccolours mw-collapsible mw-collapsed" style="overflow:auto;"> | ||
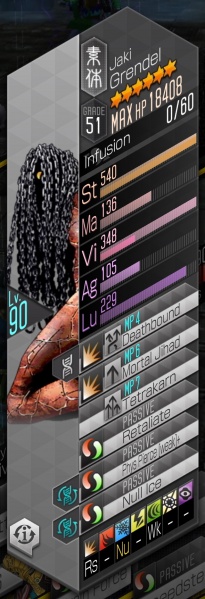
| − | {{EnemyParty|d1=Chatterskull|d2= | + | {{EnemyParty|d1=Chatterskull|d2=Kushinada|d3=Grendel|i1=AG2F32Chatterskull|i2=AG2F32Kushinada|i3=AG2F32Grendel |
|fire1=Dr|ice1=Wk|force1=Nu|light1=Wk|dark1=Nu | |fire1=Dr|ice1=Wk|force1=Nu|light1=Wk|dark1=Nu | ||
| − | | | + | |light2=Rs|dark2=Wk |
| − | | | + | |phys3=Rs|ice3=Nu|force3=Wk |
|speed=18600}} | |speed=18600}} | ||
| + | |||
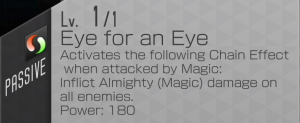
| + | [[File:Eye_for_an_Eye.png|300px]] | ||
</div> | </div> | ||
| Line 36: | Line 47: | ||
[[File:AG2Floor33.png|center|500px|thumb|Map Layout]] | [[File:AG2Floor33.png|center|500px|thumb|Map Layout]] | ||
| + | |||
| + | Notes: | ||
| + | * Deliver the package from 32F to the son hollow on this floor - he's in the isolated room to the north. | ||
| + | * After delivering the package, go back to 32F and talk to the father hollow to get the key. | ||
===Boss=== | ===Boss=== | ||
| Line 44: | Line 59: | ||
|fire3=Dr|ice3=Wk|elec3=Nu | |fire3=Dr|ice3=Wk|elec3=Nu | ||
|speed=20833}} | |speed=20833}} | ||
| + | |||
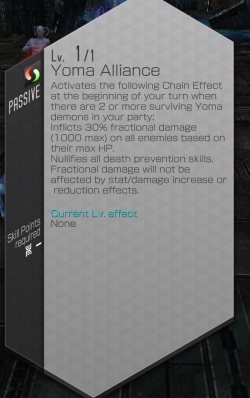
| + | [[File:Yoma_Alliance.jpg|250px]] | ||
</div> | </div> | ||
| Line 49: | Line 66: | ||
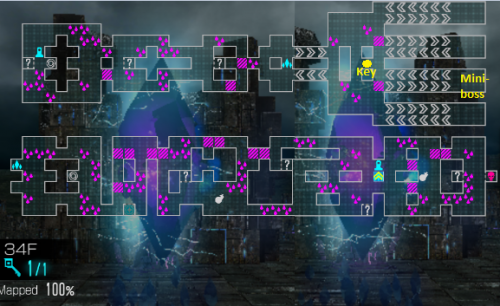
[[File:AG2Floor34.png|center|500px|thumb|Map Layout]] | [[File:AG2Floor34.png|center|500px|thumb|Map Layout]] | ||
| + | |||
| + | Notes: | ||
| + | * Defeat the mini-boss at the end of one of the conveyor belts. | ||
| + | * Afterwards, talk to the employee hollow near the conveyor belts to get the key. | ||
===Boss=== | ===Boss=== | ||
| Line 57: | Line 78: | ||
|light3=Nu|dark3=Wk | |light3=Nu|dark3=Wk | ||
|speed=22433}} | |speed=22433}} | ||
| + | |||
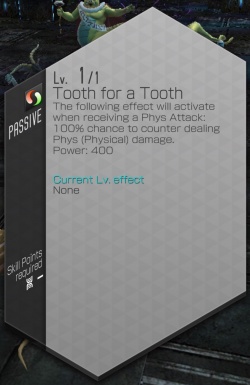
| + | [[File:Tooth_for_a_tooth.jpg|250px]] | ||
</div> | </div> | ||
| Line 62: | Line 85: | ||
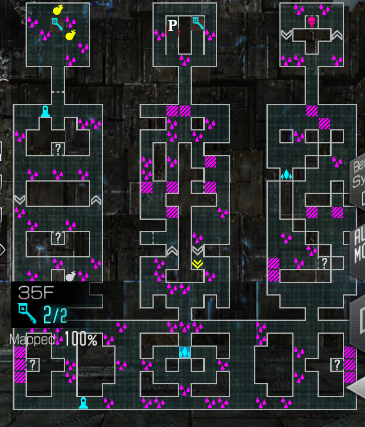
[[File:AG2Floor35.png|center|500px|thumb|Map Layout]] | [[File:AG2Floor35.png|center|500px|thumb|Map Layout]] | ||
| + | |||
| + | Notes: | ||
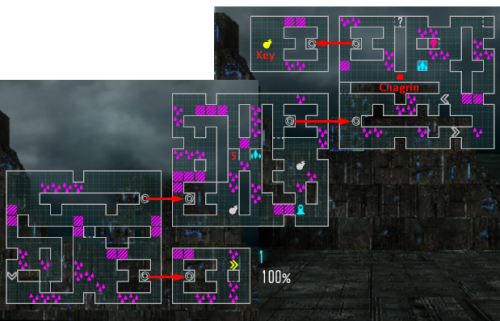
| + | * Collect key 1 in the hidden room at the top of the left column. | ||
| + | * In the middle column's top room, defeat the Peallaidh miniboss in the left dead-end to unlock the barrier, then get key 2 in the right dead-end. | ||
===Boss=== | ===Boss=== | ||
| Line 83: | Line 110: | ||
|fire3=Wk|ice3=Nu | |fire3=Wk|ice3=Nu | ||
|speed=24900}} | |speed=24900}} | ||
| + | |||
| + | [[File:bad_to_worse.jpg|250px]] | ||
</div> | </div> | ||
| Line 94: | Line 123: | ||
|phys1=Wk|fire1=Wk|ice1=Wk|elec1=Wk|force1=Wk|light1=Wk|dark1=Wk | |phys1=Wk|fire1=Wk|ice1=Wk|elec1=Wk|force1=Wk|light1=Wk|dark1=Wk | ||
|speed=11000}} | |speed=11000}} | ||
| + | |||
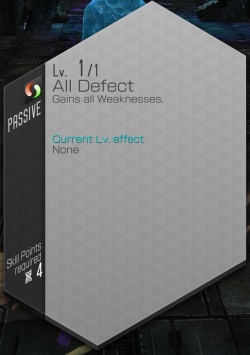
| + | [[File:all_defect.jpg|250px]] | ||
| + | </div> | ||
| + | |||
| + | ===Tested Teams=== | ||
| + | <div class="toccolours mw-collapsible mw-collapsed" style="overflow:auto;"> | ||
| + | |||
| + | Tested by Patfast | ||
| + | |||
| + | '''Party 1: {{LiberatorIcon|Vince|name=1}}''' | ||
| + | |||
| + | Strategy: Rama auditions for a role in The Matrix 4 while Asura Lord claps cheeks. | ||
| + | {{Party | ||
| + | |h1=Damage|h2=Buff|h3=N/A|h4=N/A | ||
| + | |a1=ArchTeal|a2=ArchYellow|a3=ArchPurple|a4=ArchPurple | ||
| + | |d1=Asura Lord|d2=Rama|d3=Samael|d4=Trumpeter | ||
| + | ||s1=Great Aim|s1b=Savage Glee|s2=Dodge|s2b=Evade|s3=Insanity|s3b=Master Assassin|s4=Insanity|s4b=Butcher | ||
| + | }} | ||
| + | |||
| + | |||
| + | Notes: | ||
| + | *[[Slaughter All]] was level 6. Since Slaughter All is an almighty attack that scales off of PATK, it won't trigger Final Opposition. | ||
| + | *[[Luster Candy]] was level 4 | ||
| + | *[[Rama]] had Panel 2 unlocked | ||
| + | *The other two party members don't really matter since there aren't any healers that have [[Drain Phys]], hence the "N/A". The highest EV% healer would probably be {{DemonIcon|Barong|size=32px}}, but my success with him wasn't stellar. | ||
| + | *[[Rama]] should have life and dodge brands to maximize his evasion, and to give him a plan B in case he does take a hit. [[Asura Lord]] should have war and aim brands for obvious reasons. | ||
| + | *Worst case scenario, you can use one of Rama's turns to pop a [[File:Icon Bead.png|32px|link=]] Bead. | ||
| + | |||
| + | --- | ||
| + | |||
| + | Tested by Boblers | ||
| + | |||
| + | '''Party 1: {{LiberatorIcon|Templar Dragon|name=1}}''' | ||
| + | |||
| + | Strategy: Spam Heavenly Sword to outpace the boss's healing. OseH debuffs while Barong buffs and heals. Other party members should have high AGI or bulk. | ||
| + | {{Party | ||
| + | |h1=Damage|h2=Buff + Heal|h3=high-AGI or tanky|h4=high-AGI or tanky | ||
| + | |a1=ArchRed|a2=ArchTeal|a3=ArchPurple|a4=ArchClear | ||
| + | |d1=Ose Hallel|d2=Barong|d3=Hresvelgr|d4=Guts | ||
| + | ||s1=Death Blow|s1b=Phys Boost|s2=Resist Force|s2b=|s3=Resist Phys|s3b=|s4=|s4b= | ||
| + | }} | ||
| + | |||
| + | Berserk levels: | ||
| + | * Phys: 21 | ||
| + | |||
| + | Panels: | ||
| + | * Barong: panel 1 | ||
| + | |||
| + | Brands: | ||
| + | * OseH: Divine, PAtk % (mine had 67% total) | ||
| + | * Others: Life or Dodge, HP% or EV%. | ||
| + | |||
| + | Notes: | ||
| + | * When the boss heals due to Final Opposition, he recovers about 3.4k HP. So, you need to make sure that OseH deals much more than that. With full buff swing setup (boss has all 3 debuffs and you have all 3 buffs) and Phys Berserk level 21, my OseH was dealing about 5.8k damage per Heavenly Sword. | ||
| + | * OseH should ONLY use Heavenly Sword. If he doesn't have enough MP to cast it, pass the turn. Do NOT use his standard attack. (This also means that {{ArchIcon|arch=Purple|size=15px|name=1}} is preferred to Red here, since you're not going to use Hades Blast). | ||
| + | * Spamming Heavenly Sword gives you {{EffectIcon|Charge|name=1}}, {{EffectIcon|Might|name=1}}, and (after about 2 uses) full debuffs on the boss at the start of every turn. Templar Dragon further boosts the charged attack's damage. | ||
| + | * Barong should cast Barong Dance if the team needs heals or buffs. If you just need heals, then [[File:Icon Bead.png|32px|link=]] Beads or [[File:Icon Life Stone.png|32px|link=]] Life Stones are fine too - Templar Dragon makes items only use up half a press turn icon. | ||
| + | * Other party members should pass their turns or use them on healing items - it's not worth attacking unless they can outpace the 3.4k HP heal. | ||
| + | * This setup does mean the boss will hit you with a crit on his turn, but the full buff swing and high AGI on the team means he's going to miss a lot and lose turns. | ||
| + | |||
</div> | </div> | ||
| Line 107: | Line 196: | ||
|fire3=Nu|ice3=Nu|elec3=Wk|dark3=Rs | |fire3=Nu|ice3=Nu|elec3=Wk|dark3=Rs | ||
|speed=21466}} | |speed=21466}} | ||
| + | |||
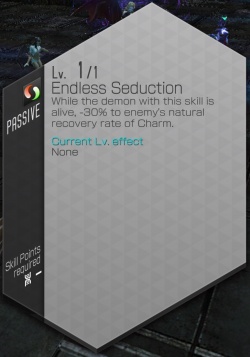
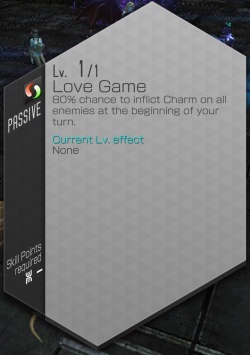
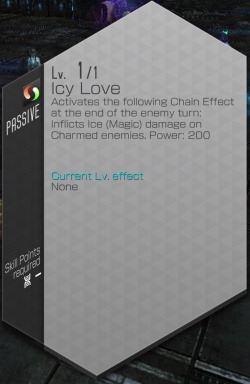
| + | [[File:endless_seduction.jpg|250px]][[File:love_game.jpg|250px]][[File:icy_love.jpg|250px]] | ||
</div> | </div> | ||
| Line 115: | Line 206: | ||
Tested by '''Majora14''' | Tested by '''Majora14''' | ||
| − | {| | + | {{Party |
| − | + | |h1=Damage Dealer|h2=Prayer|h3=Debuffer|h4=Repel/ATK Buffer | |
| − | + | |a1=ArchPurple|a2=ArchClear|a3=ArchClear|a4=ArchClear | |
| − | | | + | |d1=Seth|d2=Kinmamon|d3=Alilat|d4=Frost Ace |
| − | | | + | ||s1=Phys Boost|s1b=Charge|s2=Prayer|s2b=|s3=War Cry|s3b=|s4=Tarukaja|s4b= |
| − | | | + | }} |
| − | | Phys Boost || Prayer || War Cry || Tarukaja | ||
| − | | | ||
| − | |||
| − | |||
| − | * '''SETH''' Role | + | * '''SETH''' Role is to cast Charge and Ouas. |
** Brands: Divine | ** Brands: Divine | ||
*** LVL: 45 ; HP:1276 ; Mag DEF:566 ; Phys ATK: 1548 | *** LVL: 45 ; HP:1276 ; Mag DEF:566 ; Phys ATK: 1548 | ||
| Line 134: | Line 221: | ||
*** LVL: 45 ; HP:2381 ; Mag DEF:749 | *** LVL: 45 ; HP:2381 ; Mag DEF:749 | ||
| − | * '''ALILAT''' Role | + | * '''ALILAT''' Role is to cast War Cry every time its needed and ensure Repel Ice works |
** Brands: Life | ** Brands: Life | ||
*** LVL: 50 ; HP:3025 ; Mag DEF:737 | *** LVL: 50 ; HP:3025 ; Mag DEF:737 | ||
| Line 143: | Line 230: | ||
'''Final Advices:''' | '''Final Advices:''' | ||
| − | * You will constantly be Healing your party with | + | * You will constantly be Healing your party with [[File:Icon Bead.png|32px|link=]] Bead items mostly so {{LiberatorIcon|Templar Dragon|name=1}} its a must, and with {{EffectIcon|Charge|name=1}}, Templar Dragon will boost Ouas's damage by 50%. |
| − | * The fight will last 10 minutes if you are extremely fast and 15-25 minutes if you take your time to make your choices | + | * The fight will last 10 minutes if you are extremely fast and 15-25 minutes if you take your time to make your choices. |
| − | * Your primary focus | + | * Your primary focus is to {{EffectIcon|Charge|name=1}} and Ouas with Seth, end your turns with all your party at full HP (though Alilat can endure with 1500HP) and cure the ailments every turn with Prayer or an [[File:Icon Amrita Shower.png|32px|link=]] Amrita Shower item. |
| − | * If you | + | * If you don't have "Prayer" you can still use Kinmamon but you must use the items [[File:Icon Amrita Soda.png|32px|link=]] Amrita Soda / [[File:Icon Amrita Shower.png|32px|link=]] Amrita Shower. |
| − | * The skill Silent Prayer | + | * The skill [[Silent Prayer]] on Kinmamon is viable only if you don't use Charge in Seth, as casting Silent Prayer will remove the {{EffectIcon|Charge|name=1}} buff. |
</div> | </div> | ||
| Line 162: | Line 249: | ||
|elec3=Nu|force3=Wk|light3=Wk|dark3=Nu | |elec3=Nu|force3=Wk|light3=Wk|dark3=Nu | ||
|speed=27266}} | |speed=27266}} | ||
| + | |||
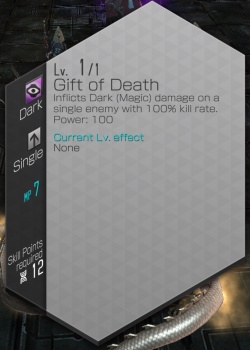
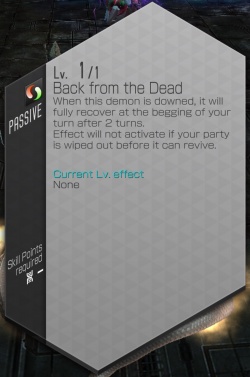
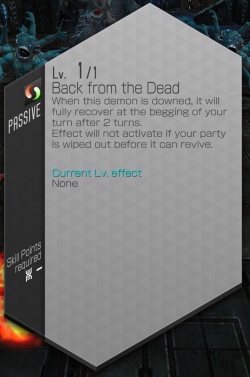
| + | [[File:gift_of_death.jpg|250px]][[File:back_from_the_dead.jpg|250px]] | ||
</div> | </div> | ||
| Line 169: | Line 258: | ||
Tested by '''Majora14''' | Tested by '''Majora14''' | ||
| − | Liberator: | + | Liberator: {{LiberatorIcon|Templar Dragon|name=1}} |
| − | + | {{Party | |
| − | + | |h1=Damage Dealer|h2=Backup Damage Dealer & Repeller|h3=Debuffer|h4=Repel/Buffer | |
| − | + | |a1=ArchPurple|a2=ArchPurple|a3=ArchClear|a4=ArchYellow | |
| − | + | |d1=Indrajit|d2=Alice|d3=Alilat|d4=Amaterasu | |
| − | | | + | ||s1=Elec Amp|s1b=Elec Boost|s2=Dark Pierce (weak)|s2b=|s3=War Cry|s3b=|s4=|s4b= |
| − | | | + | }} |
| − | | | ||
| − | | Elec Amp || Dark Pierce | ||
| − | | | ||
| − | |||
| − | |||
| − | * '''INDRAJIT''' Role | + | * '''INDRAJIT''' Role is to Cast LIGHTING SHOWER ON KIKURI-HIME |
** Brands: Spell | ** Brands: Spell | ||
*** LVL: 50 ; HP:1219 ; Mag DEF:755 ; Mag ATK: 1834 | *** LVL: 50 ; HP:1219 ; Mag DEF:755 ; Mag ATK: 1834 | ||
| − | * '''ALICE''' Damage Dealer | + | * '''ALICE''' Damage Dealer Backup for Indrajit. With Die For Me, she can kill one of the minions. Sometimes the minions cast Dark spells on her, so they lose turns. |
** Brands: Spell | ** Brands: Spell | ||
*** LVL: 50 ; HP:1256 ; Mag DEF:749 ; Mag ATK: 1525 | *** LVL: 50 ; HP:1256 ; Mag DEF:749 ; Mag ATK: 1525 | ||
| − | * '''ALILAT''' Role | + | * '''ALILAT''' Role is to Cast War Cry every time it's needed and ensure Repel Fire/Dark works |
** Brands: Life | ** Brands: Life | ||
*** LVL: 50 ; HP:3025 ; Mag DEF:737 | *** LVL: 50 ; HP:3025 ; Mag DEF:737 | ||
| − | * '''AMATERASU''' Role | + | * '''AMATERASU''' Role is to cast Tenson Kourin mostly and repel fire attacks if any |
** Brands: Spell and Shield | ** Brands: Spell and Shield | ||
*** LVL: 45 ; HP:1325 ; Mag DEF:630 | *** LVL: 45 ; HP:1325 ; Mag DEF:630 | ||
| − | '''Final | + | '''Final Advice:''' |
| − | * You | + | * You will be using constantly Items To Heal and Revive your party - for that reason, Templar Dragon its a must in your team |
| − | * Its highly | + | * Its highly recommended start the fight with a secondary team consisting in a demon who Debuff the DEF and ATK of the enemy team (With Auto Tarunda and Rakunda For Example) and with the Demon {{DemonIcon|White Rider|size=32px}}. |
| − | * White Rider role | + | * {{DemonIcon|White Rider|size=32px}}'s role - It's very important to try wiping out both of the minions with "God´s Bow" before your main party enters the fight. |
| + | |||
| + | --- | ||
| + | |||
| + | Tested by '''Urabe''' | ||
| + | Plan: Just burn it with high DPS | ||
| + | |||
| + | Liberator: {{LiberatorIcon|Kangaroo Boxer|name=1}} | ||
| + | {{Party | ||
| + | |h1=Damage|h2=Buff|h3=Damage|h4=Damage | ||
| + | |a1=|a2=ArchPurple|a3=ArchRed|a4=ArchRed | ||
| + | |d1=Kartikeya|d2=Hell Biker|d3=Siegfried|d4=Zaou-Gongen | ||
| + | ||s1=Phys Boost|s1b=Hades Blast|s2=|s2b=|s3=Phys Boost|s3b=|s4=Phys Boost|s4b=Good Aim | ||
| + | }} | ||
| + | Liberator: {{LiberatorIcon|Chalk Eater|name=1}} | ||
| + | {{Party | ||
| + | |h1=Damage|h2=Damage|h3=Damage|h4=Damage | ||
| + | |a1=ArchPurple|a2=ArchPurple|a3=ArchRed|a4=ArchPurple | ||
| + | |d1=Anubis|d2=Thor|d3=Tsukuyomi|d4=Alice | ||
| + | ||s1=|s1b=|s2=Elec Boost|s2b=|s3=Resist Phys|s3b=|s4=|s4b= | ||
| + | }} | ||
| + | Notes: | ||
| + | *You are going to need good or excellent spell/war brands | ||
| + | *[[Mjolnir]] is level 6 | ||
| + | *Actually in my second team [[Anubis]] and [[Alice]] were level 45 and without any other skill to improve their damage, also my [[Alice]] is {{ArchIcon|arch=Red|size=15px}} Red | ||
| + | *When your second team goes in, the two [[Ikusa]] MUST BE DEAD to focus [[Thor]]'s damage on the lone boss. | ||
| + | *Berserk Levels: 48 Phys, 62 Elec, 71 Dark | ||
</div> | </div> | ||
| Line 217: | Line 327: | ||
|phys3=Nu|force3=Wk|light3=Wk | |phys3=Nu|force3=Wk|light3=Wk | ||
|speed=12866}} | |speed=12866}} | ||
| + | |||
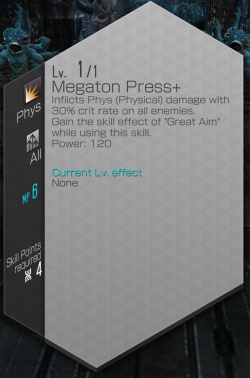
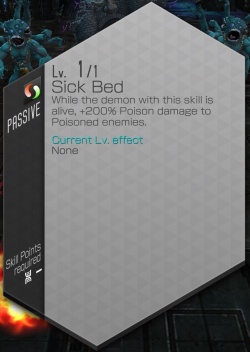
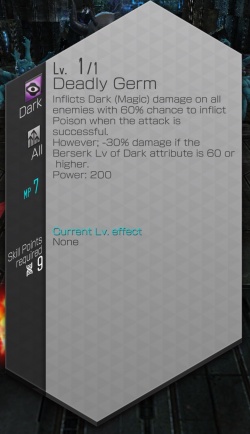
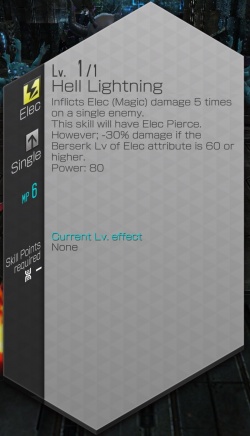
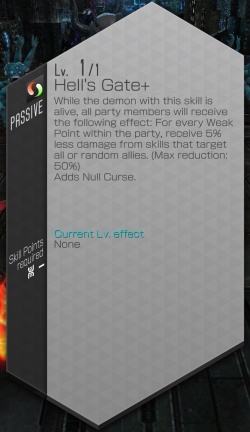
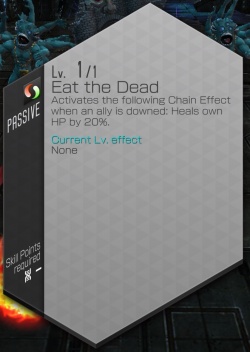
| + | [[File:megaton_press_plus.jpg|250px]][[File:back_from_the_dead_2.jpg|250px]][[File:sick_bed.jpg|250px]][[File:deadly_germ.jpg|250px]] | ||
| + | [[File:hell_lightning.jpg|250px]][[File:hells_gate_plus.jpg|250px]][[File:eat_the_dead.jpg|250px]] | ||
</div> | </div> | ||
Toms Advice: | Toms Advice: | ||
| − | *Dragon | + | *{{LiberatorIcon|Templar Dragon|name=1}} for half press turns items |
*One nuker that’s single target, fire or elec based | *One nuker that’s single target, fire or elec based | ||
*A drain phys pierce or repel phys pierce combo | *A drain phys pierce or repel phys pierce combo | ||
*And a spare unit for like buffs/debuffs | *And a spare unit for like buffs/debuffs | ||
*Do not touch the hecas | *Do not touch the hecas | ||
| + | |||
| + | |||
| + | ===Tested Teams=== | ||
| + | <div class="toccolours mw-collapsible mw-collapsed" style="overflow:auto;"> | ||
| + | |||
| + | Tested by Urabe | ||
| + | |||
| + | '''Party 1: {{LiberatorIcon|Kangaroo Boxer|name=1}}''' | ||
| + | |||
| + | Plan: Just do as much damage as you can | ||
| + | {{Party | ||
| + | |h1=Damage|h2=Buff|h3=Damage|h4=Damage | ||
| + | |a1=ArchClear|a2=ArchPurple|a3=ArchRed|a4=ArchRed | ||
| + | |d1=Kartikeya|d2=Hell Biker|d3=Siegfried|d4=Zaou-Gongen | ||
| + | ||s1=Phys Boost|s1b=|s2=|s2b=|s3=Phys Boost|s3b=|s4=Phys Boost|s4b=Good Aim | ||
| + | }} | ||
| + | |||
| + | '''Party 2: {{LiberatorIcon|Templar Dragon|name=1}}''' | ||
| + | |||
| + | Plan: Spend a lot of objects | ||
| + | {{Party | ||
| + | |h1=Damage|h2=Debuff|h3=Buff|h4=Exist | ||
| + | |a1=ArchClear|a2=ArchYellow|a3=ArchYellow|a4=ArchClear | ||
| + | |d1=Seth|d2=Mitra|d3=Amaterasu|d4=Alilat | ||
| + | ||s1=Phys Boost|s1b=|s2=Rakunda |s2b=|s3=Resist Elec|s3b=|s4=|s4b= | ||
| + | }} | ||
| + | Notes: | ||
| + | *[[Ouas]] was level 4 | ||
| + | *[[Seth]] had Panel 1 and 2 unlocked | ||
| + | *You can replace [[Mitra]] with {{DemonIcon|Rangda|size=32px}}, but you are going to need debuff spells to reduce ATK and EV/AC | ||
| + | *[[Tenson Kourin]] was level 4 | ||
| + | *All your demons MUST HAVE 2k hp or more, use Life brands on your demons and one or two stats of %HP on [[Seth]] | ||
| + | *Use [[File:Icon Amrita Shower.png|32px|link=]] Amrita Shower to cure poison and [[File:Icon Bead.png|32px|link=]] Beads to heal when [[Amaterasu]] doesn't have enough MP | ||
| + | |||
| + | --- | ||
| + | |||
| + | Tested by Patfast | ||
| + | |||
| + | '''Party 1: {{LiberatorIcon|Templar Dragon|name=1}}''' | ||
| + | |||
| + | Strategy: Drain all AoE attacks and keep [[Rama]] alive while [[Lilith A]] {{EffectIcon|Revive Seal|name=1}}s the adds. | ||
| + | {{Party | ||
| + | |h1=Damage|h2=Buff|h3=Damage|h4=Revive Seal | ||
| + | |a1=ArchTeal|a2=ArchYellow|a3=ArchTeal|a4=ArchPurple | ||
| + | |d1=Masakado|d2=Rama|d3=Asura Lord|d4=Lilith A | ||
| + | ||s1=Enduring Soul|s1b=Epitome of Aggression|s2=Evade|s2b=Dodge|s3=Savage Glee|s3b= Good Aim|s4=Auto-Rebellion|s4b=Speedster | ||
| + | }} | ||
| + | |||
| + | Notes: | ||
| + | *[[Templar Dragon]] is absolutely '''CRITICAL''' in order to win this fight, as her skill Speed Loader makes it so that items only consume half a turn when used. | ||
| + | *[[Occult Flash]], [[Slaughter All]], [[Luster Candy]], and [[Temptation]] were all max level. | ||
| + | *[[Rama]] had panel 2 unlocked, [[Lilith A]] had panel 1 unlocked, and [[Masakado]] had panels 1 and 2 unlocked. | ||
| + | *The only attacks that [[Orcus]] uses are {{ElementIcon|Dark|name=1}}, {{ElementIcon|Elec|name=1}}, and {{ElementIcon|Phys|name=1}} attacks, while [[Hecatoncheires]] only uses {{ElementIcon|Phys|name=1}} attacks; [[Masakado]] drains dark, [[Lilith A]] drains elec, and both [[Masakado]] and [[Asura Lord]] drain phys. | ||
| + | *You're gonna need at least ~30 [[File:Icon Balm of Rising.png|32px|link=]] Balm of Rising and ~50 [[File:Icon Bead.png|32px|link=]] Beads in order for this to go smoothly, so make sure to stock up at the black market. | ||
| + | *The basic battle plan is to attack the adds one at a time with {{TargetingIcon|Single|name=1}} skills and to let [[Lilith A]] deal the killing blow with [[Temptation]], in order to prevent the adds from getting back up. [[Rama]] spams [[Luster Candy]] to both increase your damage and decrease theirs, as well as to prevent him from getting hit. [[Orcus]] will heal every time you down a [[Hecatoncheires]], so don't bother touching him until you killed both the adds. After they're both dead, fire away at [[Orcus]]. | ||
| + | *When your demons start going down, make sure to revive [[Rama]] first. Speed Loader will make it so that you can revive at least 2 demons per turn, so long as at least one survives. If your demons continue to go down after the adds are killed, prioritize [[Masakado]] and [[Lilith A]] over [[Asura Lord]], since he only drains phys attacks. | ||
| + | *You can substitute [[Lilith A]] with {{DemonIcon|Skull Knight|size=32px}} since he has [[Null Dark]], as Deadly Germ doesn't pierce. | ||
| + | </div> | ||
===Encounters=== | ===Encounters=== | ||
Latest revision as of 05:31, 11 July 2023
WIP
Contents
General
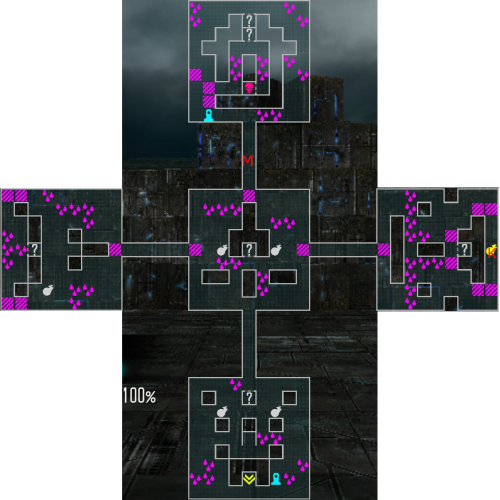
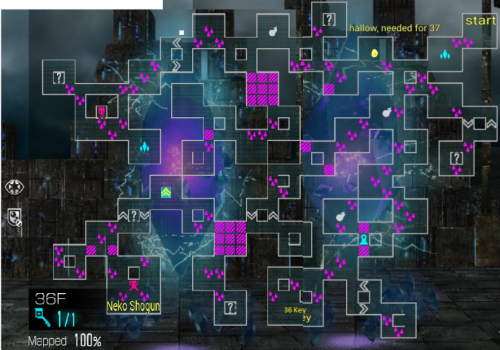
K denotes a Key Location.
Floor 31
- M is Miniboss, K is Key.
Boss
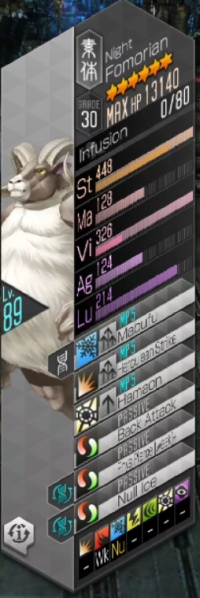
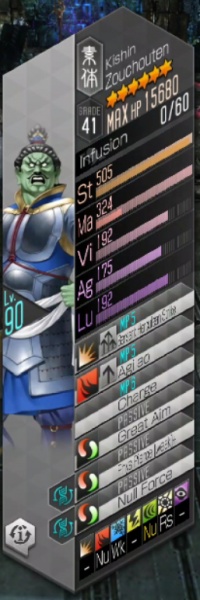
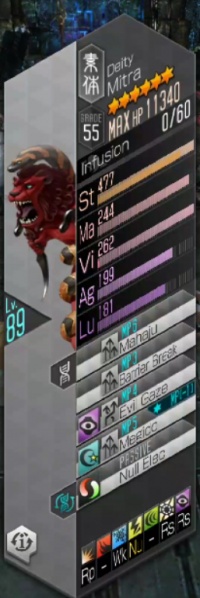
| Fomorian | Zouchouten | Mitra
|
|---|---|---|
|
|
|
| Resistances | |||||||
|---|---|---|---|---|---|---|---|
| Fomorian | - | Wk | Nu | - | - | - | - |
| Zouchouten | - | Nu | Wk | - | Nu | Rs | - |
| Mitra | Rp | - | Wk | Nu | - | Rs | Rs |
| Battle Speed | 16600 | ||||||
Floor 32
Notes:
- To get the key
- Talk to the employee woman hollow (point 1)
- Then talk to her hollow boss (point 2)
- Defeat the enemy at the southern end of the map (point 3)
- Report back to the boss hollow (point 2)
- Talk to the employee woman hollow (point 1)
- Before you leave the floor, make sure to talk to the father hollow (F1) near the southern miniboss. He will give you a package, which must be delivered to his son on 33F.
- After delivering the package on 33F, come back to 32F and talk to the father hollow again (F2). He will give you the key for 33F.
Boss
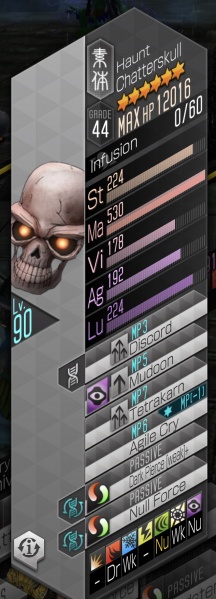
| Chatterskull | Kushinada | Grendel
|
|---|---|---|
|

|
|
| Resistances | |||||||
|---|---|---|---|---|---|---|---|
| Chatterskull | - | Dr | Wk | - | Nu | Wk | Nu |
| Kushinada | - | - | - | - | - | Rs | Wk |
| Grendel | Rs | - | Nu | - | Wk | - | - |
| Battle Speed | 18600 | ||||||
Floor 33
Notes:
- Deliver the package from 32F to the son hollow on this floor - he's in the isolated room to the north.
- After delivering the package, go back to 32F and talk to the father hollow to get the key.
Boss
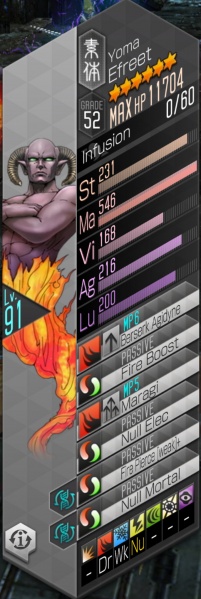
| Efreet | Valkyrie | Efreet
|
|---|---|---|
|

|

|
| Resistances | |||||||
|---|---|---|---|---|---|---|---|
| Efreet | - | Dr | Wk | Nu | - | - | - |
| Valkyrie | Rs | - | - | Rs | Rs | - | - |
| Efreet | - | Dr | Wk | Nu | - | - | - |
| Battle Speed | 20833 | ||||||
Floor 34
Notes:
- Defeat the mini-boss at the end of one of the conveyor belts.
- Afterwards, talk to the employee hollow near the conveyor belts to get the key.
Boss
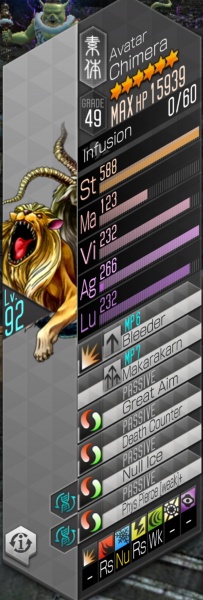
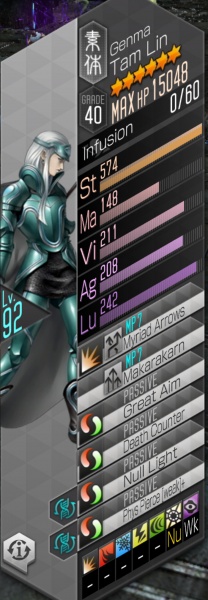
| Chimera | Horkos | Tam Lin
|
|---|---|---|
|

|
|
| Resistances | |||||||
|---|---|---|---|---|---|---|---|
| Chimera | - | Rs | Nu | Rs | Wk | - | - |
| Horkos | Rs | - | Wk | - | - | Nu | - |
| Tam Lin | - | - | - | - | - | Nu | Wk |
| Battle Speed | 22433 | ||||||
Floor 35
Notes:
- Collect key 1 in the hidden room at the top of the left column.
- In the middle column's top room, defeat the Peallaidh miniboss in the left dead-end to unlock the barrier, then get key 2 in the right dead-end.
Boss
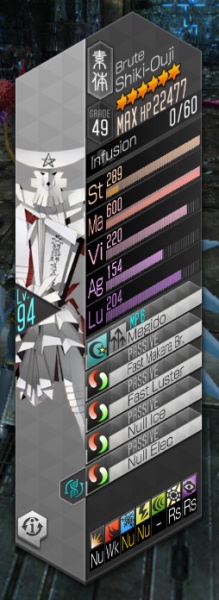
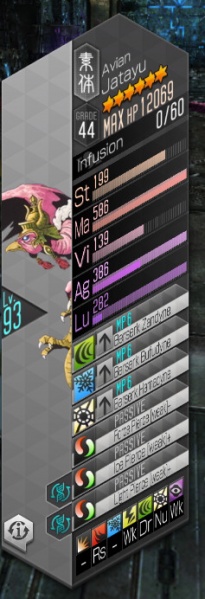
| Feng Huang | Shiki-Ouji | Jatayu
|
|---|---|---|

|
|
|
| Resistances | |||||||
|---|---|---|---|---|---|---|---|
| Feng Huang | Wk | Nu | Wk | - | - | - | - |
| Shiki-Ouji | Nu | Wk | Nu | Nu | - | Rs | Rs |
| Jatayu | - | Rs | - | Wk | Dr | Nu | Wk |
| Battle Speed | 30033 | ||||||
Floor 36
Boss
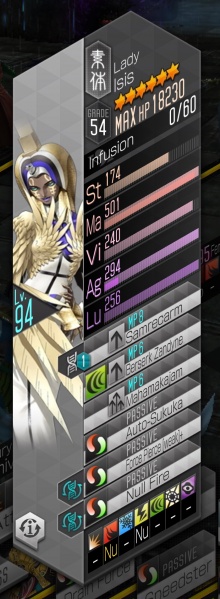
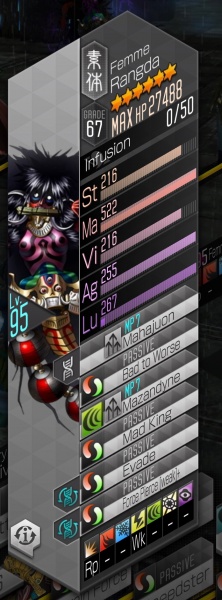
| Isis | Rangda | Silky
|
|---|---|---|
|
|
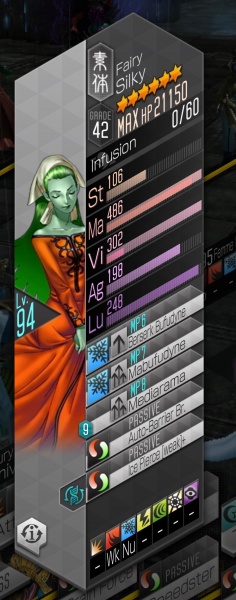
|
| Resistances | |||||||
|---|---|---|---|---|---|---|---|
| Isis | - | Nu | - | Nu | - | - | - |
| Rangda | Rp | - | - | Wk | - | - | - |
| Silky | - | Wk | Nu | - | - | - | - |
| Battle Speed | 24900 | ||||||
Floor 37
Boss
Tested Teams
Tested by Patfast
Party 1: ![]() Vince
Vince
Strategy: Rama auditions for a role in The Matrix 4 while Asura Lord claps cheeks.
| Damage | Buff | N/A | N/A |
|---|---|---|---|
 Asura Lord Asura Lord
|
 Rama Rama
|
 Samael Samael
|
 Trumpeter Trumpeter
|
| Great Aim | Dodge | Insanity | Insanity |
| Savage Glee | Evade | Master Assassin | Butcher |
Notes:
- Slaughter All was level 6. Since Slaughter All is an almighty attack that scales off of PATK, it won't trigger Final Opposition.
- Luster Candy was level 4
- Rama had Panel 2 unlocked
- The other two party members don't really matter since there aren't any healers that have Drain Phys, hence the "N/A". The highest EV% healer would probably be
 Barong, but my success with him wasn't stellar.
 - Rama should have life and dodge brands to maximize his evasion, and to give him a plan B in case he does take a hit. Asura Lord should have war and aim brands for obvious reasons.
- Worst case scenario, you can use one of Rama's turns to pop a
 Bead.
Bead.
---
Tested by Boblers
Party 1: ![]() Templar Dragon
Templar Dragon
Strategy: Spam Heavenly Sword to outpace the boss's healing. OseH debuffs while Barong buffs and heals. Other party members should have high AGI or bulk.
| Damage | Buff + Heal | high-AGI or tanky | high-AGI or tanky |
|---|---|---|---|
 Ose Hallel Ose Hallel
|
 Barong Barong
|
 Hresvelgr Hresvelgr
|
 Guts Guts
|
| Death Blow | Resist Force | Resist Phys | |
| Phys Boost |
Berserk levels:
- Phys: 21
Panels:
- Barong: panel 1
Brands:
- OseH: Divine, PAtk % (mine had 67% total)
- Others: Life or Dodge, HP% or EV%.
Notes:
- When the boss heals due to Final Opposition, he recovers about 3.4k HP. So, you need to make sure that OseH deals much more than that. With full buff swing setup (boss has all 3 debuffs and you have all 3 buffs) and Phys Berserk level 21, my OseH was dealing about 5.8k damage per Heavenly Sword.
- OseH should ONLY use Heavenly Sword. If he doesn't have enough MP to cast it, pass the turn. Do NOT use his standard attack. (This also means that
 Purple is preferred to Red here, since you're not going to use Hades Blast).
 - Spamming Heavenly Sword gives you
 Charge,
  Might, and (after about 2 uses) full debuffs on the boss at the start of every turn. Templar Dragon further boosts the charged attack's damage.
 - Barong should cast Barong Dance if the team needs heals or buffs. If you just need heals, then
 Beads or
  Life Stones are fine too - Templar Dragon makes items only use up half a press turn icon.
 - Other party members should pass their turns or use them on healing items - it's not worth attacking unless they can outpace the 3.4k HP heal.
- This setup does mean the boss will hit you with a crit on his turn, but the full buff swing and high AGI on the team means he's going to miss a lot and lose turns.
Floor 38
Boss
| Lilim | Succubus | Tiamat
|
|---|---|---|
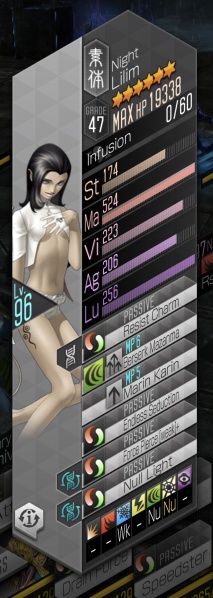
|
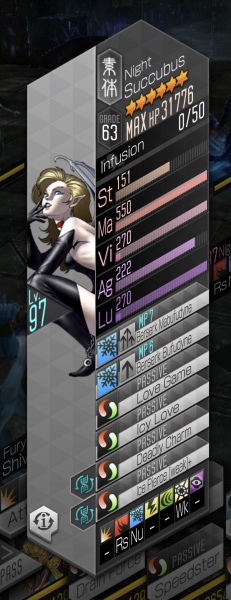
|
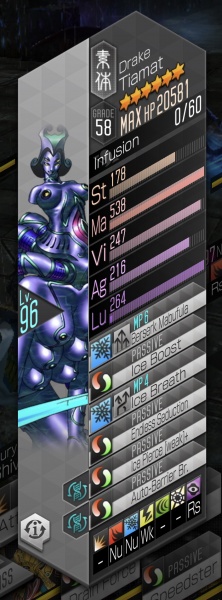
|
| Resistances | |||||||
|---|---|---|---|---|---|---|---|
| Lilim | - | - | Wk | - | Nu | Nu | - |
| Succubus | - | Rs | Nu | - | - | Wk | - |
| Tiamat | - | Nu | Nu | Wk | - | - | Rs |
| Battle Speed | 21466 | ||||||
Tested Teams
Tested by Majora14
| Damage Dealer | Prayer | Debuffer | Repel/ATK Buffer |
|---|---|---|---|
 Seth Seth
|
 Kinmamon Kinmamon
|
 Alilat Alilat
|
 Frost Ace Frost Ace
|
| Phys Boost | Prayer | War Cry | Tarukaja |
| Charge |
- SETH Role is to cast Charge and Ouas.
- Brands: Divine
- LVL: 45 ; HP:1276 ; Mag DEF:566 ; Phys ATK: 1548
- Brands: Divine
- KINMAMON Just cast Prayer every turn
- Brands: Life and Shield
- LVL: 45 ; HP:2381 ; Mag DEF:749
- Brands: Life and Shield
- ALILAT Role is to cast War Cry every time its needed and ensure Repel Ice works
- Brands: Life
- LVL: 50 ; HP:3025 ; Mag DEF:737
- Brands: Life
- ACE FROST Role its Cast Tarukaja every time its needed and Repel Ice Attacks
- Brands: Spell and Shield
- LVL: 45 ; HP:1080 ; Mag DEF:882;
- Brands: Spell and Shield
Final Advices:
- You will constantly be Healing your party with
 Bead items mostly so
  Templar Dragon its a must, and with
  Charge, Templar Dragon will boost Ouas's damage by 50%.
 - The fight will last 10 minutes if you are extremely fast and 15-25 minutes if you take your time to make your choices.
- Your primary focus is to
 Charge and Ouas with Seth, end your turns with all your party at full HP (though Alilat can endure with 1500HP) and cure the ailments every turn with Prayer or an
  Amrita Shower item.
 - If you don't have "Prayer" you can still use Kinmamon but you must use the items
 Amrita Soda /
  Amrita Shower.
 - The skill Silent Prayer on Kinmamon is viable only if you don't use Charge in Seth, as casting Silent Prayer will remove the
 Charge buff.
Floor 39
Boss
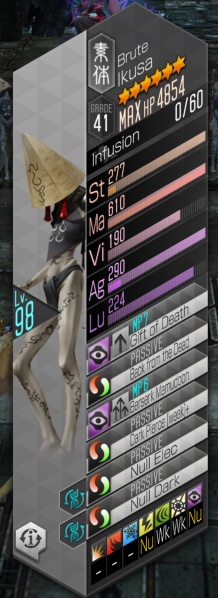
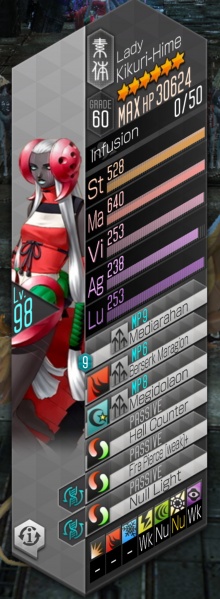
| Ikusa | Kikuri-Hime | Ikusa
|
|---|---|---|
|
|

|
| Resistances | |||||||
|---|---|---|---|---|---|---|---|
| Ikusa | - | - | - | Nu | Wk | Wk | Nu |
| Kikuri-Hime | - | - | - | Wk | Nu | Nu | Wk |
| Ikusa | - | - | - | Nu | Wk | Wk | Nu |
| Battle Speed | 27266 | ||||||
Tested Teams
Tested by Majora14
Liberator: ![]() Templar Dragon
Templar Dragon
| Damage Dealer | Backup Damage Dealer & Repeller | Debuffer | Repel/Buffer |
|---|---|---|---|
 Indrajit Indrajit
|
 Alice Alice
|
 Alilat Alilat
|
 Amaterasu Amaterasu
|
| Elec Amp | Dark Pierce (weak) | War Cry | |
| Elec Boost |
- INDRAJIT Role is to Cast LIGHTING SHOWER ON KIKURI-HIME
- Brands: Spell
- LVL: 50 ; HP:1219 ; Mag DEF:755 ; Mag ATK: 1834
- Brands: Spell
- ALICE Damage Dealer Backup for Indrajit. With Die For Me, she can kill one of the minions. Sometimes the minions cast Dark spells on her, so they lose turns.
- Brands: Spell
- LVL: 50 ; HP:1256 ; Mag DEF:749 ; Mag ATK: 1525
- Brands: Spell
- ALILAT Role is to Cast War Cry every time it's needed and ensure Repel Fire/Dark works
- Brands: Life
- LVL: 50 ; HP:3025 ; Mag DEF:737
- Brands: Life
- AMATERASU Role is to cast Tenson Kourin mostly and repel fire attacks if any
- Brands: Spell and Shield
- LVL: 45 ; HP:1325 ; Mag DEF:630
- Brands: Spell and Shield
Final Advice:
- You will be using constantly Items To Heal and Revive your party - for that reason, Templar Dragon its a must in your team
- Its highly recommended start the fight with a secondary team consisting in a demon who Debuff the DEF and ATK of the enemy team (With Auto Tarunda and Rakunda For Example) and with the Demon
 White Rider.
  White Rider's role - It's very important to try wiping out both of the minions with "God´s Bow" before your main party enters the fight.
---
Tested by Urabe
Plan: Just burn it with high DPS
Liberator: ![]() Kangaroo Boxer
Kangaroo Boxer
| Damage | Buff | Damage | Damage |
|---|---|---|---|
 Kartikeya Kartikeya
|
 Hell Biker Hell Biker
|
 Siegfried Siegfried
|
 Zaou-Gongen Zaou-Gongen
|
| Phys Boost | Phys Boost | Phys Boost | |
| Hades Blast | Good Aim |
Liberator: ![]() Chalk Eater
Chalk Eater
| Damage | Damage | Damage | Damage |
|---|---|---|---|
 Anubis Anubis
|
 Thor Thor
|
 Tsukuyomi Tsukuyomi
|
 Alice Alice
|
| Elec Boost | Resist Phys | ||
Notes:
- You are going to need good or excellent spell/war brands
- Mjolnir is level 6
- Actually in my second team Anubis and Alice were level 45 and without any other skill to improve their damage, also my Alice is
 Red
Red - When your second team goes in, the two Ikusa MUST BE DEAD to focus Thor's damage on the lone boss.
- Berserk Levels: 48 Phys, 62 Elec, 71 Dark
Floor 40
Boss
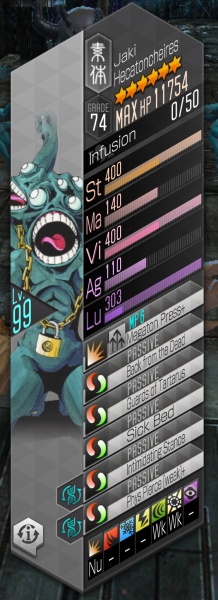
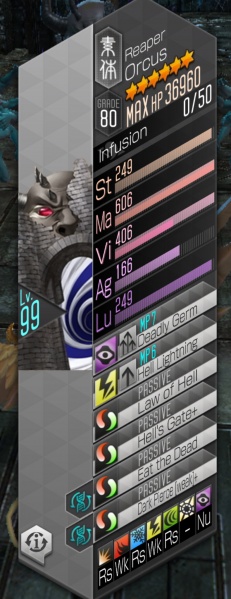
| Hecatoncheires | Orcus | Hecatoncheires
|
|---|---|---|
|
|

|
| Resistances | |||||||
|---|---|---|---|---|---|---|---|
| Hecatoncheires | Nu | - | - | - | Wk | Wk | - |
| Orcus | Rs | Wk | Rs | Wk | Rs | - | Nu |
| Hecatoncheires | Nu | - | - | - | Wk | Wk | - |
| Battle Speed | 12866 | ||||||
Toms Advice:
 Templar Dragon for half press turns items
- One nuker that’s single target, fire or elec based
- A drain phys pierce or repel phys pierce combo
- And a spare unit for like buffs/debuffs
- Do not touch the hecas
Tested Teams
Tested by Urabe
Party 1: ![]() Kangaroo Boxer
Kangaroo Boxer
Plan: Just do as much damage as you can
| Damage | Buff | Damage | Damage |
|---|---|---|---|
 Kartikeya Kartikeya
|
 Hell Biker Hell Biker
|
 Siegfried Siegfried
|
 Zaou-Gongen Zaou-Gongen
|
| Phys Boost | Phys Boost | Phys Boost | |
| Good Aim |
Party 2: ![]() Templar Dragon
Templar Dragon
Plan: Spend a lot of objects
| Damage | Debuff | Buff | Exist |
|---|---|---|---|
 Seth Seth
|
 Mitra Mitra
|
 Amaterasu Amaterasu
|
 Alilat Alilat
|
| Phys Boost | Rakunda | Resist Elec | |
Notes:
- Ouas was level 4
- Seth had Panel 1 and 2 unlocked
- You can replace Mitra with
 Rangda, but you are going to need debuff spells to reduce ATK and EV/AC
 - Tenson Kourin was level 4
- All your demons MUST HAVE 2k hp or more, use Life brands on your demons and one or two stats of %HP on Seth
- Use
 Amrita Shower to cure poison and
  Beads to heal when Amaterasu doesn't have enough MP
---
Tested by Patfast
Party 1: ![]() Templar Dragon
Templar Dragon
Strategy: Drain all AoE attacks and keep Rama alive while Lilith A ![]() Revive Seals the adds.
Revive Seals the adds.
| Damage | Buff | Damage | Revive Seal |
|---|---|---|---|
 Masakado Masakado
|
 Rama Rama
|
 Asura Lord Asura Lord
|
 Lilith A Lilith A
|
| Enduring Soul | Evade | Savage Glee | Auto-Rebellion |
| Epitome of Aggression | Dodge | Good Aim | Speedster |
Notes:
- Templar Dragon is absolutely CRITICAL in order to win this fight, as her skill Speed Loader makes it so that items only consume half a turn when used.
- Occult Flash, Slaughter All, Luster Candy, and Temptation were all max level.
- Rama had panel 2 unlocked, Lilith A had panel 1 unlocked, and Masakado had panels 1 and 2 unlocked.
- The only attacks that Orcus uses are
 Dark,
Dark,  Elec, and
  Phys attacks, while Hecatoncheires only uses
  Phys attacks; Masakado drains dark, Lilith A drains elec, and both Masakado and Asura Lord drain phys.
 - You're gonna need at least ~30
 Balm of Rising and ~50
  Beads in order for this to go smoothly, so make sure to stock up at the black market.
 - The basic battle plan is to attack the adds one at a time with
 Single Target skills and to let Lilith A deal the killing blow with Temptation, in order to prevent the adds from getting back up. Rama spams Luster Candy to both increase your damage and decrease theirs, as well as to prevent him from getting hit. Orcus will heal every time you down a Hecatoncheires, so don't bother touching him until you killed both the adds. After they're both dead, fire away at Orcus.
 - When your demons start going down, make sure to revive Rama first. Speed Loader will make it so that you can revive at least 2 demons per turn, so long as at least one survives. If your demons continue to go down after the adds are killed, prioritize Masakado and Lilith A over Asura Lord, since he only drains phys attacks.
- You can substitute Lilith A with
 Skull Knight since he has Null Dark, as Deadly Germ doesn't pierce.
Encounters
Rare Vetala Encounter
| Vetala
|
|---|

|
| Resistances | |||||||
|---|---|---|---|---|---|---|---|
| Vetala | - | Wk | - | - | - | Wk | Nu |
| Battle Speed | 21200 | ||||||
Deca & Yaks
| Decarabia | Decarabia | Yaksini | Yaksini |
|---|---|---|---|

|

|

|

|
| Resistances | |||||||
|---|---|---|---|---|---|---|---|
| Decarabia | - | - | - | - | - | Wk | Rs |
| Decarabia | - | - | - | - | - | Wk | Rs |
| Yaksini | - | - | - | Wk | Nu | Wk | - |
| Yaksini | - | - | - | Wk | Nu | Wk | - |
| Battle Speed | 19800 | ||||||
Fomo & MadG
| Fomorian | Fomorian | Mad Gasser | Mad Gasser |
|---|---|---|---|

|

|

|

|
| Resistances | |||||||
|---|---|---|---|---|---|---|---|
| Fomorian | - | Rp | Rs | - | - | - | - |
| Fomorian | - | Rp | Rs | - | - | - | - |
| Mad Gasser | - | - | - | - | - | Wk | Rs |
| Mad Gasser | - | - | - | - | - | Wk | Rs |
| Battle Speed | 22900 | ||||||
Pisaca, Kelpie, Yaks
| Pisaca | Pisaca | Kelpie | Yaksini |
|---|---|---|---|

|

|

|

|
| Resistances | |||||||
|---|---|---|---|---|---|---|---|
| Pisaca | - | Rs | - | - | Nu | Wk | Rs |
| Pisaca | - | Rs | - | - | Nu | Wk | Rs |
| Kelpie | - | - | Rs | - | Wk | Wk | - |
| Yaksini | - | - | - | Wk | Nu | Wk | - |
| Battle Speed | 23500 | ||||||
Dis, Blob
| Dis | Dis | Blob
|
|---|---|---|

|

|

|
| Resistances | |||||||
|---|---|---|---|---|---|---|---|
| Dis | - | - | Rs | Rs | - | - | Wk |
| Dis | - | - | Rs | Rs | - | - | Wk |
| Blob | Rs | - | Wk | - | - | Wk | Nu |
| Battle Speed | 19700 | ||||||
2Shadow, Pisaca, Abraxas
| Pisaca | Abraxas | Shadow | Shadow |
|---|---|---|---|

|

|

|

|
| Resistances | |||||||
|---|---|---|---|---|---|---|---|
| Pisaca | - | Rs | - | - | Nu | Wk | Rs |
| Abraxas | Dr | Wk | Wk | Wk | Wk | Wk | Wk |
| Shadow | Rs | - | - | Nu | Wk | Wk | Nu |
| Shadow | Rs | - | - | Nu | Wk | Wk | Nu |
| Battle Speed | 24350 | ||||||
Legion, Oni
| Legion | Legion | Oni | Oni |
|---|---|---|---|

|

|

|

|
| Resistances | |||||||
|---|---|---|---|---|---|---|---|
| Legion | - | - | - | Wk | - | Wk | Rs |
| Legion | - | - | - | Wk | - | Wk | Rs |
| Oni | - | - | - | Wk | - | - | - |
| Oni | - | - | - | Wk | - | - | - |
| Battle Speed | 20050 | ||||||
