Sanzu River Area (weak to  Light)
Overview
General strategy
- Set up
 Evade Mortal (with Tetraja, for example) as soon as possible, and refresh it when it runs out. Make sure it's active to shield the revenge Mortal hit whenever you kill a Chatterskull.
- Focus on killing Nidhoggr first (preferably with single-target attacks), then kill the Chatterskulls, and kill Ixtab last.
- If Nidhoggr does not die first, then he will get a full heal and a 20% HP bulwark when each of the Chatterskulls die.
- If Ixtab is not killed last, then you will wipe.
- Do not simply AoE everything down with
 Light! - if you try that, then the skulls will die first, Nidhoggr will heal + bulwark, then Ixtab will die, leaving Nidhoggr still alive, and you will wipe.
- Nidhoggr is also weak to
 Elec, and nobody NDR's it. Therefore, Elec AoE units such as
  Queen Mab can heavily damage Nidhoggr while only lightly damaging the other enemies.
- Try to cover your
 Dark weaknesses, as Ixtab will spam Dark AoEs during her turn.
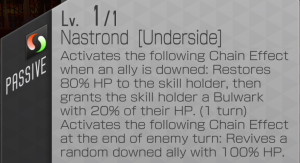
Underside skill demons
 Arianrhod
 Arianrhod (Underside) effect overview
- Self gets 50% HP, 180% Light damage, 20% accuracy, 3 MP discount for Light skills, and immunity to
 Spirit Chains of Suppression.
- The team gets 30% Light damage and 30% accuracy.
- At the start of your team's turn, your entire team gets
 Evade Mortal (up to 3 times per battle). This saves a Press Turn you would've needed to spend on casting Tetraja.
- Colors
 Clear for the fusibles ruleset. The other colors don't offer anything useful for a Light build.
- Skill Transfer
- Brands
- MATK% Spell, if using a magic-based attack.
- PATK% War, if using a strength-based attack (such as
 White Slash)
- Due to her MP discount, Divine's MP regen is probably not necessary.
- Misc notes
- She also has a 150% healing boost, but it isn't very helpful in practice. At level 50, maxed
 Media heals about 300 HP, while maxed
  Diara heals about 1400 HP. For comparison, Ixtab and the Chatterskulls deal about 500 damage per hit (with
  ATK Debuff +
  DEF Buff, but without Nu/Dr/Rp's 70% reduction), so Arianrhod's innate healing skills are unlikely to make a big difference. Stick with your healing items.
- She must be alive at the start of a turn in order to grant
 Evade Mortal.
 Jack Frost
 Jack Frost (Underside) effect overview
- Self gets 15% Ice/Light damage, and
 Concentrate (2.25x damage) on his first action - together, these are 87% damage on average across his 2 actions on the first turn. Also gets 50% HP and immunity to
  Spirit Chains of Suppression.
- If an ally uses an Ice/Light skill, Jack Frost automatically casts
 ATK Buff (up to 3 times per turn).
- Colors
 Clear for the fusibles ruleset. It also gives
  Hama.
Hama.
- Skill Transfer
- Jack Frost does not have any MP discounts, so 7 MP skills such as
 Thunderclap may be too expensive to cast repeatedly.
 Thunderclap (Underside) starts at 7 MP, then becomes 6 MP at max level. This is the strongest skill he can use, but the cost of maxing it is very high.
- However, using Thunderclap (Underside) is risky, as its AOE might kill the Chatterskulls before Nidhoggr. Due to this, single-target attacks such as
 Hamadyne or the innate
  Hama are preferred for consistency.
 Clear can level up
  Hama and transfer a damage booster, but transferring level 1
  Hamadyne will do more damage.
 Hama can be leveled cheaply - run Chapter 1 Leveling Quest for
  Slimes to feed him for skill points, then transfer skill dupes from 2★.
- Brands
- Misc notes
Fusibles challenge
Team restrictions:
| Difficulty |
Restriction
|
| Lv 3-5 |
3 or more demons must be fusible*.
|
| Lv 6-8 |
4 or more demons must be fusible.
|
| Lv 9+ |
All 5 demons must be fusible.
|
| Lv 6+ |
1 or more demons must be grade 79 (4★ base) or lower.
|
| Lv 9+ |
1 or more demons must be  Clear . Clear .
|
Notes regarding fusibles:
- Multi-fusions count.
 Pixie and
  Slime count, even though you cannot fuse them.
Team notes:
- If you don't have Arianrhod, put Tetraja on your fastest unit, so you can cast it ASAP.
 Anat: Deals a lot of AoE Elec damage, plus
  Thunderstorm applies
  ATK Debuff and
  DEF Debuff.
 Anat and
  Izanami both boost the team's Elec damage, and grant a total 2 MP discount for the team's Elec skills.
 Ishtar:
  Mesopotamian Star sets up buffs and debuffs (both for offense, and for helping survive Ixtab's attacks), then she can switch to using
  Mahamaon afterwards.
  Red offers
  Thunderclap as a single-target attack option.
- All weaknesses to
 Dark are covered, to ensure the team survives Ixtab's first turn and then kills her on your second turn.
- This is technically optional with P3 Ishtar, as she's just bulky enough to be the sole survivor of the weakness spam (even with her own weakness open), and can then finish Ixtab. This will eventually stop working at around level 50, however, at which point you need the DPS from the team surviving to win.
- From there, just use whatever
 Light units are available, with whichever damage boosters you have. Try not to boost your AoE damage too much, as to not kill Chatterskulls too early.
- Despite Arianrhod's Light damage aura, this sample party goes for mostly
 Elec, since it can more-safely AoE everything down.
Other options worth considering:

 Michael: 183 magic, P2 has 30% Light damage. However,
  Soul Judgement's random targeting can be a problem if it kills a Chatterskull too soon. Consider using him in Red for Thunderclap, or transferring Hamadyne.
 Mastema: 201 magic, Purple has Light Amp and P1 has 15% Light damage. However, you may want to transfer
  Hamadyne since
  Trial of Hate is an AoE.
 Jack Frost (with Jack Frost (Underside) skill): 179 magic, has 15% Light damage and a
  Concentrate once (87% damage on average across 2 actions on first turn). Automatically casts
  ATK Buff multiple times per turn.
  Clear has innate
  Hama, but transferring
  Hamadyne is recommended.
 Anubis: 217 magic, Purple has Merciless Blow. Transfer
  Hamadyne + Light Boost.
 Titania: 235 magic, Purple has Back Attack. Transfer
  Hamadyne + Light Boost.
 Lailah: 206 magic, has Light Boost.
  Hamadyne and
  Mahamaon. Needs Resist Dark.
 Sleipnir: 172 magic (p1), has Light Boost, P2 has 5% damage.
  Hamadyne and
  Mahamaon.
 Principality: 195 magic, Purple has Light Boost.
  Hamaon. Needs Resist Dark.
 Sandalphon: 170 magic (p1), P3 has 10% damage.
  Hamadyne and
  Mahamaon. Null Dark for 30% Dark damage reduction.
Race challenges
Holy, Megami, Deity
Team restrictions:
| Difficulty |
Restriction
|
| Lv 3-5 |
All 5 demons must be of the races Holy, Megami, Deity, Herald, or Kishin.
|
| Lv 6-8 |
All 5 demons must be of the races Holy, Megami, Deity, or Herald.
|
| Lv 9+ |
All 5 demons must be of the races Holy, Megami, or Deity.
|
Team notes:
- If you don't have Arianrhod, put Tetraja on your fastest unit, so you can cast it ASAP.
 Zeus: Pushes a lot of single-target
  Elec damage on Nidhoggr. Also has Null Dark for 70% damage reduction.
 Anat: AoE Elec damage with
  Thunderstorm, which also applies
  ATK Debuff,
  DEF Debuff, and
  Concentrate. If panel 2, also gives a 10% Elec damage aura and -1 MP cost of Elec skills for the team.
 Izanami: AoE
  Elec damage, and a team Elec damage aura (20% if Panel 3, 10% if not). If panel 4, she also discounts the team's Elec skills by 1 MP. Also has Drain Dark for 70% damage reduction.
 Ishtar:
  Mesopotamian Star sets up buffs and debuffs (both for offense, and for helping survive Ixtab's attacks), then she can switch to using
  Mahamaon afterwards.
  Red offers
  Thunderclap as a single-target attack option.
- Her weakness to
 Dark is covered, to ensure the team survives Ixtab's first turn and then kills her on your second turn.
- At higher levels, note that this team can kill Nidhoggr with AOEs without killing the Chatterskulls. Once you've reached this point, it is not necessary to cast Tetraja on the first turn (since the skulls will not die), so you can squeeze in some more damage instead. Make sure to cast it on your second turn when you do expect the skulls to die, though.
Other options worth considering:

 Odin A: Strong
  Elec attacker that applies
  Zenith and
  Gloom, as well as boosts the team's Elec damage, crit damage, and crit rate. However, note that his effect to prevent spending a press turn won't work, and he cannot gain boost levels on his skill while under
  Spirit Chains of Suppression.
 Cleopatra: Good single-target
  Light damage, and applies
  Spirit Chains of Corrosion to reduce the bulk of all enemies. However, she will need a Resist Dark transfer.
 Vishnu A: AoE
  Light damage. Also has Null Dark for 70% damage reduction. A small caveat is that his automatic Dark AoE will be repelled back at him, but it doesn't hurt very much.
 Artemis: Good single-target
  Elec damage.
 Norn: 193 magic, has Merciless Blow. Automatic cast of Luster Candy, and can do decent damage if given a Light or Elec transfer.
 Sleipnir: 172 magic (p1), has Light Boost, P2 has 5% damage.
  Hamadyne and
  Mahamaon.
 Sphinx: 210 magic, p3 has 10% light damage.
  Mahamaon and
  Ziodyne. Needs Resist Dark.
Low-grade challenge
Team restrictions:
| Difficulty |
Restriction
|
| Lv 3-5 |
3 or more demons must be grade 83 or lower.
|
| Lv 6-8 |
4 or more demons must be grade 83 or lower.
|
| Lv 9+ |
All 5 demons must be grade 83 or lower.
|
| Lv 6-8 |
1 or more demons must be grade 79 (4★ base) or lower.
|
| Lv 9+ |
2 or more demons must be grade 79 (4★ base) or lower.
|
| Lv 9+ |
1 or more demons must be grade 59 (3★ base) or lower.
|
Team notes:
- If you don't have Arianrhod, put Tetraja on your fastest unit, so you can cast it ASAP.
 Queen Mab: Her chains won't work, due to
  Spirit Chains of Suppression. But that's fine, as a couple casts of Cuailnge should already be a lot of
  Elec damage against Nidhoggr.
 Baldur: Applies -1 MP cost to the team's Light skills, and offers a 5-15% Light damage aura. He's also a 4★, to help meet challenge requirements.
 Ishtar:
  Mesopotamian Star sets up buffs and debuffs (both for offense, and for helping survive Ixtab's attacks), then she can switch to using
  Mahamaon afterwards.
  Red offers
  Thunderclap as a single-target attack option.
- All weaknesses to
 Dark are covered, to ensure the team survives Ixtab's first turn and then kills her on your second turn.
- This is technically optional with P3 Ishtar, as she's just bulky enough to be the sole survivor of the weakness spam (even with her own weakness open), and can then finish Ixtab. This will eventually stop working at around level 50, however, at which point you need the DPS from the team surviving to win.
- From there, just use whatever
 Light units are available, with whichever damage boosters you have. Try not to boost your AoE damage too much, as to not kill Chatterskulls too early.
- In this setup, Queen Mab eats both revenge hits from the Chatterskulls, so make sure to heal her before ending your turn.
Other options worth considering:

 Mastema: 201 magic, Purple has Light Amp and P1 has 15% Light damage. However, you may want to transfer
  Hamadyne since
  Trial of Hate is an AoE.
 Jack Frost (with Jack Frost (Underside) skill): 179 magic, has 15% Light damage and a
  Concentrate once (87% damage on average across 2 actions on first turn). Automatically casts
  ATK Buff multiple times per turn.
  Clear has innate
  Hama, but transferring
  Hamadyne is recommended.
 Anubis: 217 magic, Purple has Merciless Blow. Transfer
  Hamadyne + Light Boost.
 Titania: 235 magic, Purple has Back Attack. Transfer
  Hamadyne + Light Boost.
 Lailah: 206 magic, has Light Boost.
  Hamadyne and
  Mahamaon. Needs Resist Dark.
 Sleipnir: 172 magic (p1), has Light Boost, P2 has 5% damage.
  Hamadyne and
  Mahamaon.
 Principality: 195 magic, Purple has Light Boost.
  Hamaon. Needs Resist Dark.
 Sandalphon: 170 magic (p1), P3 has 10% damage.
  Hamadyne and
  Mahamaon. Null Dark for 30% Dark damage reduction.
![]() Light)
Light)


![]() Chatterskulls only:
Chatterskulls only:
![]() Ixtab only:
Ixtab only:
![]() Nidhoggr only:
Nidhoggr only:
 Spirit Chains of Suppression to you.
 Almighty hit with Mortal on their attacker.
 Evade Mortal (with Tetraja, for example) as soon as possible, and refresh it when it runs out. Make sure it's active to shield the revenge Mortal hit whenever you kill a Chatterskull.
 Arianrhod with the skill
  Arianrhod (Underside), then she will automatically cast Evade Mortal at the start of your turn.
 Light! - if you try that, then the skulls will die first, Nidhoggr will heal + bulwark, then Ixtab will die, leaving Nidhoggr still alive, and you will wipe.
 Elec, and nobody NDR's it. Therefore, Elec AoE units such as
  Queen Mab can heavily damage Nidhoggr while only lightly damaging the other enemies.
 Dark weaknesses, as Ixtab will spam Dark AoEs during her turn.
 Arianrhod (Underside) effect overview
 Spirit Chains of Suppression.
 Evade Mortal (up to 3 times per battle). This saves a Press Turn you would've needed to spend on casting Tetraja.
 Clear for the fusibles ruleset. The other colors don't offer anything useful for a Light build.
 White Slash (Underside) >
  Thunderclap (Underside) >
  Thunderclap >
  Hamadyne >
  White Slash > innate
  Hamaon.
 White Slash)
 Media heals about 300 HP, while maxed
  Diara heals about 1400 HP. For comparison, Ixtab and the Chatterskulls deal about 500 damage per hit (with
  ATK Debuff +
  DEF Buff, but without Nu/Dr/Rp's 70% reduction), so Arianrhod's innate healing skills are unlikely to make a big difference. Stick with your healing items.
 Evade Mortal.
 Jack Frost (Underside) effect overview
 Concentrate (2.25x damage) on his first action - together, these are 87% damage on average across his 2 actions on the first turn. Also gets 50% HP and immunity to
  Spirit Chains of Suppression.
 ATK Buff (up to 3 times per turn).
 Clear for the fusibles ruleset. It also gives
  Hama.
Hama. Thunderclap may be too expensive to cast repeatedly.
 Thunderclap (Underside) starts at 7 MP, then becomes 6 MP at max level. This is the strongest skill he can use, but the cost of maxing it is very high.
 Hamadyne or the innate
  Hama are preferred for consistency.
 Clear can level up
  Hama and transfer a damage booster, but transferring level 1
  Hamadyne will do more damage.
 Hama can be leveled cheaply - run Chapter 1 Leveling Quest for
  Slimes to feed him for skill points, then transfer skill dupes from 2★.
 Thunderclap (Underside), then
  Concentrate only affects the initial hit, not the AoE chain.
 Beelzebub☆ counts, despite needing a gacha-exclusive material to make him.
 Pixie and
  Slime count, even though you cannot fuse them.
 Anat: Deals a lot of AoE Elec damage, plus
  Thunderstorm applies
  ATK Debuff and
  DEF Debuff.
 Spirit Chains of Suppression prevent Anat from wasting her
  Concentrate on her random-hit chain effect, meaning she can use it to spam every second Thunderstorm instead.
 Anat and
  Izanami both boost the team's Elec damage, and grant a total 2 MP discount for the team's Elec skills.
 Ishtar:
  Mesopotamian Star sets up buffs and debuffs (both for offense, and for helping survive Ixtab's attacks), then she can switch to using
  Mahamaon afterwards.
  Red offers
  Thunderclap as a single-target attack option.
 Dark are covered, to ensure the team survives Ixtab's first turn and then kills her on your second turn.
 Light units are available, with whichever damage boosters you have. Try not to boost your AoE damage too much, as to not kill Chatterskulls too early.
 Elec, since it can more-safely AoE everything down.
 Michael: 183 magic, P2 has 30% Light damage. However,
  Soul Judgement's random targeting can be a problem if it kills a Chatterskull too soon. Consider using him in Red for Thunderclap, or transferring Hamadyne.
 Mastema: 201 magic, Purple has Light Amp and P1 has 15% Light damage. However, you may want to transfer
  Hamadyne since
  Trial of Hate is an AoE.
 Jack Frost (with Jack Frost (Underside) skill): 179 magic, has 15% Light damage and a
  Concentrate once (87% damage on average across 2 actions on first turn). Automatically casts
  ATK Buff multiple times per turn.
  Clear has innate
  Hama, but transferring
  Hamadyne is recommended.
 Anubis: 217 magic, Purple has Merciless Blow. Transfer
  Hamadyne + Light Boost.
 Titania: 235 magic, Purple has Back Attack. Transfer
  Hamadyne + Light Boost.
 Lailah: 206 magic, has Light Boost.
  Hamadyne and
  Mahamaon. Needs Resist Dark.
 Sleipnir: 172 magic (p1), has Light Boost, P2 has 5% damage.
  Hamadyne and
  Mahamaon.
 Principality: 195 magic, Purple has Light Boost.
  Hamaon. Needs Resist Dark.
 Sandalphon: 170 magic (p1), P3 has 10% damage.
  Hamadyne and
  Mahamaon. Null Dark for 30% Dark damage reduction.
 Zeus: Pushes a lot of single-target
  Elec damage on Nidhoggr. Also has Null Dark for 70% damage reduction.
 Anat: AoE Elec damage with
  Thunderstorm, which also applies
  ATK Debuff,
  DEF Debuff, and
  Concentrate. If panel 2, also gives a 10% Elec damage aura and -1 MP cost of Elec skills for the team.
 Izanami: AoE
  Elec damage, and a team Elec damage aura (20% if Panel 3, 10% if not). If panel 4, she also discounts the team's Elec skills by 1 MP. Also has Drain Dark for 70% damage reduction.
 Ishtar:
  Mesopotamian Star sets up buffs and debuffs (both for offense, and for helping survive Ixtab's attacks), then she can switch to using
  Mahamaon afterwards.
  Red offers
  Thunderclap as a single-target attack option.
 Dark is covered, to ensure the team survives Ixtab's first turn and then kills her on your second turn.
 Odin A: Strong
  Elec attacker that applies
  Zenith and
  Gloom, as well as boosts the team's Elec damage, crit damage, and crit rate. However, note that his effect to prevent spending a press turn won't work, and he cannot gain boost levels on his skill while under
  Spirit Chains of Suppression.
 Cleopatra: Good single-target
  Light damage, and applies
  Spirit Chains of Corrosion to reduce the bulk of all enemies. However, she will need a Resist Dark transfer.
 Vishnu A: AoE
  Light damage. Also has Null Dark for 70% damage reduction. A small caveat is that his automatic Dark AoE will be repelled back at him, but it doesn't hurt very much.
 Artemis: Good single-target
  Elec damage.
 Norn: 193 magic, has Merciless Blow. Automatic cast of Luster Candy, and can do decent damage if given a Light or Elec transfer.
 Sleipnir: 172 magic (p1), has Light Boost, P2 has 5% damage.
  Hamadyne and
  Mahamaon.
 Sphinx: 210 magic, p3 has 10% light damage.
  Mahamaon and
  Ziodyne. Needs Resist Dark.
 Queen Mab: Her chains won't work, due to
  Spirit Chains of Suppression. But that's fine, as a couple casts of Cuailnge should already be a lot of
  Elec damage against Nidhoggr.
 Baldur: Applies -1 MP cost to the team's Light skills, and offers a 5-15% Light damage aura. He's also a 4★, to help meet challenge requirements.
 Hamadyne by transferring it from
  Sandalphon dupes.
 Ishtar:
  Mesopotamian Star sets up buffs and debuffs (both for offense, and for helping survive Ixtab's attacks), then she can switch to using
  Mahamaon afterwards.
  Red offers
  Thunderclap as a single-target attack option.
 Dark are covered, to ensure the team survives Ixtab's first turn and then kills her on your second turn.
 Light units are available, with whichever damage boosters you have. Try not to boost your AoE damage too much, as to not kill Chatterskulls too early.
 Mastema: 201 magic, Purple has Light Amp and P1 has 15% Light damage. However, you may want to transfer
  Hamadyne since
  Trial of Hate is an AoE.
 Jack Frost (with Jack Frost (Underside) skill): 179 magic, has 15% Light damage and a
  Concentrate once (87% damage on average across 2 actions on first turn). Automatically casts
  ATK Buff multiple times per turn.
  Clear has innate
  Hama, but transferring
  Hamadyne is recommended.
 Anubis: 217 magic, Purple has Merciless Blow. Transfer
  Hamadyne + Light Boost.
 Titania: 235 magic, Purple has Back Attack. Transfer
  Hamadyne + Light Boost.
 Lailah: 206 magic, has Light Boost.
  Hamadyne and
  Mahamaon. Needs Resist Dark.
 Sleipnir: 172 magic (p1), has Light Boost, P2 has 5% damage.
  Hamadyne and
  Mahamaon.
 Principality: 195 magic, Purple has Light Boost.
  Hamaon. Needs Resist Dark.
 Sandalphon: 170 magic (p1), P3 has 10% damage.
  Hamadyne and
  Mahamaon. Null Dark for 30% Dark damage reduction.