Aura Gate
Aura Gate is an area that features a randomly generated dungeon with 50 floors. It's open 0~55 minutes every hour and randomized the floors during the 5 minutes that it isn't available. Action power is consumed while inside Aura Gate, which restores at 1 per minute.
Contents
- 1 Overview
- 2 Party Building
- 3 Aura Gate Teams + Mobs
- 4 Boss Guides
Overview
Each floor is traditional dungeon crawling with random encounters. A boss is at the end of every floor, and you can return back to any of the floors you’ve cleared every time you enter.
- When the time that Aura Gate is open for is over, it will forcibly kick you out if you were exploring.
- If you are in a battle, it will not end your battle but wait until the end of the battle.
- If you were in a boss battle and defeated the boss, that will still be saved even after you are kicked out of Aura Gate.
- The main loot in Aura Gate is Magnetite, 3~4★ Demon Talk, 6★ Brands which are found at the highest floors.
- Hence, the main goal should to be climb as far as you can, and that’s by seeking out the boss of every new floor.
- Floor 46~50 is the best floor to farm Magnetite. To farm Magnetite, you should seek out the MAG chest on every floor and move onto the next.
| Floor 50 | Before Patch 1.4 | Patch 1.4 |
|---|---|---|
| Random Magnetite | ~60 | ~120 |
| Normal Battle | ~110 | ~220 |
| Rare Battle | ~600 | ~1000 |
| Gravestone | ~550 | ~825 |
| MAG Chest | ~900 | ~1,000 |
| MAG Chest Jackpot | ~12,600 | ~100,000 |
- There are a couple gimmicks in Aura Gate indicated by the tile
| Gimmick | Description |
|---|---|
| Damage Tile | Take damage and lower HP of your party demons every time you step on this tile. |
| Dark Zone Tile | Consume a lot of action points. Hides the Minimap. |
| Magnetite Chest | Obtain some amount of Magnetite once per Aura Gate exploration. Uses 10% action power. |
| Fountain | Restores 50 action points and your party’s HP to full. Usable only once per Aura Gate exploration. |
| Moon | The moon changes phase every 10 minutes. During the full moon or new moon, the amount of magnetite and experience acquired inside will increase. |
| Random Item | You can acquire some magnetite or action points or an item. |
| Gatekeeper | Powerful demon appearing on the floor for all players. Receive a reward according to the ranking of damage dealt at the end. |
| Gravestone | Appears when another player is defeated. If you choose to battle, you'll battle with the defeated party (this won't affect your main party at all). If you win, you get fame, magnetite, and a demon's soul |
| Chaos Knight | If you succeed in the picking the right card, the number of random items encountered on this floor will increase for all players, and HP + Steps will be restored to full. If you fail, you’ll take damage or all random items on the floor will become 1 in quantity for all players. There is no indicator for when the White Rider will appear, it’s completely random. |
To deal with the gimmicks, a sub party like below is recommended:
| Null Dark Zone | Null Damage Tiles (Awakened) | Any Demon | Any Demon |
|---|---|---|---|
 Hare of Inaba Hare of Inaba
|
 Zouchouten Zouchouten
|
Any Demon | Any Demon |
As well, since your party’s HP isn’t recovered after battle, a healer is necessary.
Party Building
While floors are randomly generated, demons you find are not.
Liberators
- Main - Templar Dragon for difficult fights
- Sub - Eileen for item drops, Megakin for demon talk.
Healers
- Horus/ Feng Huang (Teal Awakened) [transferred Samarecarm] and Isis/Yellow Sandalphon (transferred Diarama) are recommended healers.
Floor 40+ Demons
- These demons are required as it becomes difficult to perform the first attack without Speedster, and auto buffs to help are very valuable.
- Fenrir (Purple Awakened) - Speedster + Auto-Takukaja
- Sleipnir - Speedster + Mahamaon
- Yatagarasu - Speedster + Auto-Sukunda
- Kama - Speedster
- Azrael - Tetrakarn + Makara Shift
Aura Gate Teams + Mobs
Floors 1~30
Floors 1 ~ 30 aren't generally considered terribly difficult to get through.
Budget Team
| Physical Attacker | Magical Attacker | Healer | Buffer |
|---|---|---|---|
 Ose Ose
|
 Baphomet Baphomet
|
 Feng Huang Feng Huang
|
 Jatayu Jatayu
|
Floors 31~35
This section drops 5★ Brands. Recommended Battle Speed is going to be around 11,000+.
Budget Team
| Physical Attacker | Magical Attacker | Healer | Debuffer/Magical Attacker |
|---|---|---|---|
 Ose Ose
|
 Baphomet Baphomet
|
 Feng Huang Feng Huang
|
 Illuyanka Illuyanka
|
Floors 36~40
This section also drops 5★ Brands. Recommended Battle Speed is going to be around 14,000+.
Budget Team
| Physical Attacker | Magical Attacker | Healer | Debuffer/Magical Attacker |
|---|---|---|---|
 Ose Ose
|
 Isis Isis
|
 Feng Huang Feng Huang
|
 Illuyanka Illuyanka
|
Floors 41~45
This section drops 6★ Brands. Recommended Battle Speed is going to be around 18,400+.
Farming Team
| Auto-Tarukaja | Sweeper #1 | Sweeper #2 | Sweeper #3 |
|---|---|---|---|
 Fenrir Fenrir
|
 Sleipnir Sleipnir
|
 Horus Horus
|
 Shadow Shadow
|
| Mazan | Mazan | Mazan | |
| Mazio | Mahama |
Floors 46~50
This section also drops 6★ Brands. Recommended Battle Speed is going to be around 20,467+.
Farming Team
| Auto-Tarukaja | Sweeper #1 | Sweeper #2 | Sweeper #3 |
|---|---|---|---|
 Fenrir Fenrir
|
 Sleipnir Sleipnir
|
 Horus Horus
|
 Shadow Shadow
|
| Mazan | Mazan | Mazan | |
| Mazio | Mahama |
Boss Guides
Unique Skills
Violent Core
+10 to Strength, +10 to Magic and +5% to damage dealt.
Merciless Core
+20 to Strength, +20 to Magic and +10% to damage dealt.
Speed Core
+20 to Agility, and +100% to Battle Speed.
Strong Guard
-30% to damage received.
Mad King
+50% to ailment success rate.
Elite Healing
+40% to Healing skill effectiveness.
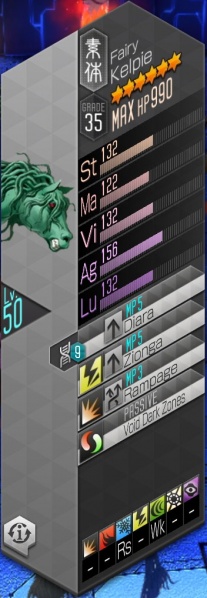
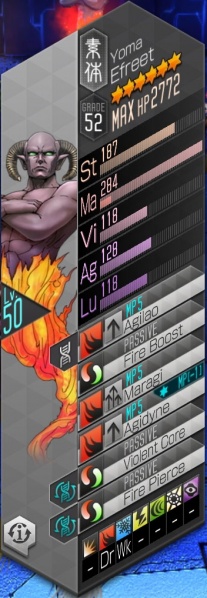
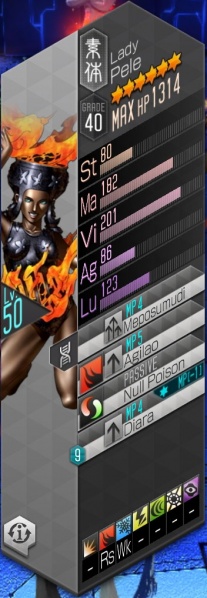
Floor 31
| Kelpie | Efreet | Pele
|
|---|---|---|
|
|
|
| Resistances | |||||||
|---|---|---|---|---|---|---|---|
| Kelpie | - | - | Rs | - | Wk | - | - |
| Efreet | - | Dr | Wk | - | - | - | - |
| Pele | - | Rs | Wk | - | - | - | - |
| Battle Speed | 12,333 | ||||||
Efreet - Fire Pierce, Violent Core
- First demon in Aura Gate with Pierce [x], future bosses will also likely have this skill so get used to not being able to mitigate damage.
- Tarunda is recommended while healing with Mediara or Diarama.
- Recommended Demons: 3★ Illuyanka, 3★ Baphomet, 4★ Succubus, 4★ Loki, 4★ Anubis
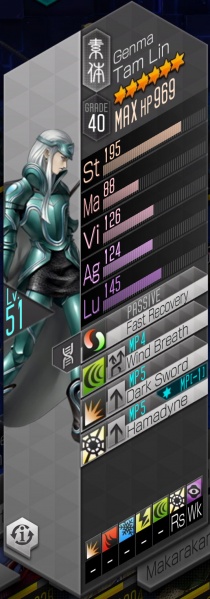
Floor 32
| Tam Lin | Ose | Tam Lin
|
|---|---|---|
|
|

|
| Resistances | |||||||
|---|---|---|---|---|---|---|---|
| Tam Lin | - | - | - | - | - | Rs | Wk |
| Ose | - | - | - | - | - | - | Rs |
| Tam Lin | - | - | - | - | - | Rs | Wk |
| Battle Speed | 12,967 | ||||||
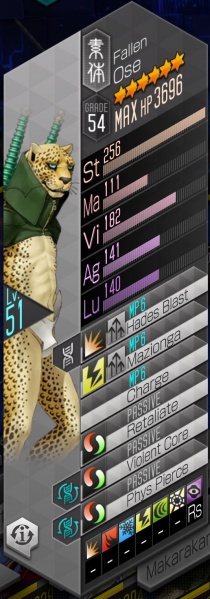
- Ose has Pierce Phys as well as a powerful AoE Phys attack, so try to make use of Tarunda and Sukunda to survive.
- Ignore Tam Lin as it could [Miss] attacks or hit [Null] against Isis to lose Ose turns.
- This is a difficult boss, so don’t be afraid to use items while playing as Templar Dragon.
- Recommended Demons: 3★ Baphomet, 3★ Isis, 3★ Forneus, 4★ Sandalphon
Floor 33
| Baphomet | Berserker | Mothman
|
|---|---|---|
|
|
|
| Resistances | |||||||
|---|---|---|---|---|---|---|---|
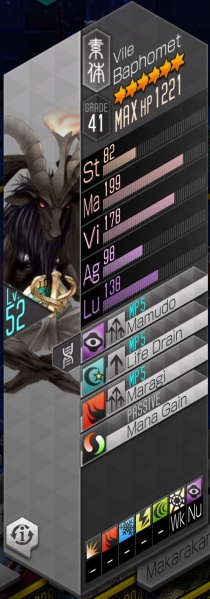
| Baphomet | - | - | - | - | - | Wk | Nu |
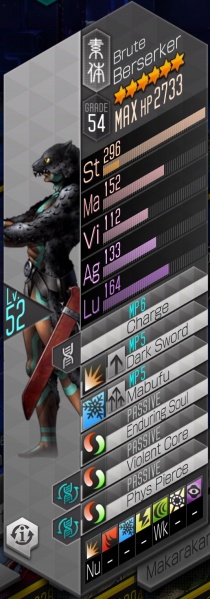
| Berserker | Nu | - | - | - | Wk | - | - |
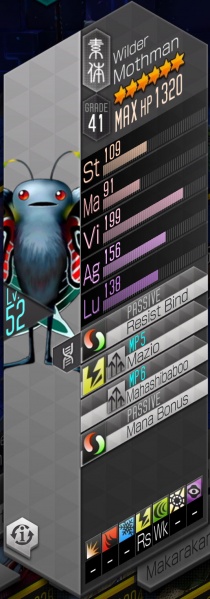
| Mothman | - | - | - | Rs | Wk | - | - |
| Battle Speed | 12,900 | ||||||
- The boss has a low amount of HP, so just rush them down.
- Recommended Demons: 3★ Isis, 3★ Forneus, 3★ Illuyanka, 4★ Sandalphon, 4★ Loki, 4★ Fenrir
Floor 34
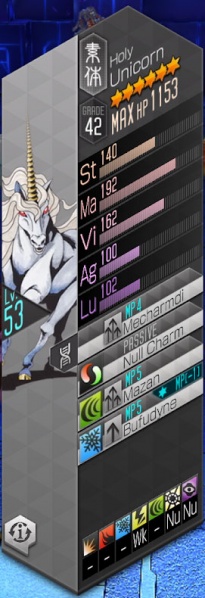
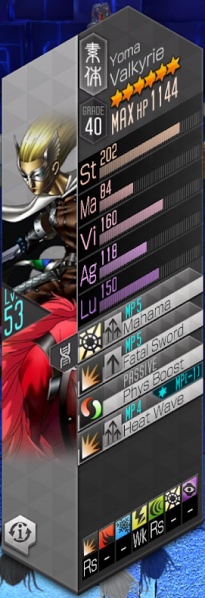
| Unicorn | Vetala | Valkyrie
|
|---|---|---|
|

|
|
| Resistances | |||||||
|---|---|---|---|---|---|---|---|
| Unicorn | - | - | - | Wk | - | Nu | Nu |
| Vetala | - | Wk | - | - | - | Wk | Nu |
| Valkyrie | Rs | - | - | Wk | Rs | - | - |
| Battle Speed | 11,467 | ||||||
- Attack with Fire/Light magic, but be wary of the unicorn as it's null to Light and knows Bufudyne.
- Recommended Demons: 3★ Ose, 3★ Horus, 3★ Baihu, 3★ Lailah, 4★ Sandalphon
Floor 35
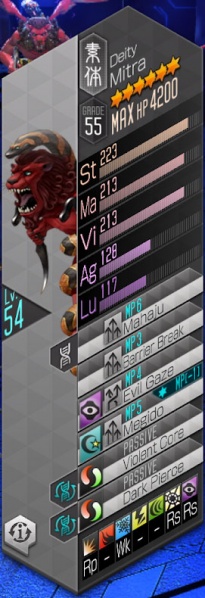
| Mitra | Mitra
|
|---|---|
|

|
| Resistances | |||||||
|---|---|---|---|---|---|---|---|
| Mitra | Rp | - | Wk | - | - | Rs | Rs |
| Mitra | Rp | - | Wk | - | - | Rs | Rs |
| Battle Speed | 12,800 | ||||||
- Identical enemies! Only the boss must be killed to end this battle, so if you have enough damage, focus down the boss first.
- Recommended Demons: 3★ Illuyanka, 3★ Gui Xian, 4★ Succubus, 4★ Loki
Floor 36
Floor 37
Floor 38
Floor 39
Floor 40
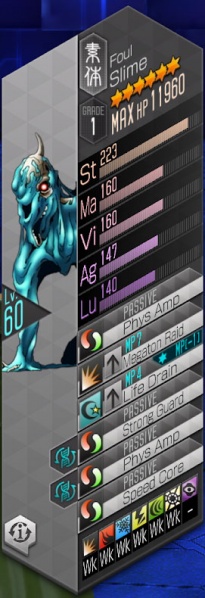
| Slime
|
|---|
|
| Resistances | |||||||
|---|---|---|---|---|---|---|---|
| Slime | Wk | - | Wk | Wk | Wk | Wk | Wk |
| Battle Speed | 29,401 | ||||||
- This boss's only non Phys attack is Life Drain, which doesn’t do much damage. Bringing Null/Drain/Repel Phys is a wise choice for this fight.
- Chalk Eater is also a great Liberator choice.
- Recommended Demons: 3★ Ose, 4★ Wu Kong, 4★ Loki
Floor 41
Floor 42
| Demon | Phys | Fire | Ice | Elec | Force | Light | Dark |
|---|---|---|---|---|---|---|---|
| Oberon (6.3k HP) | - | - | - | Weak | Drain | - | - |
| Force Boost, Zandyne, Mamarin Karion, Makarakarn, Merciless Core, Mazandyne | |||||||
| Isis (1.7k HP) | - | Resist | - | Null | - | - | - |
| Samarecarm, Zandyne, Mamakajam, Mana Gain, Violent Core, Mamakajaon | |||||||
| Scathach (1.6k HP) | - | - | - | Weak | Null | Resist | - |
| Zanma, Hades Blast, Wind Breath, Life Gain, Violent Core, Twister | |||||||
| Battle Speed 14,368 |
- This boss doesn’t have Force Pierce, so bringing demons with Force Null/Repel/Drain is useful. If you bring demons with Force Null/Repel/Drain, then the only thing you have to worry about is the charm.
- Recommended Demons: 4★ Hanuman, 4★ Oberon, 4★ Dantalian
Floor 43
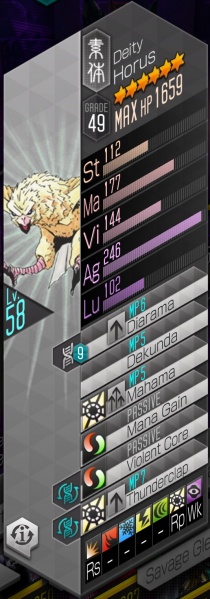
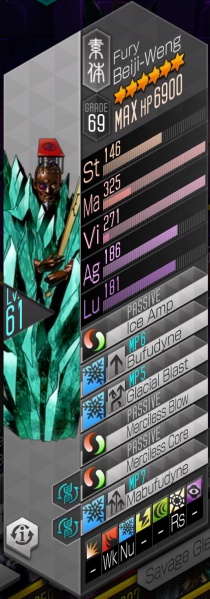
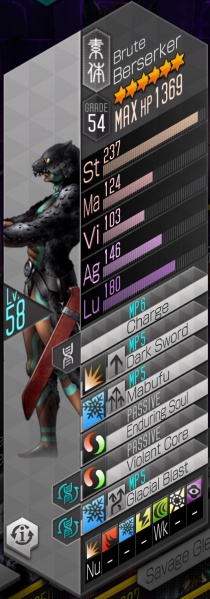
| Horus | Beiji-Weng | Berserker
|
|---|---|---|
|
|
|
| Resistances | |||||||
|---|---|---|---|---|---|---|---|
| Horus | Rs | - | - | - | - | Rp | Wk |
| Beiji-Weng | - | Wk | Nu | - | - | Rs | - |
| Berserker | Nu | - | - | - | Wk | - | - |
| Battle Speed | 19,268 | ||||||
- Easy to clear with demons that have Ice Null/Repel/Drain once you clear out the mobs.
- Recommended Demons: 3★ Forneus, 4★ Loki, 4★ Fenrir
Floor 44
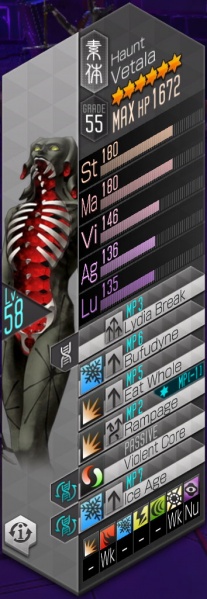
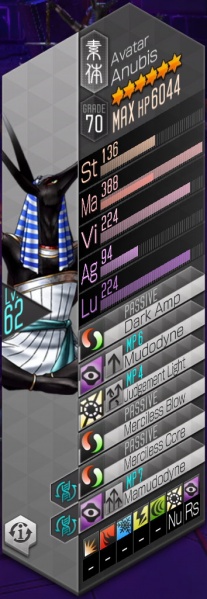
| Vetala | Anubis | Kikuri-Hime
|
|---|---|---|
|
|

|
| Resistances | |||||||
|---|---|---|---|---|---|---|---|
| Vetala | - | Wk | - | - | - | Wk | Nu |
| Anubis | - | - | - | - | - | Nu | Rs |
| Kikuri-Hime | - | - | - | Wk | Nu | - | Wk |
| Battle Speed | 12,668 | ||||||
- This boss only uses Light/Dark magic. Bringing a demon that has a Null/Repel/Drain in both will make this fight easy.
- Recommended Demons: 3★ Unicorn, 4★ Sandalphon, 4★ Beelzebub
Floor 45
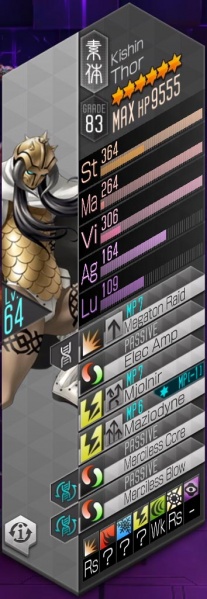
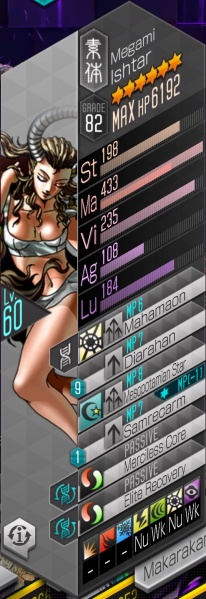
| Thor | Ishtar
|
|---|---|
|
|
| Resistances | |||||||
|---|---|---|---|---|---|---|---|
| Thor | Rs | Nu | - | Dr | Wk | Rs | - |
| Ishtar | - | - | - | Nu | Wk | Nu | Wk |
| Battle Speed | 13,600 | ||||||
- Two Bosses! Both must be killed to end this battle.
- Bring Force magic and aim for a short fight. Kill Ishtar first as it knows Samarecarm, and Judgement will do nasty amounts of damage as well as her healing around ~1200 HP per Diarahan.
- Recommended Demons: 3★ Isis, 4★ Beelzebub, 4★ Loki, 4★ Sandalphon
Floor 46
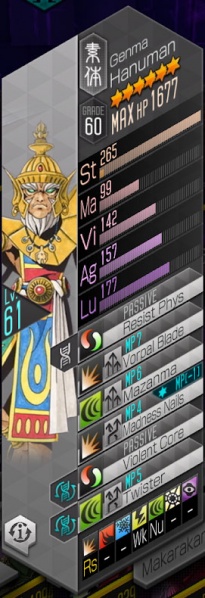
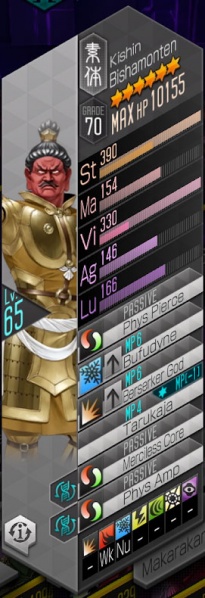
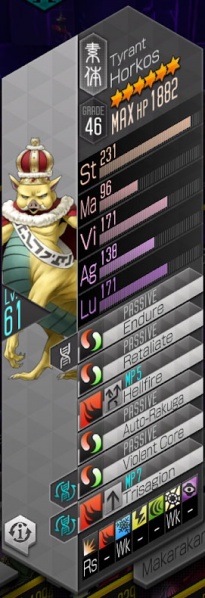
| Hanuman | Bishamonten | Horkos
|
|---|---|---|
|
|
|
| Resistances | |||||||
|---|---|---|---|---|---|---|---|
| Hanuman | Rs | - | - | Wk | Nu | - | - |
| Bishamonten | - | Wk | Nu | - | - | - | - |
| Horkos | Rs | - | Wk | - | - | Wk | - |
| Battle Speed | 14,701 | ||||||
- Bring demons with Fire magic to quickly bring down the boss. Fog Breath helps a lot as these attackers are all Phys.
- Recommended Demons: 3★ Forneus, 4★ Loki, 4★ Fenrir
Floor 47
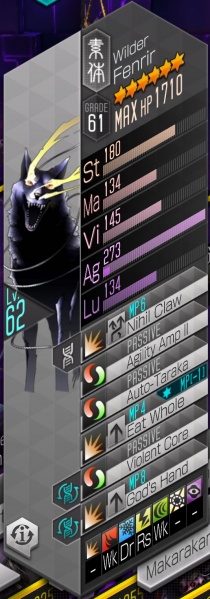
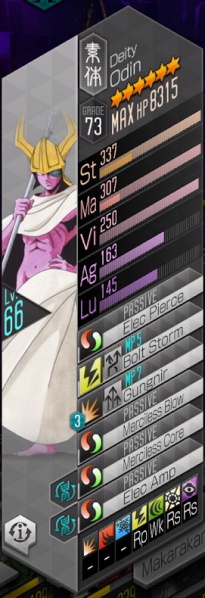
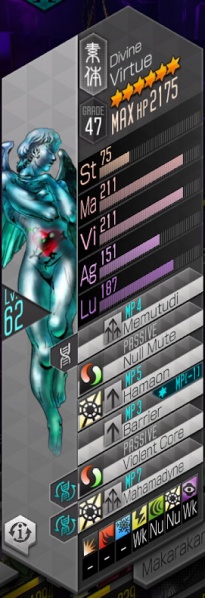
| Fenrir | Odin | Virtue
|
|---|---|---|
|
|
|
| Resistances | |||||||
|---|---|---|---|---|---|---|---|
| Fenrir | - | Wk | Dr | Rs | Wk | - | - |
| Odin | - | - | - | Rp | Wk | Rs | Rs |
| Virtue | - | - | - | Wk | Nu | Nu | Wk |
| Battle Speed | 19,568 | ||||||
- As Fenrir is a fast Phys attacker, bring Phys resist. The Elec magic the boss uses is also very strong, and it will pierce so take care of the damage it does. Make sure to use Repel Phys mirrors to repel his Gungnir that he uses 3 times at the start.
- Recommended Demons: 3★ Ose, 3★ Mitra, 4★ Rangda
Floor 48
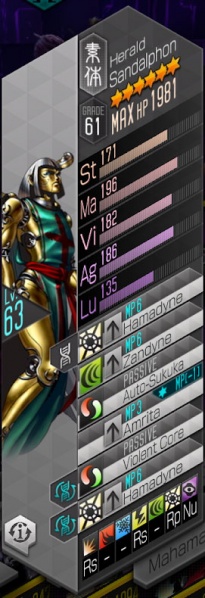
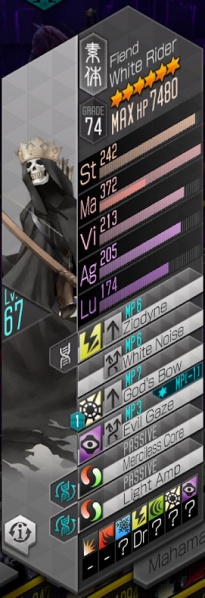
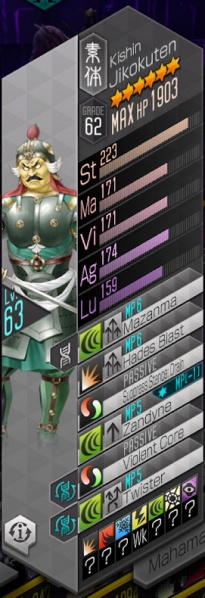
| Sandalphon | White Rider | Jikokuten
|
|---|---|---|
|
|
|
| Resistances | |||||||
|---|---|---|---|---|---|---|---|
| Sandalphon | Rs | - | - | Rs | - | Rp | Nu |
| White Rider | - | - | - | Dr | Wk | Rs | Rs |
| Jikokuten | - | - | - | Wk | Nu | Rs | - |
| Battle Speed | 18,334 | ||||||
- Force, Dark, and Elec resist is recommended here as the enemies use those elements. As well, God’s Bow will do a large amount of damage if it doesn’t hit, so beware of the burst.
- Recommended Demons: 3★ Teal Kresnik, 4★ White Rider, 4★ Sandalphon, 4★ Beelzebub
Floor 49
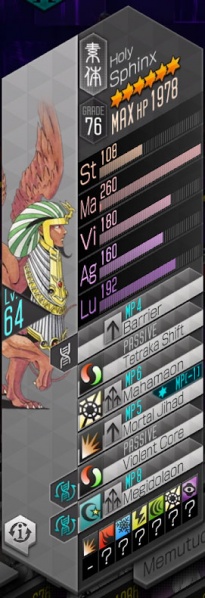
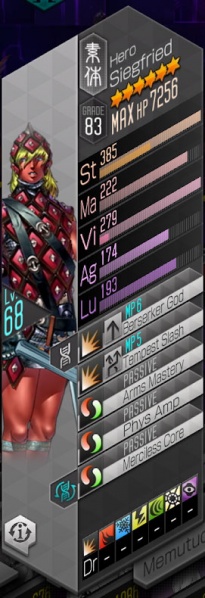
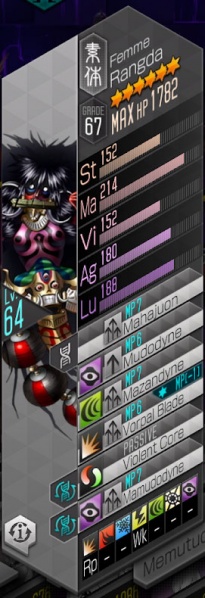
| Sphinx | Siegfried | Rangda
|
|---|---|---|
|
|
|
| Resistances | |||||||
|---|---|---|---|---|---|---|---|
| Sphinx | - | Nu | Wk | - | - | Rp | Wk |
| Siegfried | Dr | - | - | - | - | - | - |
| Rangda | Rp | - | - | Wk | - | - | - |
| Battle Speed | 17,134 | ||||||
- Physical attacks aren't effective against the boss here. The boss only has Phys skills, so once you take out the other mobs, the boss is easy to kill if you possess Phys Null/Repel/Drain.
- Recommended Demons: 3★ Ose, 3★ Berserker, 3★ Shiki-Ouji
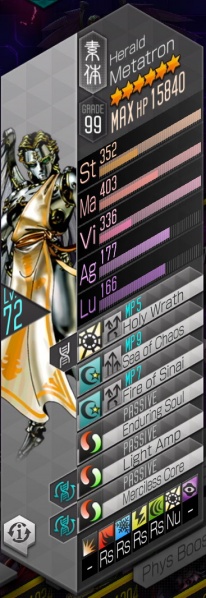
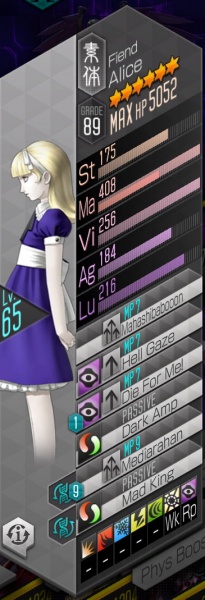
Floor 50
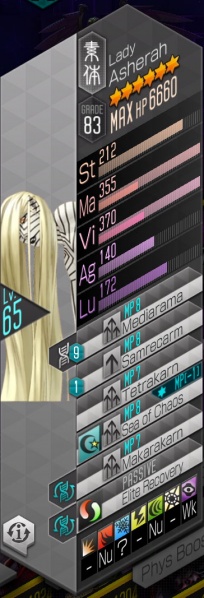
| Asherah | Metatron | Alice
|
|---|---|---|
|
|
|
| Resistances | |||||||
|---|---|---|---|---|---|---|---|
| Asherah | - | Nu | Wk | - | Nu | - | Wk |
| Metatron | - | Rs | Rs | Rs | Rs | Nu | - |
| Alice | - | - | - | - | - | Wk | Rp |
| Battle Speed | 16,701 | ||||||
Recommended Demons
Demons that are resistant to Light/Dark
- 4★ Beelzebub, 4★ Sandalphon, 5★ Trumpeter, 5★ Yoshitsune, 5★ Vishnu, 5★ Samael
Demons with Instant Kill skills
- 4★ White Rider, 5★ Alice. You can instantly kill Asherah at the start of the fight, making it much easier.
Kinmamon for barrier - when Boss 1 dies, Boss 3 will use Mashibabooon until success, and you can loop it by using the item that removes all status ailments.
| Demon 1 | Demon 2 | Demon 3 | Demon 4 |
|---|---|---|---|
 Beelzebub Beelzebub
|
 Sandalphon Sandalphon
|
 Alice Alice
|
 Kinmamon Kinmamon
|
| Mudo | Resist Light | Meparaladi | |
| Tarukaja | Hama | Tarunda |
Battle Strategy
- Kill Asherah first as it possesses Samarecarm
- Then process to kill Alice, while clearing Bind with Kinmamon when Alice uses Mashibabooon.
- Make sure to keep uptime on Tarunda, as the enemies hit very hard.
- Bring Templar Dragon as your Liberator to make your items use ½ Press Turn.