Kiwami/Barong
Overview
Encounter
Wave 1-TBA Boss-20133
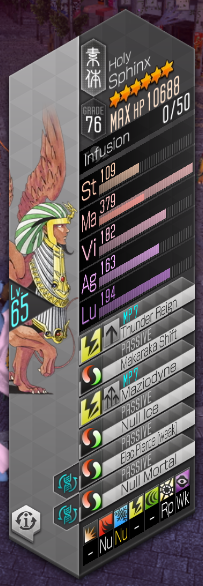
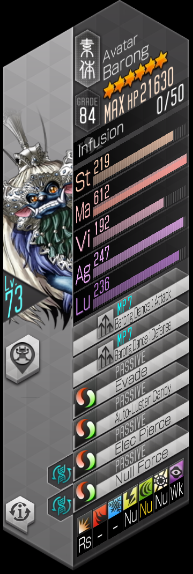
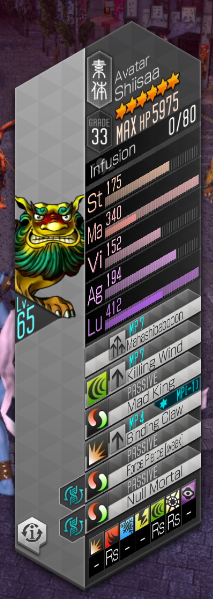
| Kiwami Barong Sphinx | Kiwami Barong | Kiwami Barong Shiisaa |
|---|---|---|
 |
 |

|
Strategy
- Barong will not cast any of the dances if his party is at full HP. Abuse this by killing one of the adds each round!
- Equip Ward brands on all your demons to block Shiisa's Mahashibaboon.
Teams proven to work
Reika
| Elec Burst | Dark Burst | Healing + Buffs | Dark Burst |
|---|---|---|---|
 Indrajit Indrajit
|
 Black Frost Black Frost
|
 Amaterasu Amaterasu
|
 Izanami Izanami
|
| Elec Enhancement | Mudoon L | Recovery Boost | Mudoon L |
| Elec Amp | Dark Boost | Resist Elec | Back Attack |
- Very straightforward fight once you learn the AI's behavior. Setup concentrate on the 1st wave, nuke Sphinx down in a single round. Rinse and repeat for Shiisa, and finally for Barong.
- Templar Dragon as D2 to increase Concentrate damage.
- Indrajit provides consistent Elec DPS, especially after being buffed by Izanami. A Charge Seth would work even better though!
- Black Frost is used for Concentrate Mudoon L.
- Izanami buffs both Dark and Elec damage and is another source of Concentrate.
- Two concentrate demons are required to chew through Sphinx's 9k+ HP.
- Mudoon L is used as a cheap ST nuke. Mudodyne / Hell's Gaze are strictly better but kinda overkill imo.
- Amaterasu provides buffs and healing once you begin engaging Barong.