Digest 6
Welcome to the 6th issue of the Dx2 Digest! The event continues into its second week, with Dark Prana as the prize for Part 2. Also the return of the coveted Hallels banner with a surprise guarantee at the end!
All times and dates mentioned are in JPT.
- Issue: 6
- Date: 2021/05/20 - 2021/05/27
- Written by User:Reika
Contents
Featured Banner
Brief Description: 8,500 gems with either Ose Hallel or Flauros Hallel at the end, plus 100 bonus tomes.
Verdict: The Hallels are powerful demons and being able to get one of them for 8,500 is pretty amazing value. If you are fine with either of them, this is a pretty decent banner to roll for, especially with an increased amount of guaranteed 5s in the step-up.
However if you are chasing a specific Hallel, be aware that the Hallel Absolute summon is incredibly pricey due to the lack of bonus tome step-ups. It will cost you 26,500 gems to gather the 300 tomes for an Absolute Hallel summon, making it even more expensive than the initial debut.
Other Banners
- Featured Demons: Mahamayuri, Pales, Cernunnos
A special commemoration event for Shin Megami Tensei IV! Three new demons are featured this time, offered at 0.33% each. There is also a bonus tome step-up and a one-time Absolute summon that guarantees each of them for a discounted 200 tomes. See the section below for more details!
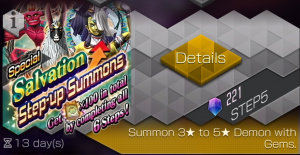
Special Salvation Step-up Summons
Brief Description: 16,500 gems for 300 tomes (100 tomes per cycle of 5,500 gems).
Verdict: This is the best banner to roll if you are chasing any of the new demons. You don't even need to finish it - stopping after Cycle 2 will give you enough Tomes to perform an Absolute Summon for whoever you want! This is pretty good value especially for Mahamayuri, who is currently the best Cleric for Battle Tower.
Salvation Step-up Summons
Brief Description: 27,500 gems for 300 tomes (60 tomes per cycle of 5,500 gems).
Verdict: This banner is for those who need more Salvation Tomes to tome more than one demon. Only roll this if you want to Tome a second demon (after finishing the Special one), though doing just the discounted step 1 isn't a bad idea.
Salvation Gem Summons
Brief Description: 100 gems for 1 try and 1 Dimensional Tome.
Verdict: This is for those who have exhausted every single step-up available. Avoid this like 16 Scourges.
Salvation Absolute Summons
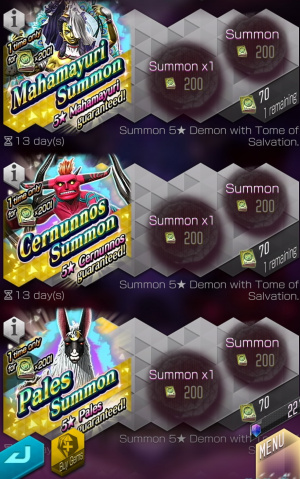
Mahamayuri / Cernunnos / Pales Absolute Summons
Brief Description: 200 Salvation Tomes for a guaranteed demon of choice, available once. Don't mistakenly roll the wrong banner.
Verdict: 200 Tomes for a non-random guaranteed demon is incredible. It essentially means you can pick whichever you want if you invest 11,000 gems, though whether or not any of these demons are worth 11,000 gems is up to you. Also worth to note, Moirai sisters had the same discounted Absolute Summon on their debut, which never came back on their rerun, so it's not a long shot to say this might be the only chance to grab one of these for 200 Tomes.
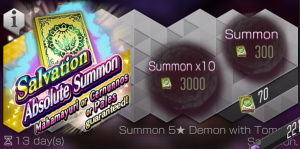
Salvation Absolute Summons
Brief Description: 300 Salvation Tomes for a random Mahamayuri, Cernunnos or Pales.
Verdict: This is purely for those who have exhausted the Absolute summons and wish to gamble. Stay away from this unless you are whaling hard for P3 or something.
Skill Box Summons
There are two new skill box summons available this time.
Box 1
- Available Skills: Force Survivor, Auto-Tarunda
Verdict: The only source of Force Survivor so far. This is a great skill for Baal and Cu Chulainn A, as it ensures they won't be blown up by Surt A's Twilight Inferno. It's also very useful for Mahamayuri, who appreciates both the damage and the Endure. Auto-Tarunda is a generally useful skill, though it might be hard to find a slot for it nowadays.
Box 2
- Available Skills: Dark Survivor, Auto-Taruka
Verdict: The only source of Dark Survivor so far. This is a great skill for Tzitzimitl if running the counter build against SurtA Sisters, or for your Dark nukers in general like Hecate and Lilith A who already have innate Dark Amp. Auto-Taruka is always useful to have especially for Democalypse.
New Demon Analysis
These are preliminary observations, full writeup will be added to the Tier List after some testing this week.
Mahamayuri
- Kujaku Myo-o makes him immune to Ailments and Auto-cleanses your entire party at the start of turn. This is incredibly powerful for Battle Tower, as the MC is forced to move first - other Clerics cannot prevent him from wasting a Press Turn.
- Hits fairly hard due to innate Force Amp, high BP on Blossoming Cyclone and a good MAG stat. As a bonus, it also heals your whole party, allowing him to provide sustain the same way Ardha does.
- He possesses the extremely coveted Repel Force (for comparison, the only other useable Repel Force demon are Mot and Mastema), which makes Atavaka pairings possible.
- Teal patches up his Elec Weakness, Purple lets him hit harder.
- On the flip side, he wants way too many stats at once - MATK to deal damage, HP for survivability, Evasion against Phys attacks - which makes him tricky to build. The same goes with his transfer skills - do you transfer Force Boost to let him hit harder? Epitome of Fortitude to tank better? Evade to capitalize off his P1 bonus? Support skills like Autos?
- Compared to Daisoujou, the former has better stats + kit for a pure support demon - no weaknesses, can focus purely on survivability/evasion, can run a myriad of support skills, while Mahamayuri offers more offensive pressure. Pick whichever your team needs more.
Pales
- Basically gives all your Vile, Jaki and Drake demons Intimidating Stance, the best being Demiurge.
- Has three Repel/Drains to further the Demiurge synergy.
- Only requires one other Vile, Jaki or Drake demon to work, unlike the racial trios (Angels/Moirai). It's better to run Pales + Demiurge + another Intimidating Stance demon like Surt A or Masakado for Double IS, instead of trying to cram in a third Vile/Jaki/Drake.
- With P1 he gains +60% Ailment Recovery. Add in Fast Recovery or Rallying Survivor and you have a guaranteed Charm and Bind cure (base chance of 25% + 80%/85%). The last slot can be something like Prayer, letting him act as your team's Cleric.
- Teal patches up his Fire Weakness.
- Has the potential to become really strong if SEGA releases strong Vile/Jaki/Drake demons in the future.
Cernunnos
- Perfect for Dark Democalypse as he has a strong ST skill that casts Rakunda and innate Dark Amp in Purple.
- Life & Death revives a demon the moment an enemy dies. This opens up possible combos with Ixtab, especially against AOE.
- With no usage limit, Life & Death is a powerful tool to keep momentum swinging in your favor, as it also procs off ally kills. This is particularly strong with P2, as it adds a Rakukaja and Tarukaja buff to the mix.
- Innate Enduring Soul+ is useful to let him last around longer.
- He can also run a support set in Yellow, letting his allies do the killing instead and supporting the team with Autos, Recarmdra etc
Events
Keeping Evil at Bay Ranked Event
A Ranked Collectathon this time, with two new skills offered for the Top 1000: Force Prana and Dark Prana.
- These skills restore 5 MP at the end of every wave and provide a +15% boost to Force/Dark damage. Useful for your PVE demons to replace Mana Aid - Yama for example will appreciate Dark Prana for Vanity 12 runs, while still being useable for Dark Democalypse.
- Special summon files will also be handed out through the event! These are basically Superior Summon Files with a low chance to summon either of the event demons (0.2% cumulative rate for all of them).
- There's a lot of Kasane Magatama available from the event milestones!
- Part 1 Starts: 13 May 2021, 3 pm
- Part 1 Ends: 19 May 2021, 11.59 pm
- Part 2 Starts: 20 May 2021, 12 midnight
- Part 2 Ends: 27 May 2021, 2 pm
Democalypse
Democalypse is ON this week, with Light as the bonus area!
- Season: 38
- Elements: Ice, Light, Phys
Battle Tower
- Season: 5
- Round: 2
List of handicaps:
- Attack first at start of battle (-30%)
- +50% to Party HP (-30%)
- -15% to party damage output (+20%)
- -25% to party damage output (+20%)
- -80% to party Ice/Elec damage output (+20%)
- +50% to enemy Fire/Dark damage output (+20%)
- Enemy nulls mortal (+20%)
- -1 MP at start of Battle (+20%)
List of sidegoals:
- Activate a Dark skill (+1500)
- Cure ally ailment (+1500)
- Heal party member with skill (+1500)
Meta Analysis
This section attempts to analyze the Tower meta. All teams are assumed to be running full debilitating handicaps (+120%) and trying to clear all 3 side goals (+4500).
- Mahamayuri is very powerful for Tower, as he cleanses all ailments automatically at the start of turn. Not only does this not cost a Press Turn, it also allows your MC (who is forced to move first) to act immediately, instead of wasting a turn being Charm/Bound.
- Force Survivor or Enduring Soul are recommended to attempt the "Cure ally ailment" side goal, as he needs to survive an entire turn.
- Defense:
- Running no ailments will allow you to deny the "Cure ally ailment" side goal. This proved to be a rather popular defense last week, expect to see more of it as the season goes on.
- "Enemy nulls mortal" means Clerics will be a lot harder to remove on defense, making the Xi Wangmu + Cleric (Daisoujou or Mahamayuri) core very potent.
- Bulky Slow IS Teams: A combination of Null Mortal, -40% overall damage dealt and -1 MP means they will likely survive the first turn, especially if double Intimidating Stance is included. Surt A bears special mention as he gets to abuse the +50% Fire damage handicap.
- Everyone's hated purple bug Angra Mainyu is still as strong as ever, especially paired with Mahamayuri as a dedicated Cleric to bail the MC out from Ailments and Xi Wangmu to provide debuff + revive support, or Atavaka to provide Anti-Pierce and Intimidating Stance.
- It's true Mahamayuri directly counters the ailments from 16 Scourges. Unfortunately, that doesn't address the rest of what Angra brings, which includes party-wide +2 MP, two turns of Luster Candy, 25% Fractional damage every turn, three repels and also functioning as a Dodge Tank.
- Offense:
- Remember to account for -1 MP when building your team, as it can mean the difference between using Life/War/Spell and Divines. Even with Everything Evil, non-Divine Angra Mainyu cannot cast 16 Scourges Turn 1 with this handicap enabled.
- Reduced Ice and Elec damage means the Rama sword and Izanami sword will deal reduced damage, especially with -40% overall damage thrown in. Plan around this accordingly!
- Mahamayuri is very useful to check Moirai, as he constantly removes Clotho's charm (while also letting you grab the healing side-goal). Make sure he is tanky enough to survive Atropos though!
- Lilith A is a great option for a Revive Sealer this season, just like Skull Knight was last season. She can easily slot into core Masakado A + Angra Mainyu comps, and the charm from Temptation will be useful to trigger the Mute counter from opposing Daisoujou (so you can cleanse it off for the side-goal). The new Dark Survivor is also very useful to keep her alive.
- Hecate is a decent pick as she alone can fulfill all three side-goals, while also having Fire and Dark damage reduction on her Panel 1. She is pretty awkward to fit in teams though.
- Cernunnos fulfills the Dark side-goal while also giving you plenty of revive support, which is very useful to keep the MC's shield high. Elec Repel also makes him a useful partner for Atavaka against Atropos.
- "Cure ally ailment" is in general a very difficult side-goal to play around. Do not blindly shove Clerics into every team expecting to clear it - consider the teams that would still run Ailments and formulate a dedicated team to handle those.
- A fast team should also be considered, though you will probably need some sort of Ailment control (like Angra, Motoko Kusanagi, Nekomata A, Master Therion or even the Ixtab Sword) to control their MC as with 40% reduced overall damage it will be difficult to sweep them in one turn. For the side-goals, just transfer cheap spells like Mudo and Dia , and try to use them if you have the chance.
- Risky
- While the Lilith Sword might sound good on paper to grab both the Healing and "use Dark attacks" sidegoals, the healing chain effect will not proc if the attack is nullified. As the sword does not pierce, this makes it difficult to use as Dark is a frequently nullified element (Angra, Demiurge, all three Moirai sisters to name a few)
- Alice A can reduce starting MP to 0 if paired with the -1 MP Handicap. However, she also gives the opponent an easy ailment to cleanse off, so do not blindly tech her into teams.


