Brands of Sin: Vanity
Contents
Brand of Vanity
 Jeanne d'Arc (Stage 1~5)
 Barong (Stage 6~9)
 Quetzalcoatl (Stage 10)
Wave 1
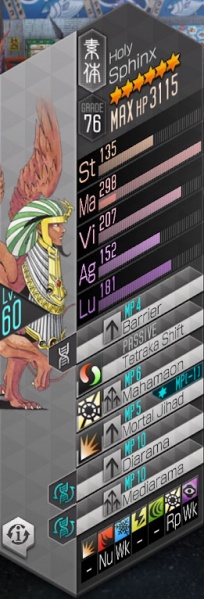
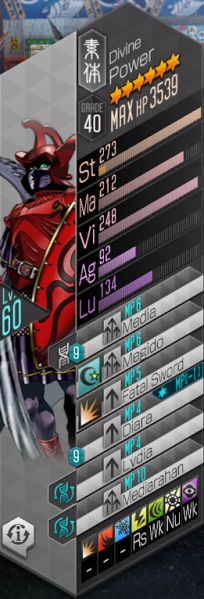
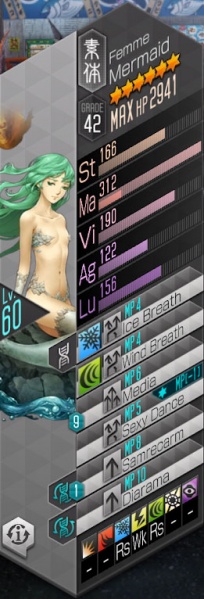
| Sphinx | Power | Mermaid
|
|---|---|---|
|
|
|
| Resistances | |||||||
|---|---|---|---|---|---|---|---|
| Sphinx | - | Nu | Wk | - | - | Rp | Wk |
| Power | - | - | - | Rs | Wk | Nu | Wk |
| Mermaid | - | - | Rs | Wk | Rs | - | - |
| Battle Speed | 12,200 | ||||||
Wave 2
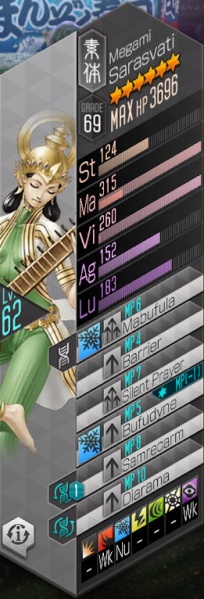
| Sarasvati | Sphinx | Power
|
|---|---|---|
|

|

|
| Resistances | |||||||
|---|---|---|---|---|---|---|---|
| Sarasvati | - | Wk | Nu | - | - | - | Wk |
| Sphinx | - | Nu | Wk | - | - | Rp | Wk |
| Power | - | - | - | Rs | Wk | Nu | Wk |
| Battle Speed | 13,200 | ||||||
Wave 3
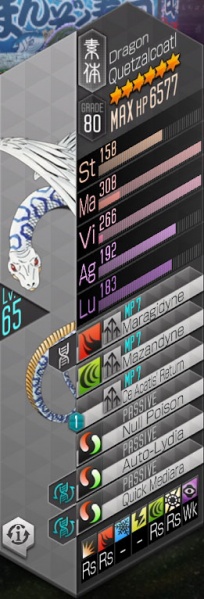
| Sarasvati | Quetzalcoatl | Sphinx
|
|---|---|---|

|
|

|
| Resistances | |||||||
|---|---|---|---|---|---|---|---|
| Sarasvati | - | Wk | Nu | - | - | - | Wk |
| Quetzalcoatl | Rs | Rs | - | - | Rs | Rs | Wk |
| Sphinx | - | Nu | Wk | - | - | Rp | Wk |
| Battle Speed | 16,533 | ||||||
Auto Party
Explanation
- The demons here are all weak to Dark, hence the usage of demons that are Dark magic users. Enemies here tend to heal, and due to Sphinx's Tetra Shift, phys attackers aren't very reliable.
 Garuda makes this a lot easier due to having Repel Fire and Null Force, both elements that Quetzalcoatl uses. If you don't have it, bringing at least one Null Fire demon (preferably one that can Dark DPS, like Red
 Tsukuyomi) and one Null Force demon is very useful.
 Pazuzu is a lot tankier of an option than
  Feng Huang, and boasts multiple nulls to prevent Sphinx's Mahamaon / Quetzalcoatl's Mazandyne.
- Other two slots are for Dark DPS.
Example Party
| Fire Null + Dark DPS | Healer | Dark DPS | Dark DPS |
|---|---|---|---|
 Tsukuyomi Tsukuyomi
|
 Pazuzu Pazuzu
|
 Beelzebub Beelzebub
|
 Anubis Anubis
|
| Mamudo | Resist Ice | Mudo | Mudo |
| Resist Phys | Diarama | Dark Boost | Mamudo |
Dark DPS options include: ![]() Alice,
Alice, ![]() Anubis,
Anubis, ![]() Beelzebub,
Beelzebub, ![]() Rangda,
Rangda, ![]() Black Frost,
Black Frost, ![]() Kaiwan, Red
Kaiwan, Red ![]()
![]() Tsukuyomi
Tsukuyomi
Healer alternative is ![]() Feng Huang or
Feng Huang or ![]() Asherah.
Asherah.
Teal ![]()
![]() Jikokuten is also a possibility if you have lots of Fire/Wind Drain demons, to force Quetzalcoatl to lose more turns due to Suppress Stance: Drain, but remember that it's a physical attacker.
Jikokuten is also a possibility if you have lots of Fire/Wind Drain demons, to force Quetzalcoatl to lose more turns due to Suppress Stance: Drain, but remember that it's a physical attacker.
Divine + at least 1 Ward set for Sarasvati to use Silent Prayer. Red Tsukuyomi can use Life or Spell instead of Divine because Lunar Blessing causes its awakened Mudoon to only cost 3 MP.
Videos of clear:
- https://www.youtube.com/watch?v=Srykc45j0sY
- https://www.youtube.com/watch?v=nP44cOEB4M0
- https://www.youtube.com/watch?v=cQONAosrwXM
Additional discussion:
- https://www.reddit.com/r/Dx2SMTLiberation/comments/9g4g02/v10_auto_team_f2p_version/
- https://www.reddit.com/r/Dx2SMTLiberation/comments/a4lao7/budget_only_3_vanity_10_auto_clear_team/
 Quetzalcoatl (Stage 11)
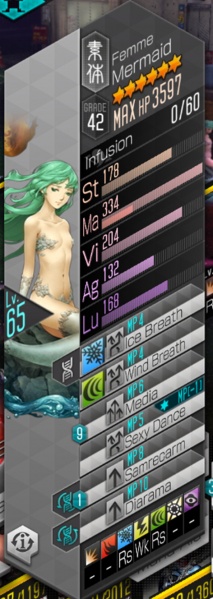
Wave 1
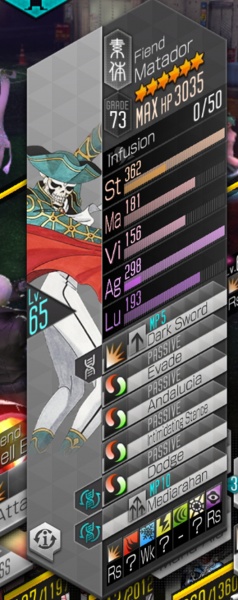
| Makami | Matador | Mermaid
|
|---|---|---|

|
|
|
| Resistances | |||||||
|---|---|---|---|---|---|---|---|
| Makami | - | - | - | - | - | Rs | Wk |
| Matador | Rs | - | Wk | - | - | Rs | Rs |
| Mermaid | - | - | Rs | Wk | Rs | - | - |
| Battle Speed | 21,433 | ||||||
Wave 2
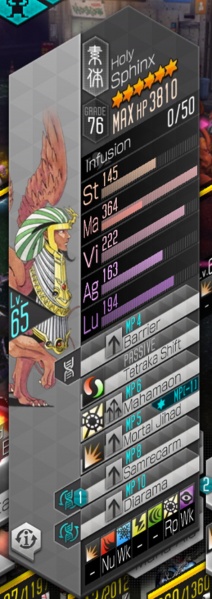
| Makami | Sphinx | Mermaid
|
|---|---|---|

|
|

|
| Resistances | |||||||
|---|---|---|---|---|---|---|---|
| Makami | - | - | - | - | - | Rs | Wk |
| Sphinx | - | Nu | Wk | - | - | Rp | Wk |
| Mermaid | - | - | Rs | Wk | Rs | - | - |
| Battle Speed | 16,933 | ||||||
Wave 3
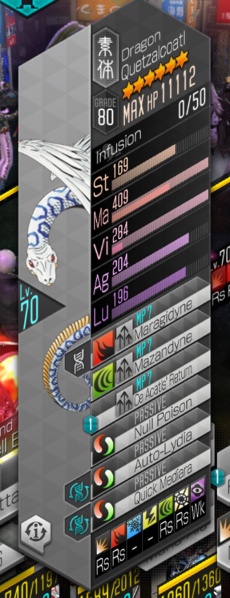
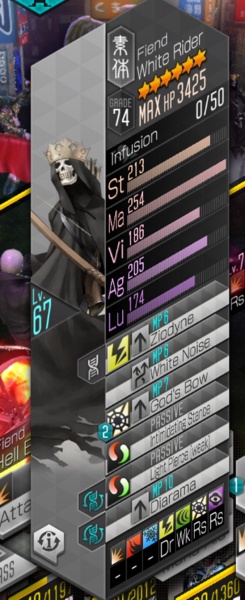
| Quetzalcoatl | Matador | White Rider
|
|---|---|---|
|

|
|
| Resistances | |||||||
|---|---|---|---|---|---|---|---|
| Quetzalcoatl | Rs | Rs | - | - | Rs | Rs | Wk |
| Matador | Rs | - | Wk | - | - | Rs | Rs |
| White Rider | - | - | - | Dr | Wk | Rs | Rs |
| Battle Speed | 23,833 | ||||||
Auto Party
Tested by Ronfar; loses once every 15 or so fights, depending on support demon and luck with dodging God's Bow instant kills
| Speed & Support | Healer | Speed & Support | Dark DPS |
|---|---|---|---|
 Garuda Garuda
|
 Asherah Asherah
|
 Huang Long Huang Long
|
 Black Frost Black Frost
|
| Bufula L | Mamudodyne | War Cry | Dark Amp |
| Resist Ice | Null Mute | Speedster | Resist Light |
- Garuda is set to Support AI so it will cast Fog Breath. Garuda cannot be hurt at all by Quetzalcoatl and Quick Mediara does run out of uses, so if you kill Matador and White Rider twice and Garuda is still alive, you are guaranteed to win eventually. Matador is weak to ice and White Rider is weak to Force, the two elements this Garuda can use. My Garuda happens to have Panel 1 and half of Panel 2 filled, but it seems like it should work just fine without panels. (Resist Ice is probably unnecessary, but I use Garuda elsewhere as well.)
- Brands: Speed, Spell (Mag Atk+%, Speed+)
- Asherah is also immune to Quetzalcoatl's attack spells, and Mother Creation helps if White Rider manages to inflict an instant kill. Null Mute protects her from Matador's Dark Sword skill; getting muted is a disaster and Ward brands don't always last long enough. Mamudodyne helps kill enemies - every wave has an enemy with a Dark weakness - and usually won't keep her from casting Mediarama.
- Brands: Heal, Divine (Mag Atk+%, Healing Amount+%)
- Huang Long is primarily being used for 6 MP Luster Candy and War Cry rather than Five Elements; the enemies tend to fight defensively and some have attacks that ignore Five Elements completely. Garuda without Speedster isn't enough to raise Battle Speed high enough to beat 23,833, and my Yellow Huang Long was the best speedster I had available. (When I did try Purple Huang Long for Five Elements spam, I lost.)
- Brands: Ward, Divine
- Black Frost's Go To Hell skill inflicts piercing Dark damage and also inflicts Curse, hitting a weakness against each wave and limiting the amount of HP that the enemies can heal.
- Brands: Ward, Divine (Mag Atk+%)
Semi Expensive
|
|
|
|
- Garuda A can probably be replaced with Panel 1
 Garuda, though Panel 3 is optimal to have Matador miss him more often.
 - The purpose of Garuda A and Susano-o is to snipe White Rider who is the greatest threat to your run and happens to be weak to Force.
- If you manage to consistently snipe White Rider the fight is quite trivial.
- Garuda A has a second use in the fact that if Matador misses, you will debuff Evasion. It will prevent Yoshitsune to miss without needing too much accuracy on him.
- Yoshitsune is replaceable by a strong demon with Mana Aid, but is still probably one of the stronger demon to use who isn't banner exclusive.
Speed Clear Auto Party
Confirmed by Reika.
- Clear speeds of about 1 - 2 minutes. With enough accuracy stats, 100% clear on auto is possible.
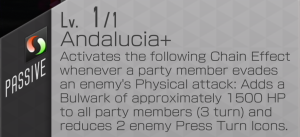
- Before attempting an auto-run, turn off "receive assists from other players" in your auto-settings, as random physical assists that miss Matador will trigger Andalucia.
- If you have support demons with shaky accuracy on your friend list, consider turning off "choose support demons automatically" as missed attacks on Matador can be disastrous.
- If you have enough accuracy to hit Matador consistently with your physical demons, consider running Ward brands as Dark Sword mutes can easily mess up runs.
| Speed & Support | Phys DPS | Phys DPS | Dark DPS & Null Mortal |
|---|---|---|---|
 Kartikeya Kartikeya
|
 Yoshitsune Yoshitsune
|
 Shiva_A Shiva_A
|
 Yama Yama
|
| Offensive Cry | Great Aim | Great Aim | Dark Amp |
| Mana Aid | Epitome of Carnage | Butcher | Dark Boost |
- Kartikeya provides the battle speed required to go first, while providing your entire team additional Accuracy and Crit. The former is crucial to hit Matador, while the latter useful to fish for extra turns. Change his AI to Support so he will cast Offensive Cry - it is the strongest attack buff/debuff combo in the game and Mana Aid allows him to spam it every wave.
- Brands: Speed, Speed (Phys ATK%, Speed%)
- Yoshitsune helps with the wave clear and can deal massive amount of damage to the Boss once the side mobs have been cleared. Panel 2 is highly recommended; the added mana allows him to throw multiple attack spells at the boss even with War brands. Consider inheriting Mana Gain if you do not have P2, this at least lets him use 2 spells consecutively.
- Brands: War, Ward/Aim (Phys Atk+%)
- Shiva Alt in Teal drains every elemental spell the Boss can cast, while providing solid DPS for wave clear. Paired with Yoshitsune's Vorpal Blade, Third Eye can easily clear the whole wave - it is crucial to clear both waves in a single round, as Yama's Null Mortal buff does not refresh at the start of the wave. If additional accuracy is not required, Mana Aid can be used in place of Great Aim for even faster clear times.
- Brands: Divine, Ward/Aim (Mag ATK%, Accuracy%).
- Yama provides a 3-turn Null Mortal buff to everyone, letting you tank God Arrows from White Rider. He also casts an AOE dark spell at the beginning of the Boss wave that has 100% curse chance - not only will this mess up the AI by making them prioritize healing, it will also reduce the amount of healing they receive. He is also a strong dark caster that will hit the Boss for weakness, netting you extra press turns.
- Brands: Divine (Mag ATK+%)
 Quetzalcoatl (Stage 12)
Wave 1
| Makami | Matador | Mermaid
|
|---|---|---|

|

|

|
| Resistances | |||||||
|---|---|---|---|---|---|---|---|
| Makami | - | - | - | - | - | Rs | Wk |
| Matador | Rs | - | Wk | - | - | Rs | Rs |
| Mermaid | - | - | Rs | Wk | Rs | - | - |
| Battle Speed | 21,433 | ||||||
Wave 2
| Mermaid | Makami | Sphinx
|
|---|---|---|

|

|

|
| Resistances | |||||||
|---|---|---|---|---|---|---|---|
| Mermaid | - | - | Rs | Wk | Rs | - | - |
| Makami | - | - | - | - | - | Rs | Wk |
| Sphinx | - | Nu | Wk | - | - | Rp | Wk |
| Battle Speed | 16,933 | ||||||
Wave 3
| Matador | Quetzalcoatl | White Rider
|
|---|---|---|

|

|

|
| Resistances | |||||||
|---|---|---|---|---|---|---|---|
| Matador | Rs | - | Wk | - | - | Rs | Rs |
| Quetzalcoatl | Rs | Rs | - | - | Rs | Rs | Wk |
| White Rider | - | - | - | Dr | Wk | Rs | Rs |
| Battle Speed | 24,133 | ||||||
 Quetzalcoatl (Stage 13)
Wave 1
| Kushinada | Matador | Peallaidh
|
|---|---|---|

|

|

|
| Resistances | |||||||
|---|---|---|---|---|---|---|---|
| Kushinada | - | - | - | - | - | Rs | Wk |
| Matador | Rs | - | Wk | - | - | Rs | Rs |
| Peallaidh | - | Wk | Rs | - | - | Wk | - |
| Battle Speed | 23,633 | ||||||
Wave 2
| Peallaidh | Kushinada | Throne
|
|---|---|---|

|

|

|
| Resistances | |||||||
|---|---|---|---|---|---|---|---|
| Peallaidh | - | Wk | Rs | - | - | Wk | - |
| Kushinada | - | - | - | - | - | Rs | Wk |
| Throne | - | Nu | Wk | Rs | - | Nu | Wk |
| Battle Speed | 23,633 | ||||||
Wave 3
| Matador | Quetzalcoatl | White Rider
|
|---|---|---|

|

|

|
| Resistances | |||||||
|---|---|---|---|---|---|---|---|
| Matador | Rs | - | Wk | - | - | Rs | Rs |
| Quetzalcoatl | Rs | Rs | - | - | Rs | Rs | Wk |
| White Rider | - | - | - | Dr | Wk | Rs | Rs |
| Battle Speed | 24,266 | ||||||
Notes:
- Quetz has the effects of his panels 1-3.
 Quetzalcoatl (Stage 14)
Wave 1
| Matador | Nekomata A | Loki
|
|---|---|---|

|

|

|
| Resistances | |||||||
|---|---|---|---|---|---|---|---|
| Matador | Rs | - | Wk | - | - | Rs | Rs |
| Nekomata A | - | Rs | - | Wk | Rs | - | - |
| Loki | - | - | Nu | - | Rs | Wk | Rs |
| Battle Speed | 24,400 | ||||||
Wave 2
| Chatterskull | Quetzalcoatl | Moh Shuvuu
|
|---|---|---|

|

|

|
| Resistances | |||||||
|---|---|---|---|---|---|---|---|
| Chatterskull | - | Dr | Wk | - | - | Wk | Nu |
| Quetzalcoatl | Rs | Rs | - | - | Rs | Rs | Wk |
| Moh Shuvuu | - | Wk | - | - | Nu | - | - |
| Battle Speed | 20,800 | ||||||
Explanation:
- Quetzalcoatl has the effects of his panels 1-2, with the notable effect being -1 MP cost of Ce Acatls' Return.
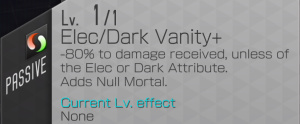
- Elec/Dark Vanity+ reduces all damage by 80%, except from
 Elec and
  Dark, so take Demons with Elec and Dark Skills into the battle.
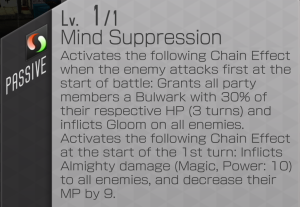
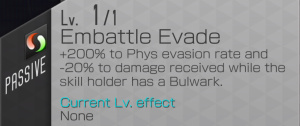
 - The enemies here can become extremely evasive. If you go first, they'll set up Bulwarks on themselves and
 Gloom on you for the first 3 turns of each wave. Further, Matador will punish any misses by taking out 2 of your Press Turn icons and re-applying the Bulwarks.
- It's easier to intentionally use a slow team to avoid all of this.
- Alternatively, you can remove the Bulwarks with
 Loup-Garou.
- Each wave will drain 9 of your MP on the first turn (doesn't matter who outspeeds who).
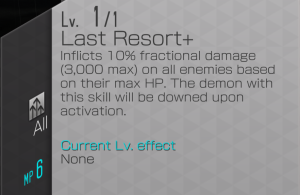
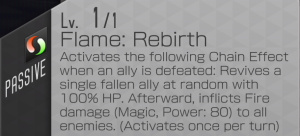
- In the second wave, the sides are actually frail, but both also have an endure. Whenever they die, whether due to you or due to Last Resort+, Quetz will revive them and attack you with Flame: Rebirth.
- Bring some
 Revive Ban to put a stop to them quickly.
- Bring some
Example party
Auto-Party
|
|
|
|
- Dx2 is
 Chalk Eater, as we can leverage Zeus or Tiamat A's Attribute affinity down to hit weaknesses, giving us buffs and extra press turns.
 - The team must be slower than 20,800 battle speed, so we can avoid the enemy casting Bulwarks.
- The enemies do still have a little evasion even without the Bulwarks, so leveling Zeus and Tiamat's accuracy-boost passives is recommended.
- Demeter protects the team with Bulwarks, and gives some extra MP.
- Zeus decreases Elec affinity, grants an extra press turn, and does good damage. Tiamat A does the same, but with Dark affinity.
- Zeus can also
 Revive Ban the annoying side enemies in wave 2.
 - Izanami boosts everyone's Elec/Dark damage, and if panel 4, also reduces their Elec/Dark skills' MP costs by 1. She's also slow, so she fits very well with the team requirements. Maziodyne and Hell Gaze are used as transfers so she can sweep wave 1 with Maziodyne, then she alternates between Bolt Storm and Hell Gaze in wave 2.


