Brands of Sin: Deceit
Contents
Brands of Deceit
 Wu Kong (Stage 1~5)
Stage 4~5
Wave 1
| Demon | Phys | Fire | Ice | Elec | Force | Light | Dark |
|---|---|---|---|---|---|---|---|
| Yomotsu-Shikome | - | Weak | - | - | - | Weak | Resist |
| Tarunda, Toxic Sting, Bufula, — | |||||||
| Oni | - | - | - | Weak | - | - | - |
| Tetra Break, Maragi, Vajra Blast, — | |||||||
| Pisaca | - | Weak | - | - | Null | Weak | Resist |
| Mamudo, Charm Bite, Life Drain, — | |||||||
Wave 2
| Demon | Phys | Fire | Ice | Elec | Force | Light | Dark |
|---|---|---|---|---|---|---|---|
| Zouchouten | - | Null | Weak | - | - | Resist | - |
| Rakukaja, Vajra Blast, Agilao, — | |||||||
| Oni | - | - | - | Weak | - | - | - |
| Tetra Break, Maragi, Vajra Blast, — | |||||||
| Pisaca | - | Weak | - | - | Null | Weak | Resist |
| Mamudo, Charm Bite, Life Drain, — | |||||||
Wave 3
| Demon | Phys | Fire | Ice | Elec | Force | Light | Dark |
|---|---|---|---|---|---|---|---|
| Wu Kong | Resist | Resist | - | Weak | Resist | Resist | Weak |
| Phys Boost, Taunt, Oni-Kagura, Charge |
 Vishnu (Stage 6~9)
Stage 6~7
Wave 1
| Demon | Phys | Fire | Ice | Elec | Force | Light | Dark |
|---|---|---|---|---|---|---|---|
| Virtue | - | - | - | Weak | Null | Null | Weak |
| Meclosedi, Null Mute, Hamaon, Barrier | |||||||
| Gui Xian | - | Weak | Null | - | - | - | - |
| Bufula, Mabufula, Ice Boost, Rakukaja | |||||||
| Pisaca | - | Weak | - | - | Null | Weak | Resist |
| Mamudo, Charm Bite, Life Drain, Ju | |||||||
Wave 2
| Demon | Phys | Fire | Ice | Elec | Force | Light | Dark |
|---|---|---|---|---|---|---|---|
| Virtue | - | - | - | Weak | Null | Null | Weak |
| Meclosedi, Null Mute, Hamaon, Barrier | |||||||
| Gui Xian | - | Weak | Null | - | - | - | - |
| Bufula, Mabufula, Ice Boost, Rakukaja | |||||||
| Mitra | Repel | - | Weak | - | - | Resist | Resist |
| Maju, Barrier Break, Evil Gaze, Megido | |||||||
Wave 3
| Demon | Phys | Fire | Ice | Elec | Force | Light | Dark |
|---|---|---|---|---|---|---|---|
| Vishnu | - | Null | Drain | - | Null | Null | Null |
| Bufudyne, Holy Wrath, Avatar, Mudodyne, Null Fire | |||||||
- Vishnu has Null Fire!
- Vishnu has the skill Avatar, which revives it with 1 HP on death.
- Vishnu is not weak to Phys, so using Phys attackers work.
- Recommended Demons: 3★
 Ose, 3★
  Horus, 4★
  Sandalphon, 4★
  Beelzebub, 5★
  Yoshitsune
Stage 8~9
Wave 1
| Demon | Phys | Fire | Ice | Elec | Force | Light | Dark |
|---|---|---|---|---|---|---|---|
| Mitra | Repel | Resist | Weak | Resist | - | Resist | Resist |
| Maju, Barrier Break, Evil Gaze, Megido, Resist Fire, Resist Elec | |||||||
| Hanuman | Resist | - | Null | Weak | Null | - | Resist |
| Resist Phys, Vorpal Blade, Mazanma, Madness Nails, Null Ice, Resist Dark | |||||||
| Berserker | Null | - | - | Null | Resist | - | - |
| Charge, Dark Sword, Mabufu, Enduring Soul, Null Elec, Resist Force | |||||||
| Battle Speed (12667 / 13800) |
Wave 2
| Demon | Phys | Fire | Ice | Elec | Force | Light | Dark |
|---|---|---|---|---|---|---|---|
| Ose | - | - | - | - | Resist | Resist | Resist |
| Hades Blast, Mazionga, Charge, Counterstrike, Resist Force, Resist Light | |||||||
| Hanuman | Resist | - | Null | Weak | Null | - | Resist |
| Resist Phys, Vorpal Blade, Mazanma, Madness Nails, Null Ice, Resist Dark | |||||||
| Berserker | Null | - | - | Null | Resist | - | - |
| Charge, Dark Sword, Mabufu, Enduring Soul, Null Elec, Resist Force | |||||||
| Battle Speed (12867 / 14467) |
Wave 3
| Demon | Phys | Fire | Ice | Elec | Force | Light | Dark |
|---|---|---|---|---|---|---|---|
| Vishnu (4.2k HP / 4.9k HP) | - | Drain | Drain | Repel | - | Null | Null |
| Ice Age, Holy Wrath, Avatar, Thunderclap, Null Fire, Repel Elec | |||||||
| Battle Speed (12000 / 13800) |
- Vishnu has Drain Fire and Repel Elec!
- Recommended Demons: 3★
 Ose, 4★
  Sandalphon, 4★
  Orochi, 4★
  Sphinx
 Metatron (Stage 10)
Wave 1
| Hanuman | Orochi | Horus
|
|---|---|---|
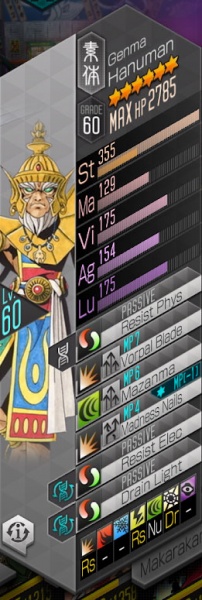
|
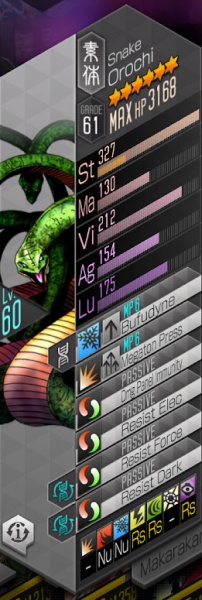
|
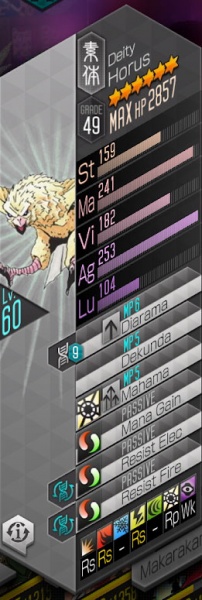
|
| Resistances | |||||||
|---|---|---|---|---|---|---|---|
| Hanuman | Rs | - | - | Rs | Nu | Dr | - |
| Orochi | - | Nu | Nu | Rs | Rs | - | Rs |
| Horus | Rs | Rs | - | Rs | - | Rp | Wk |
| Battle Speed | 18,700 | ||||||
Wave 2
| Titania | Orochi | Horus
|
|---|---|---|
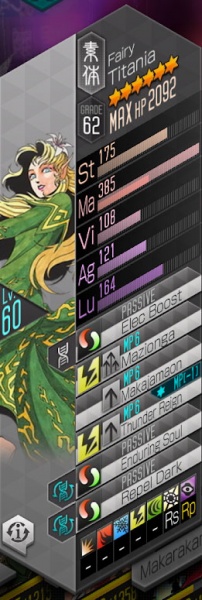
|

|

|
| Resistances | |||||||
|---|---|---|---|---|---|---|---|
| Titania | - | - | - | - | - | Rs | Rp |
| Orochi | - | Nu | Nu | Rs | Rs | - | Rs |
| Horus | Rs | Rs | - | Rs | - | Rp | Wk |
| Battle Speed | 17,600 | ||||||
Wave 3
| Metatron
|
|---|
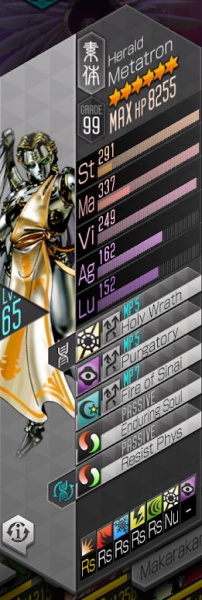
|
| Resistances | |||||||
|---|---|---|---|---|---|---|---|
| Metatron | Rs | Rs | Rs | Rs | Rs | Nu | - |
| Battle Speed | 16,200 | ||||||
Auto-Battle Team
Explanation
The party goes like this:
| Speedster + Debuffer | DPS | Phys Null/Repel/Drain or High Phys Evasion | Healer |
|---|---|---|---|
| Any Demon | Any Demon | Any Demon | Any Demon |
or
| DPS | DPS | DPS | Healer |
|---|---|---|---|
| Any Demon | Any Demon | Any Demon | Any Demon |
- Speedster + Debuffer: Must have Speedster, Makarakarn, and Tarunda. Makarakarn is required to prevent Titania from wiping your party with magic, and helps reduce the number of turns Metatron gets by repelling Purgatory/Holy Wrath.
- DPS: Must have an AoE, preferably
 Phys or
  Dark. Dark magic as Metatron is resistant to everything but Dark, and the Horus in the first two waves is weak to Dark. Physical DPS will get extra turns for the party whenever it crits, which is why AoE w/ acc is recommended to raise the chances of getting a single crit.
 - Phys Null/Evasion: Treat as a DPS. If Phys Null/Repel/Drain, it will stop the Hanuman/Orochi from using their AoE phys which hurts. If Phys Evasion, it'll lose them turns.
- Healer: Must have Mediarama, other slot is for Diarama + Resists. Diarama is used as if you run any Phys Null/Repel/Drain, the enemies will regular attack a target, and the auto AI will heal that targeted ally up.
As for brands:
- Speedster - Divine + Ward/Speed (Speed, HP, Phys Evasion)
- Magic DPS - Divine + Ward (MATK, HP, Speed, Phys Evasion)
- Phys DPS - War + Ward (PATK, ACC)
- Healer - Divine + Ward (Recovery, HP, MATK, Speed, Phys Evasion)
Demons:
 Fenrir: Speedster for getting your party's battle speed up to the required amount. Makarakarn is required to prevent Titania from wiping your party with magic, and helps reduce the number of turns Metatron gets by repelling Purgatory/Holy Wrath.
 Pazuzu: Nulls Force/Dark/Light and heals. The force null loses turns for Hanuman when it uses Mazanma, and Light/Dark Null works wonders against Metatron after it blasts through the first Makarakarn.
 Feng Huang: A speedier option than Pazuzu as a healer without any relevant Nulls and low HP. However, it can have way higher evasion + crit resistance which helps if you have trouble with the first two waves.
 Pallas Athena: A good Physical DPS that comes with Mana Aid. Basically, a "budget"
  Yoshitsune.
 Ose: Phys Null and Hades Blast.
 Rangda: Phys Repel and Mudodyne
Videos of clears:
- https://www.youtube.com/watch?v=VQ3wDGy3D6Y
- https://www.youtube.com/watch?v=QE5jSks1doQ
- https://www.youtube.com/watch?v=7g-k_cEEPmk
- https://www.youtube.com/watch?v=5TwQRxbO-g4
- https://www.youtube.com/watch?v=xsw_ybXpsl8
Additional discussion:
Example Parties
| Speedster + Debuffer | Magic Attacker (Dark) | Phys Null | Healer |
|---|---|---|---|
 Fenrir Fenrir
|
 Beelzebub Beelzebub
|
 Ose Ose
|
 Feng Huang Feng Huang
|
| Makarakarn | Dark Boost | Oni-Kagura | Resist Ice |
| Tarunda | Samrecarm | Bloody Glee | Diarama |
| Speedster + Debuffer | Phys Attacker | Phys Repel | Healer |
|---|---|---|---|
 Fenrir Fenrir
|
 Pallas Athena Pallas Athena
|
 Rangda Rangda
|
 Pazuzu Pazuzu
|
| Makarakarn | Hades Blast | Resist Elec | Resist Ice |
| Tarunda | Phys Boost | Mudo | Diarama |
- Battle Speed needs to be 18,700+. If you cannot hit the battle speed, use a Purple

 Beelzebub for initial Makara Shift. Transfer Diarama for Beelzebub, and Mamudo + Diarama for
  Prometheus.
  Templar Dragon helps a lot until you can get to a stable point with farming.
- If you have excess skill points and free slots, transfer Samrecarm.
Strategy (Manual Play)
- 1st wave - Kill order is Hanuman > Orochi > Horus. Hanuman will start off the fight always with Vorpal Blade (unless you have two nulls/repels/drains), and will start using it if the only one alive. Horus will just spam Diarama for 450, it's not a lot.
- 2nd wave - If you have Makarakarn or an Elec Null/Drain/Repel, Titania will use Makajamaon. You can exploit that if playing manual - kill order should be Titania > Orochi > Horus.
- 3rd wave - Metatron is really easy compared to the waves before, just outlast it.
 Metatron (Stage 11)
Wave 1
| Zhong Kui | Horus | Pazuzu
|
|---|---|---|
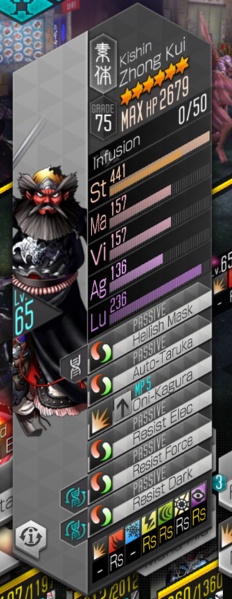
|
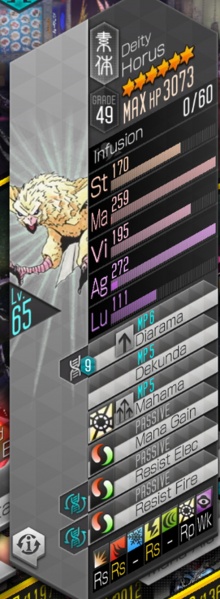
|
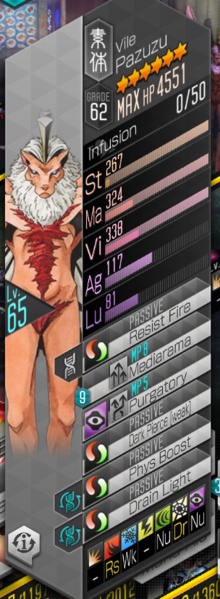
|
| Resistances | |||||||
|---|---|---|---|---|---|---|---|
| Zhong Kui | - | Rs | - | Rs | Rs | Rs | Rs |
| Horus | Rs | Rs | - | Rs | - | Rp | Wk |
| Pazuzu | - | Rs | Wk | - | Nu | Dr | Nu |
| Battle Speed | 17,500 | ||||||
Wave 2
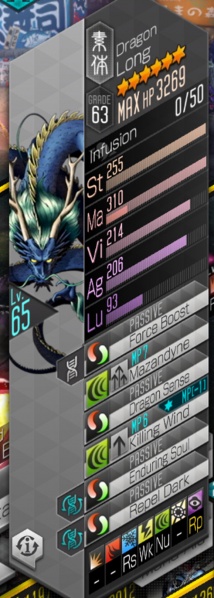
| Horus | Pazuzu | Long
|
|---|---|---|

|

|
|
| Resistances | |||||||
|---|---|---|---|---|---|---|---|
| Horus | Rs | Rs | - | Rs | - | Rp | Wk |
| Pazuzu | - | Rs | Wk | - | Nu | Dr | Nu |
| Long | - | - | Rs | Wk | Nu | - | Rp |
| Battle Speed | 19,833 | ||||||
Wave 3
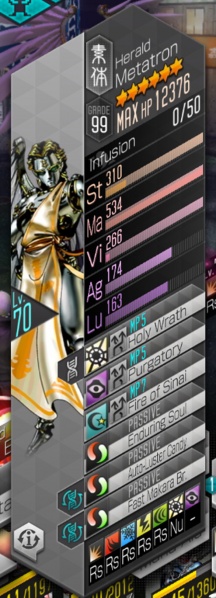
| Metatron
|
|---|
|
| Resistances | |||||||
|---|---|---|---|---|---|---|---|
| Metatron | Rs | Rs | Rs | Rs | Rs | Nu | - |
| Battle Speed | 17,400 | ||||||
Auto Party
|
|
|
|
Kartikeya casts Offensive Cry each wave. Skanda provides critical %, and is a suitable replacement for ![]() Hell Biker's Red Zone if your demons have enough critical % of their own. Siegfried is not necessary, and any physical attacker will work just fine in his slot.
Hell Biker's Red Zone if your demons have enough critical % of their own. Siegfried is not necessary, and any physical attacker will work just fine in his slot.
It's likely that Metatron will be killed T1 if crits land consistently. If he's not killed T1, Asura can tank 2-3 casts of Fire of Sinai before dying, at which point a single Hassou Tobi! from Yoshitsune should be more than enough to finish him off.
Use ![]() Kangaroo Boxer for his cumulative damage buff.
Kangaroo Boxer for his cumulative damage buff.
Clear time ranges from 40-50 seconds.
|
|
|
|
Abaddon A's unique skill cancels Metatron's Auto-Luster Candy and then inflicts Debilitate, making the boss fight much easier. Muscle Punch seems to be the best way to get a decent damage output from a demon with otherwise generally weak stats. The rest is a standard Hell Gongen team; panels on Yoshitsune and Zaou-Gongen are nice but should not be necessary.
 Metatron (Stage 12)
Wave 1
| Zhong Kui | Horus | Pazuzu
|
|---|---|---|

|

|

|
| Resistances | |||||||
|---|---|---|---|---|---|---|---|
| Zhong Kui | - | Rs | - | Rs | Rs | Rs | Rs |
| Horus | Rs | Rs | - | Rs | - | Rp | Wk |
| Pazuzu | - | Rs | Wk | - | Nu | Dr | Nu |
| Battle Speed | 17,500 | ||||||
Wave 2
| Horus | Pazuzu | Long
|
|---|---|---|

|

|

|
| Resistances | |||||||
|---|---|---|---|---|---|---|---|
| Horus | Rs | Rs | - | Rs | - | Rp | Wk |
| Pazuzu | - | Rs | Wk | - | Nu | Dr | Nu |
| Long | - | - | Rs | Wk | Nu | - | Rp |
| Battle Speed | 19,833 | ||||||
Wave 3
| Metatron
|
|---|

|
| Resistances | |||||||
|---|---|---|---|---|---|---|---|
| Metatron | Rs | Rs | Rs | Rs | Rs | Nu | - |
| Battle Speed | 18,000 | ||||||
Example Party
|
|
|
|
- Fast, consistent clears requires a good support demon, like another paneled Yoshitsune
- Must hit the BS=19833
- Asura's job is to remove Metatron's LC, deal damage, and tank Fire of Sinai. That's the reason why you want to have him on Life/Shield brands. P2 helps out immensely
- If you have no Auto-Rebellion you can use the Savage Glee and Epitome of Carnage combo, and hope Zaou-Gongen crits in the 1st or 2nd wave
- Yoshitsune is the real damage dealer, so give him some good PATK brands
|
|
|
|
- The idea behind this team is to be able to outheal Metatron's damage, even if he uses Fire of Sinai four times, so that you can reliably clear even without a support demon.
- Archetypes don't matter, although
 Red and
  Yellow are both useful on Lakshmi A, with
  Red's Deathtouch triggering Diwali, and
  Yellow's Defensive Cry giving buff control to make Asura even tankier.
 - Jeanne d'Arc should have Diarama or some other healing spell, so that she can still heal after using Orlean Prayer 3 turns in a row.
- Lakshmi A needs Resist Force to avoid dying to Long's Mazandyne.
- This team clears extremely slowly (up to 10 minutes per clear, with no support demon), which is actually somewhat beneficial: if you use all of your Aura Gate/duel stamina, you can leave it on auto and use more regular stamina than you started with.
|
|
|
|
- Will also require a good support demon
- Kartikeya is only here to hit the BS limit; if you can hit it with
 Masakado A use him
 - Zaou-Gongen for the crit passing, Yoshitsune for damage dealing
- Abaddon A removes LC, and debilitates Metatron.
- He will LC our team on our turn to make sure we can tank Fire of Sinai more than 1-2 turns.
- Instead of Muscle Punch and Guard brands you can also run a damage boost/phys AOE, and run Divine brands
|
|
|
|
- The idea behind this team is to have both damage and survivability.
- Minimum Battle Speed is 18000 to outspeed Metatron. Getting outsped the 2nd wave is fine.
- Barong provides Luster Candy with Barong Dance, healing and Speedster.
- Zaou-Gongen for the infinite crit spam with Panel 3.
- Auto-Rebellion/Phys Pierce (weak) is nice but not necessary since none of the demons NDR phys.
- Alternatives include Savage Glee/Bloody Glee.
- Yoshitsune is the main damage dealer.
- Orcus serves two purposes. Not only does he decrease the AOE damage from Metatron because of Hell's Gate but he also debuffs with War Cry.
- Buff control is very important since without it you will die.
- Ideally you want orcus to War Cry the first turn against the boss to reduce his attack.
- Samrecarm is for insurance. You might need it.
- Some notes on the AI:
- If Barong doesn't have enough MP for Barong Dance and Orcus is
 Yellow, he'll use Nocturne instead of war cry. It's not the best but hopefully you can survive anyway.
- If Barong doesn't have enough MP for Barong Dance and Orcus is
 Metatron (Stage 13)
Wave 1
| Ongyo-Ki | Pallas Athena | Yurlungur
|
|---|---|---|

|

|

|
| Resistances | |||||||
|---|---|---|---|---|---|---|---|
| Ongyo-Ki | Rs | - | Rs | - | Rs | Nu | - |
| Pallas Athena | Rs | - | - | - | Rs | Nu | Nu |
| Yurlungur | - | Nu | Nu | Rs | - | - | Nu |
| Battle Speed | 18,733 | ||||||
Wave 2
| Pallas Athena | Yurlungur | Anzu
|
|---|---|---|

|

|

|
| Resistances | |||||||
|---|---|---|---|---|---|---|---|
| Pallas Athena | Rs | - | - | - | Rs | Nu | Nu |
| Yurlungur | - | Nu | Nu | Rs | - | - | Nu |
| Anzu | - | - | - | Nu | Nu | - | - |
| Battle Speed | 19,766 | ||||||
Wave 3
| Metatron
|
|---|

|
| Resistances | |||||||
|---|---|---|---|---|---|---|---|
| Metatron | Rs | Rs | Rs | Rs | Rs | Nu | - |
| Battle Speed | 18,400 | ||||||
Notes:
- Metatron has his old panel 1-3 effects. The notable parts are: -1 mp cost of Almighty skills, and -30% to magic damage received.
 Metatron (Stage 14)
Wave 1
| Cerberus | Hell Biker | Pallas Athena
|
|---|---|---|

|

|

|
| Resistances | |||||||
|---|---|---|---|---|---|---|---|
| Cerberus | - | Rp | Wk | - | - | - | - |
| Hell Biker | - | Rp | - | - | Rs | Wk | - |
| Pallas Athena | - | - | - | - | - | Nu | Wk |
| Battle Speed | 20,813 | ||||||
Wave 2
| Metatron
|
|---|

|
| Resistances | |||||||
|---|---|---|---|---|---|---|---|
| Metatron | - | Rs | Rs | Rs | Rs | Nu | - |
| Battle Speed | 18,800 | ||||||
Explanation
- The first wave of enemies have their panel 1-3 effects. The notable one is Hell Biker, who gets +20% speed and -1 mp cost of Red Zone from panel 3.
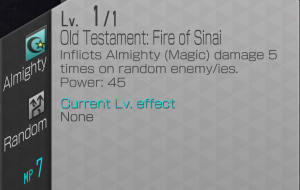
- Metatron has his old panel 1-4 effects. The notable parts are: -1 mp cost of Almighty skills, -30% to magic damage received, -20% to all damage received, and 3 more random Almighty hits after casting Old Testament: Fire of Sinai.
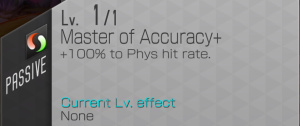
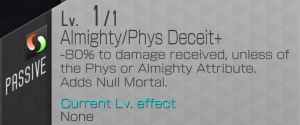
- Almighty/Phys Deceit+ reduces all damage by 80%, except from
 Almighty and
  Phys, so take Demons with Almighty and Phys Skills into the battle.
 - Uncertain Ordinance makes enemies only take damage from
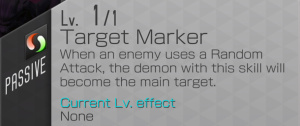
 Random Targets attacks. Further, Athena's Target Marker in wave 1 makes all random attacks hit her until she's eliminated.
- At time of writing,
 Almighty doesn't have a lot of random-target options, and none of them are transferable.
  Phys on the other hand can transfer Nihil Claw from Fenrir, if needed.
- At time of writing,
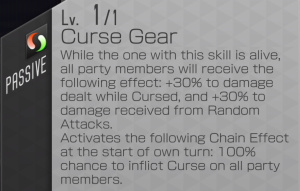
- Curse Gear makes enemies deal more damage and take more damage while
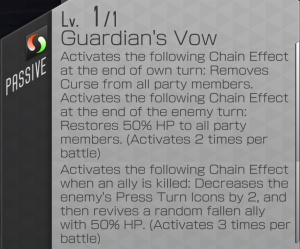
 Cursed. Synergizing with this, the enemy will inflict Curse on themselves at the start of their turn, then Guardian's Vow cleanses it off at the end of their turn. You'll need to apply Curse during your own turn in order to get the benefits.
 - The enemies will automatically give themselves heals and revives, though it's limited to 2 heals per wave and 3 revives in the first wave (Metatron will not revive himself).
- The heals will exhaust themselves in 2 turns, and applying Curse can reduce the amount of healing. The revives can drag the fight on, but
 Revive Ban is helpful to put a stop to this.
- The heals will exhaust themselves in 2 turns, and applying Curse can reduce the amount of healing. The revives can drag the fight on, but
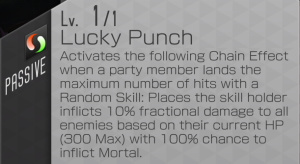
- Lucky Punch casts random-target Mortal and 10% fractional damage against your party when Cerberus or Athena land all hits of their random-target Phys attacks.
- Your options are: use
 Null Mortal buffs or passives to block it (such as from
  Kali A, who automatically re-casts it every turn), or use Teal
 Asura + Anti-pierce to draw in and negate all the random Phys hits (meaning Lucky Punch doesn't trigger).
- Your options are: use
Example Party
Auto-Party
|
|
|
|
- Dx2 is
 Eileen since we'll be using a lot of
  Random Targets attacks, as well as Passing a lot.
 - Asura baits all of the enemy's attacks, and takes -95% damage (due to Three Faces Six Arms at 50% + his own P2 at 30% + Black Frost's panel 2 at 15%). Asura must be
 Teal to negate the enemies'
  Phys attacks, preventing the Mortal follow-up in wave 1. He may have accuracy issues, so consider accuracy-boosting transfers. Levels on Ashura (and/or his P3's MP reduction) are highly recommended so he can cast it more often.
 - Black Frost's P4 generates MP and buffs for the team whenever the enemies Curse themselves, as well as when he Curses them. He also provides a 30% team-wide damage boost (from P3 + P4) and 15% damage reduction (from P2) while the enemy is cursed. Since his attacks are not random-target, he won't deal any damage, meaning his brands don't need any particular stat. We just run Divines so he can cast more often.
- Metatron's Divine Proxy reinforces Asura's Repel Phys, and gives himself
 Concentrate whenever Asura repels an attack, which will be very often in wave 1. He also applies
  Revive Ban if he scores a kill, speeding up the fight a little. Levels on Fire of Sinai are highly recommended so he can cast it more often.
- However, the boss Metatron takes -30% magic damage, so our Metatron's progress will be slowed down a bit.
- Panel 4 is highly recommended to help speed up the fight.
- Erlkonig provides some healing. This is for two reasons:
- In phase 1, while Asura nullifies all random attacks, Hell Biker's attack is not random-target, so he can slap anyone in your team. Who he hits is random, and he doesn't deal much - but if you're unlucky, he can eventually kill someone.
- In phase 2, Asura will be taking damage from Metatron. While each hit is small, it will add up over time and eventually kill him, which means the run is over.
- We aren't using the effects of Erlkonig's panels, so another healer such as
 Barong could go in his place. The amount of healing needed is not very high, you just need to make sure the healing source does not have a usage cap.
 - Other forms of bulk such as Bulwarks or
 Fortify also work in place of healing.
Notes:
 Idun offers Fortify, 20% damage reduction, +2 MP regen, one revive every turn, and debuffs on the boss. She perfectly takes Erlkonig's spot and offers more for it. Idun won't do damage, so run Divines with any stat boosts.
- Amusingly, this 20% reduction combined with Asura and Black Frost's reduction can result in over 100% reduction, causing the boss to deal 0 damage.
 Kalki offers healing, +1 MP regen, up to 3 revives total, some buffs, and Drain Pierce + Repel Pierce. Again, he can take Erlkonig's spot and perform much better than him. This can also open up replacing Metatron with
  Mara, who can do more damage against the Metatron boss (who takes -30% magic damage). Kalki himself won't do damage, so run Divines with any stat boosts.
 Demeter's Bulwarks can defend the party from damage well, but her chain effects will make the fight take a long time.
 Kali A is great as a friend support, offering more DPS and accuracy to the team. Run Divine (PAtk%) or War brands on her.


