Difference between revisions of "Demon Alliance Invasion/History"
(demon icons) |
(archiving inanna) |
||
| (5 intermediate revisions by 2 users not shown) | |||
| Line 1: | Line 1: | ||
| + | =="Tale of the Primordial Goddess" event== | ||
| + | [[https://d2-megaten-l.sega.com/en/news/detail/097992.html Official News Announcement]] | ||
| + | |||
| + | ===Normal: Scathach [[File:Scathach.jpg|32px|link=]]=== | ||
| + | <div class="toccolours mw-collapsible mw-collapsed" style="overflow:auto;"> | ||
| + | [[File:encounter_scathach.jpg|thumb]] | ||
| + | <br><big>'''Battle 1'''</big> | ||
| + | {| class="wikitable" | ||
| + | !align="center"| | ||
| + | !align="center"| {{ElementIcon|Phys}} | ||
| + | !align="center"| {{ElementIcon|Fire}} | ||
| + | !align="center"| {{ElementIcon|Ice}} | ||
| + | !align="center"| {{ElementIcon|Elec}} | ||
| + | !align="center"| {{ElementIcon|Force}} | ||
| + | !align="center"| {{ElementIcon|Light}} | ||
| + | !align="center"| {{ElementIcon|Dark}} | ||
| + | |- | ||
| + | | '''Scathach''' | ||
| + | | - | ||
| + | | - | ||
| + | | - | ||
| + | | Wk | ||
| + | | Nu | ||
| + | | Rs | ||
| + | | - | ||
| + | |- | ||
| + | |} | ||
| + | |||
| + | * {{ElementIcon|Elec}} [[Mazio]] | ||
| + | * {{ElementIcon|Elec}} [[Bolt Storm]] | ||
| + | * {{EffectIcon|DEF Debuff}} [[Rakunda]] | ||
| + | [[File:Super-auto-recovery-bind.jpg|300px]] | ||
| + | |||
| + | <br><big>'''Battle 2'''</big> | ||
| + | {| class="wikitable" | ||
| + | !align="center"| | ||
| + | !align="center"| {{ElementIcon|Phys}} | ||
| + | !align="center"| {{ElementIcon|Fire}} | ||
| + | !align="center"| {{ElementIcon|Ice}} | ||
| + | !align="center"| {{ElementIcon|Elec}} | ||
| + | !align="center"| {{ElementIcon|Force}} | ||
| + | !align="center"| {{ElementIcon|Light}} | ||
| + | !align="center"| {{ElementIcon|Dark}} | ||
| + | |- | ||
| + | | '''Scathach''' | ||
| + | | - | ||
| + | | - | ||
| + | | - | ||
| + | | Wk | ||
| + | | Nu | ||
| + | | Rs | ||
| + | | - | ||
| + | |- | ||
| + | |} | ||
| + | |||
| + | * {{ElementIcon|Elec}} [[Mazio]] | ||
| + | * {{ElementIcon|Elec}} [[Bolt Storm]] | ||
| + | * {{EffectIcon|DEF Debuff}} [[Rakunda]] | ||
| + | [[File:Soul-fracture-20.jpg|300px]] | ||
| + | [[File:Super-auto-recovery-bind.jpg|300px]] | ||
| + | |||
| + | '''Notes''' | ||
| + | * Trivial fight, just bring your SP units to squeeze as many points from it as possible. | ||
| + | </div> | ||
| + | |||
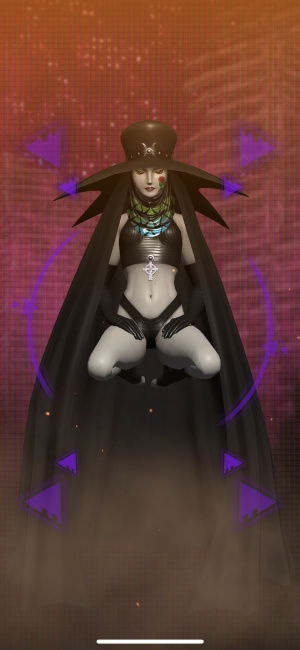
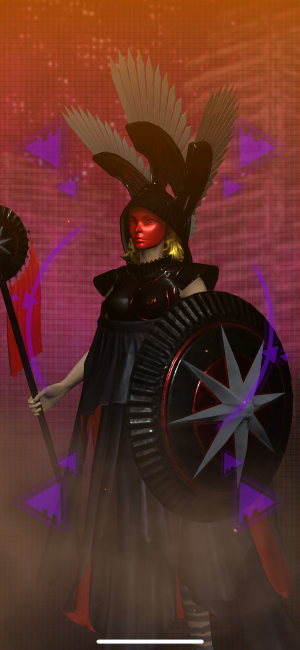
| + | ===Superior: Pallas Athena [[File:Pallas Athena.jpg|32px|link=]]=== | ||
| + | <div class="toccolours mw-collapsible mw-collapsed" style="overflow:auto;"> | ||
| + | [[File:encounter_pallas_athena.png|thumb]] | ||
| + | <br><big>'''Battle 1'''</big> | ||
| + | {| class="wikitable" | ||
| + | !align="center"| | ||
| + | !align="center"| {{ElementIcon|Phys}} | ||
| + | !align="center"| {{ElementIcon|Fire}} | ||
| + | !align="center"| {{ElementIcon|Ice}} | ||
| + | !align="center"| {{ElementIcon|Elec}} | ||
| + | !align="center"| {{ElementIcon|Force}} | ||
| + | !align="center"| {{ElementIcon|Light}} | ||
| + | !align="center"| {{ElementIcon|Dark}} | ||
| + | |- | ||
| + | | '''Pallas Athena''' | ||
| + | | Rs | ||
| + | | - | ||
| + | | - | ||
| + | | Wk | ||
| + | | - | ||
| + | | Nu | ||
| + | | Rs | ||
| + | |- | ||
| + | |} | ||
| + | |||
| + | * {{ElementIcon|Elec}} [[Maziodyne]] | ||
| + | * {{ElementIcon|Elec}} [[Thunderous Advent]] | ||
| + | * [[Resist Dark]] | ||
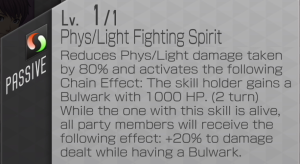
| + | [[File:Phys-light-fighting-spirit.png|300px]] | ||
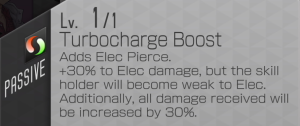
| + | [[File:Turbocharge-boost.png|300px]] | ||
| + | [[File:Super-auto-recovery-bind.jpg|300px]] | ||
| + | |||
| + | <br><big>'''Battle 2'''</big> | ||
| + | {| class="wikitable" | ||
| + | !align="center"| | ||
| + | !align="center"| {{ElementIcon|Phys}} | ||
| + | !align="center"| {{ElementIcon|Fire}} | ||
| + | !align="center"| {{ElementIcon|Ice}} | ||
| + | !align="center"| {{ElementIcon|Elec}} | ||
| + | !align="center"| {{ElementIcon|Force}} | ||
| + | !align="center"| {{ElementIcon|Light}} | ||
| + | !align="center"| {{ElementIcon|Dark}} | ||
| + | |- | ||
| + | | '''Pallas Athena''' | ||
| + | | Rs | ||
| + | | - | ||
| + | | - | ||
| + | | Wk | ||
| + | | - | ||
| + | | Nu | ||
| + | | Rs | ||
| + | |- | ||
| + | |} | ||
| + | |||
| + | * {{ElementIcon|Elec}} [[Thunderous Advent]] | ||
| + | * [[Resist Dark]] | ||
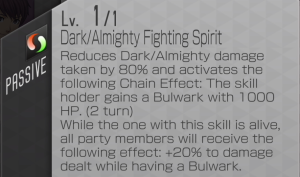
| + | [[File:Dark-almighty-fighting-spirit.png|300px]] | ||
| + | [[File:Turbocharge-boost.png|300px]] | ||
| + | [[File:Soul-fracture-20.jpg|300px]] | ||
| + | [[File:Super-auto-recovery-bind.jpg|300px]] | ||
| + | |||
| + | '''Notes''' | ||
| + | * Another simple fight, the main concern is 80% damage reduction + a 1000 HP Bulwark if you use certain elements, depending on the phase: | ||
| + | ** Phase 1 penalizes {{ElementIcon|Phys|name=1}} or {{ElementIcon|Light|name=1}} damage. | ||
| + | ** Phase 2 penalizes {{ElementIcon|Dark|name=1}} or {{ElementIcon|Almighty|name=1}} damage. | ||
| + | ** {{ElementIcon|Elec|name=1}} damage is safe on either phase. | ||
| + | ** The Bulwark is actually a non-issue, as 1,000 HP is practically nothing for the boss in this mode. As long as your main damage dealers aren't getting 80% reduced, you should be able to punch through the Bulwarks no problem. | ||
| + | * Athena is weak to Elec the whole time, as opposed to Inanna, who needs setup. This means you can earn extra turns with cheap non-piercing {{ElementIcon|Elec}} [[Zio]] transfers on supports, if needed. | ||
| + | |||
| + | '''Recommended demons:''' | ||
| + | <br>In addition to the units detailed in the [[Demon Alliance Invasion#Useful Demons|Useful Demons]] section of this guide: | ||
| + | |||
| + | Support: | ||
| + | * | ||
| + | |||
| + | |||
| + | Damage: | ||
| + | * | ||
| + | |||
| + | </div> | ||
| + | |||
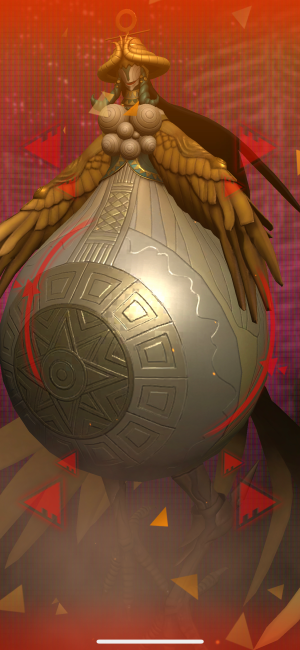
| + | ===Ultimate: Inanna [[File:Inanna.jpg|32px|link=]]=== | ||
| + | <div class="toccolours mw-collapsible mw-collapsed" style="overflow:auto;"> | ||
| + | [[File:encounter_inanna.png|thumb]] | ||
| + | <br><big>'''Battle 1'''</big> | ||
| + | {| class="wikitable" | ||
| + | !align="center"| | ||
| + | !align="center"| {{ElementIcon|Phys}} | ||
| + | !align="center"| {{ElementIcon|Fire}} | ||
| + | !align="center"| {{ElementIcon|Ice}} | ||
| + | !align="center"| {{ElementIcon|Elec}} | ||
| + | !align="center"| {{ElementIcon|Force}} | ||
| + | !align="center"| {{ElementIcon|Light}} | ||
| + | !align="center"| {{ElementIcon|Dark}} | ||
| + | |- | ||
| + | | '''Inanna''' | ||
| + | | - | ||
| + | | Nu | ||
| + | | Nu | ||
| + | | Nu | ||
| + | | Nu | ||
| + | | - | ||
| + | | Rs | ||
| + | |- | ||
| + | |} | ||
| + | |||
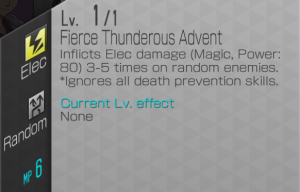
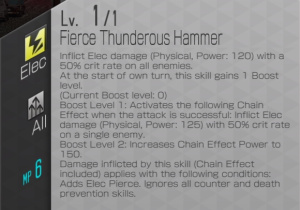
| + | [[File:Fierce-thunderous-advent.png|300px]] | ||
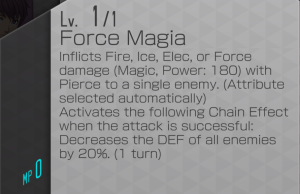
| + | [[File:Force Magia.png|300px]] | ||
| + | [[File:Underworld-corrosion.png|300px]] | ||
| + | [[File:Indomitable-force-elec.png|300px]] | ||
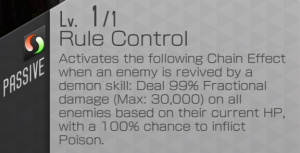
| + | [[File:Rule-control-pass.png|300px]] | ||
| + | [[File:Super-auto-recovery-bind.jpg|300px]] | ||
| + | |||
| + | <br><big>'''Battle 2'''</big> | ||
| + | {| class="wikitable" | ||
| + | !align="center"| | ||
| + | !align="center"| {{ElementIcon|Phys}} | ||
| + | !align="center"| {{ElementIcon|Fire}} | ||
| + | !align="center"| {{ElementIcon|Ice}} | ||
| + | !align="center"| {{ElementIcon|Elec}} | ||
| + | !align="center"| {{ElementIcon|Force}} | ||
| + | !align="center"| {{ElementIcon|Light}} | ||
| + | !align="center"| {{ElementIcon|Dark}} | ||
| + | |- | ||
| + | | '''Inanna''' | ||
| + | | - | ||
| + | | Nu | ||
| + | | Nu | ||
| + | | Nu | ||
| + | | Nu | ||
| + | | - | ||
| + | | Rs | ||
| + | |- | ||
| + | |} | ||
| + | |||
| + | [[File:Soul-fracture-20.jpg|300px]] | ||
| + | [[File:Force Magia.png|300px]] | ||
| + | [[File:Hell-corrosion.png|300px]] | ||
| + | [[File:Indomitable-fire-ice.png|300px]] | ||
| + | [[File:Rule-control-pass.png|300px]] | ||
| + | [[File:Super-auto-recovery-bind.jpg|300px]] | ||
| + | |||
| + | '''Notes:''' | ||
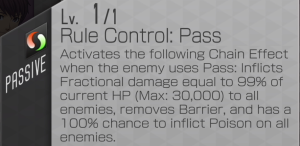
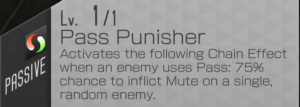
| + | * Avoid having your demons pass, as that'll trigger Rule Control, which will most likely KO your party. | ||
| + | ** This shouldn't happen on auto, since the boss does not have Nu/Dr/Rp Phys, and your demons will try to use their standard attack when at low MP. | ||
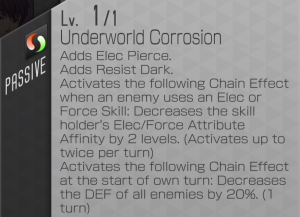
| + | * '''Underworld Corrosion''' reduces the boss's {{ElementIcon|Elec|name=1}} and {{ElementIcon|Force|name=1}} resistance by 2 levels, up to twice. She starts at Null, so attack with piercing Elec/Force damage twice to get her down to Weak. This can then get you more damage, more turns, and Chalk Eater synergy for buffs + more turns. | ||
| + | ** Alternatively, someone with [[Attribute affinity down]] can work as a more-direct solution that doesn't need as much setup. | ||
| + | ** Note that both resistances go down regardless of which one you used, so you can use a piercing Elec attacker to open the way for a Force attacker. | ||
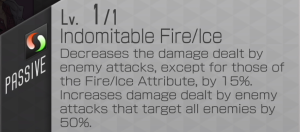
| + | ** The damage of skills that aren't Elec/Force are reduced by 15%. This is only a minor annoyance, but really pushes you to use the correct elements if you can. | ||
| + | ** [[Devil Connector]] skills unfortunately do not count for triggering Corrosion. | ||
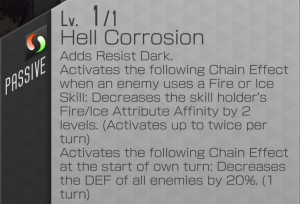
| + | * In phase 2, she swaps Underworld Corrosion for '''Hell Corrosion''', which does the same thing but for {{ElementIcon|Fire|name=1}} and {{ElementIcon|Ice|name=1}}. | ||
| + | * The boss gives your team a 50% damage boost when using an {{TargetingIcon|All|name=1}} attack, meaning those can be viable. | ||
| + | * The boss triggers a lot of {{EffectIcon|DEF Debuff|name=1}}s on her turn, so having a demon that can trigger {{EffectIcon|DEF Buff|name=1}}s during the enemy turn can help combat this. For example: {{DemonIcon|Demeter|size=32px}}. | ||
| + | |||
| + | * Liberators: | ||
| + | ** {{LiberatorIcon|Chalk Eater|name=1}} - Grants buffs or more press turns when hitting weaknesses. | ||
| + | ** {{LiberatorIcon|Shionyan|name=1}} - Grants +12 Mag for magic teams. If paired with Idun, can offer extra MP occasionally. | ||
| + | ** {{LiberatorIcon|Carbon Black|name=1}} - Crit damage and +12 Str for physical teams. | ||
| + | ** {{LiberatorIcon|Templar Dragon|name=1}} - Boost damage of demons that use {{EffectIcon|Charge|name=1}} or {{EffectIcon|Concentrate|name=1}}. | ||
| + | |||
| + | '''Recommended demons:''' | ||
| + | <br>In addition to the units detailed in the [[Demon Alliance Invasion#Useful Demons|Useful Demons]] section of this guide: | ||
| + | |||
| + | Support: | ||
| + | * {{DemonIcon|Demeter|size=32px}}: counteracts the boss's {{EffectIcon|DEF Debuff|name=1}} spam during the enemy turn, as well as providing plenty of [[Luster Candy]] buffs overall. | ||
| + | * {{DemonIcon|Ame no Uzume|size=32px}}: pairs well with {{DemonIcon|Seth|size=32px}} or {{DemonIcon|Mahamayuri|size=32px}}, since they deal Force damage and heal, triggering Ame's {{EffectIcon|ATK Buff|name=1}}. | ||
| + | * [[File:silveruniticon.png|32px|link=]] {{DemonIcon|Barong|size=32px}}: [[Luster Candy]] buffs from [[Barong Dance]]. | ||
| + | |||
| + | Damage for phase 1 ({{ElementIcon|Elec|name=1}} and {{ElementIcon|Force|name=1}}) | ||
| + | * [[File:silveruniticon.png|32px|link=]] {{DemonIcon|Loup-Garou|size=32px}}: Elec affinity down, Elec damage aura for the party, and reduces party's Elec skill MP costs. | ||
| + | * [[File:silveruniticon.png|32px|link=]] {{DemonIcon|Zeus|size=32px}}: Elec affinity down, grants an extra press turn. | ||
| + | * [[File:silveruniticon.png|32px|link=]] {{DemonIcon|Odin A|size=32px}}: Sets up {{EffectIcon|Zenith|name=1}} and {{EffectIcon|Gloom|name=1}}, grants Phys/Elec damage and crit rate aura to the party, and doesn't consume press turns when he hits weakness. | ||
| + | * [[File:silveruniticon.png|32px|link=]] {{DemonIcon|Indrajit|size=32px}}: Damage and {{EffectIcon|ATK Buff|name=1}} from [[Lightning Shower]]. | ||
| + | * [[File:silveruniticon.png|32px|link=]] {{DemonIcon|Queen Mab|size=32px}}: Automatic Fire/Elec attack every time an ally acts, an Elec/Fire damage aura for the party, and an {{EffectIcon|ATK Buff|name=1}} every player turn. | ||
| + | * [[File:silveruniticon.png|32px|link=]] {{DemonIcon|Botis|size=32px}}: Automatic follow-up when an ally uses Elec, and applies Elec [[anti-damage reduction]] to the boss. If panel 2, then [[Accursed Lightning]] also grants an {{EffectIcon|ATK Buff|name=1}} with every cast. | ||
| + | * {{DemonIcon|Izanami|size=32px}}: Elec damage aura for the party, and reduces party's Elec skill MP costs. | ||
| + | * {{DemonIcon|Morrighan|size=32px}}: Force affinity down, {{EffectIcon|Spirit Chains of Corrosion|name=1}}, and [[Luster Candy]] buff from [[Ruthless Death Gale]]. | ||
| + | * {{DemonIcon|Lugh|size=32px}}: Force (and Light) affinity down, grants weakness damage aura to the party, gives himself {{EffectIcon|Charge|name=1}}, and has high crit rate. | ||
| + | * {{DemonIcon|Kumbhanda|size=32px}}: Force affinity down (first turn only, does not refresh), {{EffectIcon|Spirit Chains of Corrosion|name=1}}, and generates a press turn. | ||
| + | * {{DemonIcon|Susano-o|size=32px}}: Damage and {{EffectIcon|ATK Buff|name=1}} from [[Kusanagi]]. Note that he uses PATK but his skill outputs magic damage, so this may make synergies awkward. Also be careful that he does not have pierce until panel 4. | ||
| + | * [[File:silveruniticon.png|32px|link=]] {{DemonIcon|Nyarlathotep|size=32px}}: Sets up {{EffectIcon|Gloom|name=1}} and makes the enemy take more magic damage while Gloomed. | ||
| + | * [[File:silveruniticon.png|32px|link=]] {{DemonIcon|Seth|size=32px}}: Damage and self-heal from [[Ouas]] to trigger Ame no Uzume's buffs. | ||
| + | * {{DemonIcon|Pendragon|size=32px}}: Deals a Force (or Ice) follow-up every time an ally hits a weakness. | ||
| + | * {{DemonIcon|Krishna|size=32px}}: Generates a press turn. | ||
| + | * {{DemonIcon|Sabaoth|size=32px}}: Potentially grants an extra press turn, if he uses [[Sanction]] while in the second half of a press turn. | ||
| + | * {{DemonIcon|Mahamayuri|size=32px}}: Damage and party heal from [[Blossoming Cyclone]] to trigger Ame no Uzume's buffs. | ||
| + | |||
| + | Damage ({{ElementIcon|Fire|name=1}} and {{ElementIcon|Ice|name=1}}) | ||
| + | * [[File:silveruniticon.png|32px|link=]] {{DemonIcon|Adramelech|size=32px}}: Fire affinity down, and an {{EffectIcon|ATK Buff|name=1}} every time he uses [[Sacrificial Inferno]]. | ||
| + | * [[File:silveruniticon.png|32px|link=]] {{DemonIcon|Lost Name|size=32px}}: {{EffectIcon|ATK Buff|name=1}} every time he acts, grants an extra press turn, gives himself {{EffectIcon|Charge|name=1}}, and has high crit rate. | ||
| + | * [[File:silveruniticon.png|32px|link=]] {{DemonIcon|Elohim|size=32px}}: Damage and {{EffectIcon|ATK Buff|name=1}} from [[Solar Flare]]. | ||
| + | * [[File:silveruniticon.png|32px|link=]] {{DemonIcon|Queen Mab|size=32px}}: Automatic Fire/Elec attack every time an ally acts, an Elec/Fire damage aura for the party, and an {{EffectIcon|ATK Buff|name=1}} every player turn. | ||
| + | * [[File:silveruniticon.png|32px|link=]] {{DemonIcon|Mahakala|size=32px}}: {{EffectIcon|ATK Debuff|name=1}} and {{EffectIcon|DEF Debuff|name=1}} from [[Wrathful Flame]], as well as automatic {{EffectIcon|Concentrate|name=1}} for himself. If panel 3, Wrathful Flame also applies {{EffectIcon|ATK Buff|name=1}} and {{EffectIcon|DEF Buff|name=1}}. | ||
| + | * [[File:silveruniticon.png|32px|link=]] {{DemonIcon|Mithras|size=32px}}: Automatic follow-up when an ally uses Fire (or Light), and applies Fire/Light [[anti-damage reduction]] to the boss. | ||
| + | * [[File:silveruniticon.png|32px|link=]] {{DemonIcon|Moloch|size=32px}}: Fire damage aura for the team. | ||
| + | * [[File:silveruniticon.png|32px|link=]] {{DemonIcon|Mada|size=32px}}: Damage and [[Bulwark]]s for the team, if needed. | ||
| + | * {{DemonIcon|Sukuna-Hikona A|size=32px}}: Ice affinity down, {{EffectIcon|ATK Buff|name=1}} + {{EffectIcon|DEF Debuff|name=1}} + MP regen when an ally hits a weakness. | ||
| + | * {{DemonIcon|Vivian|size=32px}}: {{EffectIcon|ATK Buff|name=1}} every time she casts [[Teardrop]], and applies [[anti-damage reduction]] to the boss. | ||
| + | * {{DemonIcon|Anahita|size=32px}}: Damage and {{EffectIcon|ATK Buff|name=1}} from [[Hell Stream]], as well as Bulwarks if needed. If panel 2, also has a magic damage aura for the party. | ||
| + | * {{DemonIcon|Rahab|size=32px}}: {{EffectIcon|ATK Buff|name=1}} when an ally or the enemy hits a weakness. Also gives himself {{EffectIcon|Might|name=1}} alongside this effect. | ||
| + | * {{DemonIcon|Kuzuryu|size=32px}}: [[Luster Candy]] + {{EffectIcon|DEF Debuff|name=1}} + {{EffectIcon|Concentrate|name=1}} for himself every time he casts [[Roaring Torrent]]. | ||
| + | * {{DemonIcon|Kumbhanda|size=32px}}: {{EffectIcon|Spirit Chains of Corrosion|name=1}}, and generates a press turn. | ||
| + | * {{DemonIcon|Frost Ace|size=32px}}: Ice damage aura for the party (especially if panel 2) and party-wide {{EffectIcon|Might|name=1}} every time he uses [[Vengeful Frost Fist]]. | ||
| + | * {{DemonIcon|Pendragon|size=32px}}: Deals a Force (or Ice) follow-up every time an ally hits a weakness. | ||
| + | |||
| + | </div> | ||
| + | |||
| + | =="Hell's Hunter Takes Aim" event== | ||
| + | [[https://d2-megaten-l.sega.com/en/news/detail/096998.html Official News Announcement]] | ||
| + | |||
| + | ===Normal: Ose [[File:Ose.jpg|32px|link=]]=== | ||
| + | <div class="toccolours mw-collapsible mw-collapsed" style="overflow:auto;"> | ||
| + | [[File:encounter_ose.jpg|thumb]] | ||
| + | <br><big>'''Battle 1'''</big> | ||
| + | {| class="wikitable" | ||
| + | !align="center"| | ||
| + | !align="center"| {{ElementIcon|Phys}} | ||
| + | !align="center"| {{ElementIcon|Fire}} | ||
| + | !align="center"| {{ElementIcon|Ice}} | ||
| + | !align="center"| {{ElementIcon|Elec}} | ||
| + | !align="center"| {{ElementIcon|Force}} | ||
| + | !align="center"| {{ElementIcon|Light}} | ||
| + | !align="center"| {{ElementIcon|Dark}} | ||
| + | |- | ||
| + | | '''Ose''' | ||
| + | | - | ||
| + | | - | ||
| + | | - | ||
| + | | - | ||
| + | | Wk | ||
| + | | - | ||
| + | | Rs | ||
| + | |- | ||
| + | |} | ||
| + | |||
| + | * {{ElementIcon|Phys}} [[Hades Blast]] | ||
| + | * {{ElementIcon|Elec}} [[Mazionga]] | ||
| + | * Force Defect (changes Force affinity to Weak) | ||
| + | [[File:Super-auto-recovery-bind.jpg|300px]] | ||
| + | |||
| + | <br><big>'''Battle 2'''</big> | ||
| + | {| class="wikitable" | ||
| + | !align="center"| | ||
| + | !align="center"| {{ElementIcon|Phys}} | ||
| + | !align="center"| {{ElementIcon|Fire}} | ||
| + | !align="center"| {{ElementIcon|Ice}} | ||
| + | !align="center"| {{ElementIcon|Elec}} | ||
| + | !align="center"| {{ElementIcon|Force}} | ||
| + | !align="center"| {{ElementIcon|Light}} | ||
| + | !align="center"| {{ElementIcon|Dark}} | ||
| + | |- | ||
| + | | '''Ose''' | ||
| + | | - | ||
| + | | - | ||
| + | | - | ||
| + | | - | ||
| + | | Wk | ||
| + | | - | ||
| + | | Rs | ||
| + | |- | ||
| + | |} | ||
| + | * {{ElementIcon|Phys}} [[Hades Blast]] | ||
| + | * {{ElementIcon|Elec}} [[Mazionga]] | ||
| + | * Force Defect (changes Force affinity to Weak) | ||
| + | [[File:Soul-fracture-20.jpg|300px]] | ||
| + | [[File:Super-auto-recovery-bind.jpg|300px]] | ||
| + | |||
| + | '''Notes''' | ||
| + | * Trivial fight, just bring your SP units to squeeze as many points from it as possible. | ||
| + | </div> | ||
| + | |||
| + | ===Superior: Dantalian [[File:Dantalian.jpg|32px|link=]]=== | ||
| + | <div class="toccolours mw-collapsible mw-collapsed" style="overflow:auto;"> | ||
| + | [[File:encounter_dantalian.png|thumb]] | ||
| + | <br><big>'''Battle 1'''</big> | ||
| + | {| class="wikitable" | ||
| + | !align="center"| | ||
| + | !align="center"| {{ElementIcon|Phys}} | ||
| + | !align="center"| {{ElementIcon|Fire}} | ||
| + | !align="center"| {{ElementIcon|Ice}} | ||
| + | !align="center"| {{ElementIcon|Elec}} | ||
| + | !align="center"| {{ElementIcon|Force}} | ||
| + | !align="center"| {{ElementIcon|Light}} | ||
| + | !align="center"| {{ElementIcon|Dark}} | ||
| + | |- | ||
| + | | '''Dantalian''' | ||
| + | | - | ||
| + | | Rs | ||
| + | | Rs | ||
| + | | Rs | ||
| + | | Wk | ||
| + | | Rs | ||
| + | | Rs | ||
| + | |- | ||
| + | |} | ||
| + | |||
| + | * {{ElementIcon|Force}} [[Turbulent Advent]] | ||
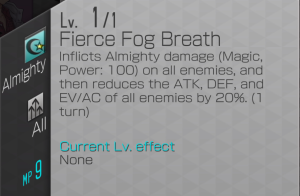
| + | [[File:Fierce-fog-breath.png|300px]] | ||
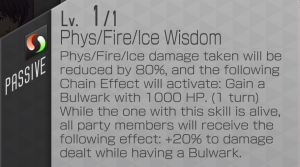
| + | [[File:Phys-fire-ice-wisdom.png|300px]] | ||
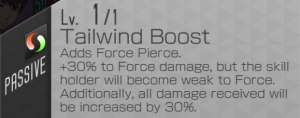
| + | [[File:Tailwind-boost.png|300px]] | ||
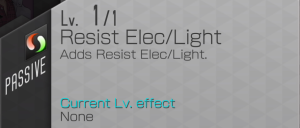
| + | [[File:Resist-elec-light.png|300px]] | ||
| + | [[File:Super-auto-recovery-bind.jpg|300px]] | ||
| + | |||
| + | <br><big>'''Battle 1'''</big> | ||
| + | {| class="wikitable" | ||
| + | !align="center"| | ||
| + | !align="center"| {{ElementIcon|Phys}} | ||
| + | !align="center"| {{ElementIcon|Fire}} | ||
| + | !align="center"| {{ElementIcon|Ice}} | ||
| + | !align="center"| {{ElementIcon|Elec}} | ||
| + | !align="center"| {{ElementIcon|Force}} | ||
| + | !align="center"| {{ElementIcon|Light}} | ||
| + | !align="center"| {{ElementIcon|Dark}} | ||
| + | |- | ||
| + | | '''Dantalian''' | ||
| + | | - | ||
| + | | Rs | ||
| + | | Rs | ||
| + | | Rs | ||
| + | | Wk | ||
| + | | Rs | ||
| + | | Rs | ||
| + | |- | ||
| + | |} | ||
| + | |||
| + | * {{ElementIcon|Force}} [[Turbulent Advent]] | ||
| + | [[File:Fierce-fog-breath.png|300px]] | ||
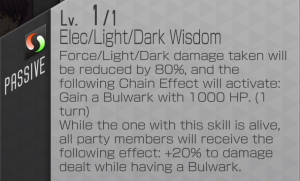
| + | [[File:Elec-light-dark-wisdom.png|300px]] | ||
| + | [[File:Tailwind-boost.png|300px]] | ||
| + | [[File:Resist-elec-light.png|300px]] | ||
| + | [[File:Super-auto-recovery-bind.jpg|300px]] | ||
| + | |||
| + | '''Notes''' | ||
| + | * Another simple fight, the main concern is 80% damage reduction + a 1000 HP Bulwark if you use certain elements, depending on the phase: | ||
| + | ** Phase 1 penalizes {{ElementIcon|Phys|name=1}}, {{ElementIcon|Fire|name=1}} or {{ElementIcon|Ice|name=1}} damage. | ||
| + | ** Phase 2 penalizes {{ElementIcon|Elec|name=1}}, {{ElementIcon|Light|name=1}} or {{ElementIcon|Dark|name=1}} damage. | ||
| + | ** {{ElementIcon|Force|name=1}} damage is safe on either phase. | ||
| + | ** The Bulwark is actually a non-issue, as 1,000 HP is practically nothing for the boss in this mode. As long as your main damage dealers aren't getting 805 reduced, you should be able to punch through the Bulwarks no problem. | ||
| + | * Dantalian is weak to Force the whole time, as opposed to Barbatos, who needs setup. This means you can earn extra turns with cheap non-piercing {{ElementIcon|Force}} [[Zan]] transfers on supports, if needed. | ||
| + | |||
| + | '''Recommended demons:''' | ||
| + | <br>In addition to the units detailed in the [[Demon Alliance Invasion#Useful Demons|Useful Demons]] section of this guide: | ||
| + | |||
| + | Support: | ||
| + | * | ||
| + | |||
| + | |||
| + | Damage: | ||
| + | * | ||
| + | |||
| + | </div> | ||
| + | |||
| + | ===Ultimate: Barbatos [[File:Barbatos.jpg|32px|link=]]=== | ||
| + | <div class="toccolours mw-collapsible mw-collapsed" style="overflow:auto;"> | ||
| + | [[File:encounter_barbatos.png|thumb]] | ||
| + | <br><big>'''Battle 1'''</big> | ||
| + | {| class="wikitable" | ||
| + | !align="center"| | ||
| + | !align="center"| {{ElementIcon|Phys}} | ||
| + | !align="center"| {{ElementIcon|Fire}} | ||
| + | !align="center"| {{ElementIcon|Ice}} | ||
| + | !align="center"| {{ElementIcon|Elec}} | ||
| + | !align="center"| {{ElementIcon|Force}} | ||
| + | !align="center"| {{ElementIcon|Light}} | ||
| + | !align="center"| {{ElementIcon|Dark}} | ||
| + | |- | ||
| + | | '''Barbatos''' | ||
| + | | - | ||
| + | | - | ||
| + | | - | ||
| + | | Rs | ||
| + | | Nu | ||
| + | | Rs | ||
| + | | Rs | ||
| + | |- | ||
| + | |} | ||
| + | |||
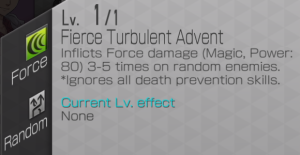
| + | [[File:Fierce-turbulent-advent.png|300px]] | ||
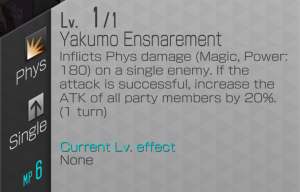
| + | [[File:Yakumo-ensnarement.png|300px]] | ||
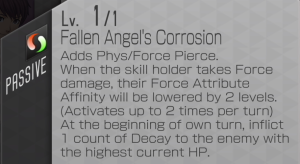
| + | [[File:Fallen-angels-corrosion.png|300px]] | ||
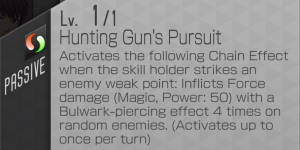
| + | [[File:Hunting-guns-pursuit.png|300px]] | ||
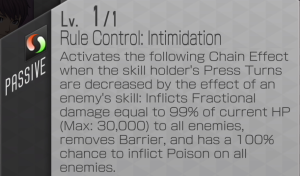
| + | [[File:Rule-control-intimidation.png|300px]] | ||
| + | [[File:Super-auto-recovery-bind.jpg|300px]] | ||
| + | |||
| + | <br><big>'''Battle 2'''</big> | ||
| + | {| class="wikitable" | ||
| + | !align="center"| | ||
| + | !align="center"| {{ElementIcon|Phys}} | ||
| + | !align="center"| {{ElementIcon|Fire}} | ||
| + | !align="center"| {{ElementIcon|Ice}} | ||
| + | !align="center"| {{ElementIcon|Elec}} | ||
| + | !align="center"| {{ElementIcon|Force}} | ||
| + | !align="center"| {{ElementIcon|Light}} | ||
| + | !align="center"| {{ElementIcon|Dark}} | ||
| + | |- | ||
| + | | '''Barbatos''' | ||
| + | | - | ||
| + | | - | ||
| + | | - | ||
| + | | Rs | ||
| + | | Nu | ||
| + | | Rs | ||
| + | | Rs | ||
| + | |- | ||
| + | |} | ||
| + | |||
| + | [[File:Soul-fracture-20.jpg|300px]] | ||
| + | [[File:Fierce-turbulent-advent.png|300px]] | ||
| + | [[File:Yakumo-ensnarement.png|300px]] | ||
| + | [[File:Fallen-angels-corrosion.png|300px]] | ||
| + | [[File:Rule-control-intimidation.png|300px]] | ||
| + | [[File:Super-auto-recovery-bind.jpg|300px]] | ||
| + | |||
| + | '''Notes:''' | ||
| + | * Avoid using [[Intimidating Stance]]-like effects, as that'll trigger Rule Control, which will most likely KO your party. | ||
| + | * Fallen Angel's Corrosion reduces the boss's {{ElementIcon|Force|name=1}} resistance by 2 levels, up to twice. He starts at Null, so attack with piercing Force damage twice to get him down to Weak. This can then get you more damage, more turns, and Chalk Eater synergy for buffs + more turns. | ||
| + | ** Alternatively, someone with [[Attribute affinity down]] can work as a more-direct solution that doesn't need as much setup. | ||
| + | ** [[Devil Connector]] skills unfortunately do not count for triggering Corrosion. | ||
| + | * In Phase 1, be careful about bringing {{ElementIcon|Force|name=1}} weak demons, as this will trigger a follow up attack by the boss. | ||
| + | ** If you have {{DemonIcon|Demeter|size=32px}}, then you can bring them intentionally, so she can [[Bulwark]] + buff from the boss's follow-up hit. | ||
| + | ** {{DemonIcon|Orcus|size=32px}} works similarly, but he will only apply [[File:Icon ATK Buff.png|32px|link=]] ATK buffs and will disable bonus turns gained from weakness, making him a worse, but still useful, alternative. | ||
| + | ** Other options for the weakness-tanking strategy: {{DemonIcon|Rahab|size=32px}}, {{DemonIcon|Gogmagog|size=32px}} (also heals for Ame), {{DemonIcon|Barong|size=32px}} (also heals for Ame), {{DemonIcon|Ananta|size=32px}}. | ||
| + | ** {{DemonIcon|Zeus|size=32px}} is weak to Force, and so are most {{ElementIcon|Elec|name=1}} attackers - his attribute affinity down can open the door for them to attack, while their Force weaknesses synergize with the tank strategy. | ||
| + | |||
| + | * Liberators: | ||
| + | ** {{LiberatorIcon|Chalk Eater|name=1}} - Grants buffs or more press turns when hitting weaknesses. | ||
| + | ** {{LiberatorIcon|Shionyan|name=1}} - Grants +12 Mag for magic teams. If paired with Idun, can offer extra MP occasionally. | ||
| + | ** {{LiberatorIcon|Carbon Black|name=1}} - Crit damage and +12 Str for physical teams. | ||
| + | ** {{LiberatorIcon|Templar Dragon|name=1}} - Boost damage of demons that use {{EffectIcon|Charge|name=1}} or {{EffectIcon|Concentrate|name=1}}. | ||
| + | ** {{LiberatorIcon|Meat Balloon|name=1}} - 10% chance to cast a [[File:Icon DEF Buff.png|32px|link=]] DEF buff when hit by magic. Helpful if running a tanky buff engine that eats lots of hits, such as Demeter/Orcus + Ame no Uzume + Barong + Ananta. | ||
| + | |||
| + | '''Recommended demons:''' | ||
| + | <br>In addition to the units detailed in the [[Demon Alliance Invasion#Useful Demons|Useful Demons]] section of this guide: | ||
| + | |||
| + | Support: | ||
| + | * {{DemonIcon|Ame no Uzume|size=32px}}'s Force weakness makes her synergize with the Demeter tank strategy in phase 1. Consider pairing her with {{DemonIcon|Seth|size=32px}} or {{DemonIcon|Mahamayuri|size=32px}}, since they deal Force damage and heal, triggering Ame's [[File:Icon ATK Buff.png|32px|link=]] ATK buff. | ||
| + | ** {{DemonIcon|Gogmagog|size=32px}} also has a Force weakness, and [[Final Opposition]] heals himself, triggering Ame's buff. | ||
| + | ** {{DemonIcon|Barong|size=32px}} has a Force weakness, plus he heals + buffs with [[Barong Dance]]. | ||
| + | * {{DemonIcon|Idun|size=32px}} offers bulk and MP regen to the team, like Demeter. The variety of ailments on Goddess's Prank can also help trigger Shionyan's MP recovery effects against Poisoned/Charmed/Muted enemies. | ||
| + | * Side note: be careful about using {{DemonIcon|Narcissus|size=32px}}. His Force chain effect and team bulwarks seem promising, but the event's stacked buffs can get so high that he will kill his own party members (his gimmick is that he bulwarks the team, [[Merciless Love]] slaps teammates for tiny damage since he's charmed, then his chains hit the enemy for big damage). | ||
| + | ** Narcissus' standard attack (the thing he hits allies with) sometimes deals much less damage to allies than it should. It's unclear what causes this (tends to happen in team 2, but not always, etc), but due to this it's fairly safe to use him in the Dantalian fight. It's still not a good idea to use him in the Barbatos fight, though. | ||
| + | |||
| + | Damage: | ||
| + | * [[File:silveruniticon.png|32px|link=]] {{DemonIcon|Morrighan|size=32px}}: Damage and Luster Candy buff from [[Ruthless Death Gale]]. | ||
| + | * [[File:silveruniticon.png|32px|link=]] {{DemonIcon|Susano-o|size=32px}}: Damage and [[File:Icon ATK Buff.png|32px|link=]] ATK buff from [[Kusanagi]]. Note that he uses PATK but his skill outputs magic damage, so this may make synergies awkward. Also be careful that he does not have pierce until panel 4. | ||
| + | * [[File:silveruniticon.png|32px|link=]] {{DemonIcon|Lugh|size=32px}}: Force (and Light) affinity down, grants weakness damage aura to the party. | ||
| + | * [[File:silveruniticon.png|32px|link=]] {{DemonIcon|Rahab|size=32px}}: [[File:Icon ATK Buff.png|32px|link=]] ATK buff when an ally or the enemy hits a weakness. This can synergize with the Demeter tank strat in phase 1, especially since Rahab himself is also weak to Force. Even though the enemy's not weak to Ice, Rahab gives himself {{EffectIcon|Might|name=1}} alongside this effect, so he can therefore crit reliably for extra turns. | ||
| + | * [[File:silveruniticon.png|32px|link=]] {{DemonIcon|Pendragon|size=32px}}: Deals a Force (or Ice) follow-up every time an ally hits a weakness. | ||
| + | * [[File:silveruniticon.png|32px|link=]] {{DemonIcon|Sabaoth|size=32px}}: Potentially grants an extra press turn, if he uses [[Sanction]] while in the second half of a press turn. | ||
| + | * [[File:silveruniticon.png|32px|link=]] {{DemonIcon|Seth|size=32px}}: Damage and self-heal from [[Ouas]] to trigger Ame no Uzume's buffs. | ||
| + | * [[File:silveruniticon.png|32px|link=]] {{DemonIcon|Mahamayuri|size=32px}}: Damage and party heal from [[Blossoming Cyclone]] to trigger Ame no Uzume's buffs. | ||
| + | * [[File:silveruniticon.png|32px|link=]] {{DemonIcon|Nyarlathotep|size=32px}}: Sets up {{EffectIcon|Gloom|name=1}} ('''but only in phase 1!''') and makes the enemy take more magic damage while Gloomed. | ||
| + | * Any Affinity lowering demon will help greatly, since they can enable Chalk Eater teams. | ||
| + | |||
| + | </div> | ||
| + | |||
| + | |||
| + | =="The Wolf and the Blood Banquet" event== | ||
| + | [[https://d2-megaten-l.sega.com/en/news/detail/096540.html Official News Announcement]] | ||
| + | |||
| + | ===Normal: Ammut [[File:Ammut.jpg|32px|link=]]=== | ||
| + | <div class="toccolours mw-collapsible mw-collapsed" style="overflow:auto;"> | ||
| + | [[File:encounter_ammut.jpg|thumb]] | ||
| + | <br><big>'''Battle 1'''</big> | ||
| + | {| class="wikitable" | ||
| + | !align="center"| | ||
| + | !align="center"| {{ElementIcon|Phys}} | ||
| + | !align="center"| {{ElementIcon|Fire}} | ||
| + | !align="center"| {{ElementIcon|Ice}} | ||
| + | !align="center"| {{ElementIcon|Elec}} | ||
| + | !align="center"| {{ElementIcon|Force}} | ||
| + | !align="center"| {{ElementIcon|Light}} | ||
| + | !align="center"| {{ElementIcon|Dark}} | ||
| + | |- | ||
| + | | '''Ammut''' | ||
| + | | - | ||
| + | | - | ||
| + | | Wk | ||
| + | | Wk | ||
| + | | - | ||
| + | | - | ||
| + | | - | ||
| + | |- | ||
| + | |} | ||
| + | |||
| + | * {{ElementIcon|Almighty}} [[Deathtouch]] | ||
| + | * {{ElementIcon|Phys}} [[Madness Nails]] | ||
| + | * Elec Defect (changes Elec affinity to Weak) | ||
| + | [[File:Soul-fracture-20.jpg|300px]] | ||
| + | [[File:Super-auto-recovery-bind.jpg|300px]] | ||
| + | |||
| + | <br><big>'''Battle 2'''</big> | ||
| + | {| class="wikitable" | ||
| + | !align="center"| | ||
| + | !align="center"| {{ElementIcon|Phys}} | ||
| + | !align="center"| {{ElementIcon|Fire}} | ||
| + | !align="center"| {{ElementIcon|Ice}} | ||
| + | !align="center"| {{ElementIcon|Elec}} | ||
| + | !align="center"| {{ElementIcon|Force}} | ||
| + | !align="center"| {{ElementIcon|Light}} | ||
| + | !align="center"| {{ElementIcon|Dark}} | ||
| + | |- | ||
| + | | '''Ammut''' | ||
| + | | - | ||
| + | | - | ||
| + | | Wk | ||
| + | | Wk | ||
| + | | - | ||
| + | | - | ||
| + | | - | ||
| + | |- | ||
| + | |} | ||
| + | |||
| + | * {{ElementIcon|Almighty}} [[Deathtouch]] | ||
| + | * {{ElementIcon|Phys}} [[Madness Nails]] | ||
| + | * Elec Defect (changes Elec affinity to Weak) | ||
| + | * [[File:Icon ATK Debuff.png|32px|link=]][[File:Icon DEF Debuff.png|32px|link=]] [[War Cry]] | ||
| + | [[File:Soul-fracture-20.jpg|300px]] | ||
| + | [[File:Super-auto-recovery-bind.jpg|300px]] | ||
| + | |||
| + | '''Notes''' | ||
| + | * Reduce boss hp to zero. | ||
| + | * Non-issue fight, just bring your SP units to squeeze as many points from it as possible. | ||
| + | |||
| + | </div> | ||
| + | |||
| + | ===Superior: Man Eater [[File:Man Eater.jpg|32px|link=]]=== | ||
| + | <div class="toccolours mw-collapsible mw-collapsed" style="overflow:auto;"> | ||
| + | [[File:encounter_maneater.png|thumb]] | ||
| + | <br><big>'''Battle 1'''</big> | ||
| + | {| class="wikitable" | ||
| + | !align="center"| | ||
| + | !align="center"| {{ElementIcon|Phys}} | ||
| + | !align="center"| {{ElementIcon|Fire}} | ||
| + | !align="center"| {{ElementIcon|Ice}} | ||
| + | !align="center"| {{ElementIcon|Elec}} | ||
| + | !align="center"| {{ElementIcon|Force}} | ||
| + | !align="center"| {{ElementIcon|Light}} | ||
| + | !align="center"| {{ElementIcon|Dark}} | ||
| + | |- | ||
| + | | '''Maneater''' | ||
| + | | - | ||
| + | | Wk | ||
| + | | - | ||
| + | | Wk | ||
| + | | - | ||
| + | | Rs | ||
| + | | Rp | ||
| + | |- | ||
| + | |} | ||
| + | |||
| + | * [[Resist Light]] | ||
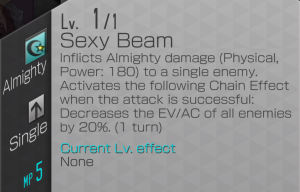
| + | [[File:Sexy-beam.png|300px]] | ||
| + | [[File:Fierce-rending-thunder.png|300px]] | ||
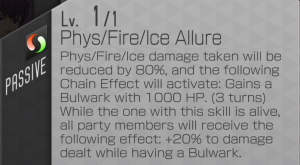
| + | [[File:Phys-fire-ice-allure.png|300px]] | ||
| + | [[File:Turbocharge-boost.png|300px]] | ||
| + | [[File:Super-auto-recovery-bind.jpg|300px]] | ||
| + | |||
| + | <br><big>'''Battle 1'''</big> | ||
| + | {| class="wikitable" | ||
| + | !align="center"| | ||
| + | !align="center"| {{ElementIcon|Phys}} | ||
| + | !align="center"| {{ElementIcon|Fire}} | ||
| + | !align="center"| {{ElementIcon|Ice}} | ||
| + | !align="center"| {{ElementIcon|Elec}} | ||
| + | !align="center"| {{ElementIcon|Force}} | ||
| + | !align="center"| {{ElementIcon|Light}} | ||
| + | !align="center"| {{ElementIcon|Dark}} | ||
| + | |- | ||
| + | | '''Maneater''' | ||
| + | | - | ||
| + | | Wk | ||
| + | | - | ||
| + | | Wk | ||
| + | | - | ||
| + | | Rs | ||
| + | | Rp | ||
| + | |- | ||
| + | |} | ||
| + | |||
| + | * [[Resist Light]] | ||
| + | [[File:Sexy-beam.png|300px]] | ||
| + | [[File:Fierce-rending-thunder.png|300px]] | ||
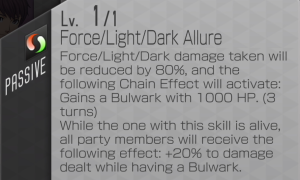
| + | [[File:Force-light-dark-allure.png|300px]] | ||
| + | [[File:Turbocharge-boost.png|300px]] | ||
| + | [[File:Super-auto-recovery-bind.jpg|300px]] | ||
| + | |||
| + | '''Notes''' | ||
| + | * Another simple fight, no real gimmicks outside of bulwark spam. | ||
| + | * To avoid triggering Bulwark, ensure your first team has no {{ElementIcon|Phys|name=1}}, {{ElementIcon|Fire|name=1}} or {{ElementIcon|Ice|name=1}} damage, while your second team should avoid {{ElementIcon|Force|name=1}}, {{ElementIcon|Light|name=1}} and {{ElementIcon|Dark|name=1}} damage. {{ElementIcon|Elec|name=1}} damage is safe on either phase. | ||
| + | |||
| + | '''Recommended demons:''' | ||
| + | <br>In addition to the units detailed in the [[Demon Alliance Invasion#Useful Demons|Useful Demons]] section of this guide: | ||
| + | |||
| + | Support: | ||
| + | * | ||
| + | |||
| + | |||
| + | Damage: | ||
| + | * | ||
| + | |||
| + | </div> | ||
| + | |||
| + | ===Ultimate: Loup-Garou [[File:Loup-Garou.jpg|32px|link=]]=== | ||
| + | <div class="toccolours mw-collapsible mw-collapsed" style="overflow:auto;"> | ||
| + | [[File:encounter_loupgarou.png|thumb]] | ||
| + | <br><big>'''Battle 1'''</big> | ||
| + | {| class="wikitable" | ||
| + | !align="center"| | ||
| + | !align="center"| {{ElementIcon|Phys}} | ||
| + | !align="center"| {{ElementIcon|Fire}} | ||
| + | !align="center"| {{ElementIcon|Ice}} | ||
| + | !align="center"| {{ElementIcon|Elec}} | ||
| + | !align="center"| {{ElementIcon|Force}} | ||
| + | !align="center"| {{ElementIcon|Light}} | ||
| + | !align="center"| {{ElementIcon|Dark}} | ||
| + | |- | ||
| + | | '''Loup Garou''' | ||
| + | | - | ||
| + | | Rs | ||
| + | | Rs | ||
| + | | Nu | ||
| + | | - | ||
| + | | - | ||
| + | | - | ||
| + | |- | ||
| + | |} | ||
| + | |||
| + | [[File:Fierce-thunderous-advent.png|300px]] | ||
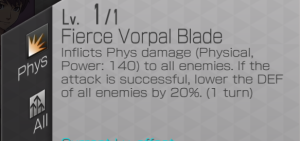
| + | [[File:Fierce-vorpal-blade.png|300px]] | ||
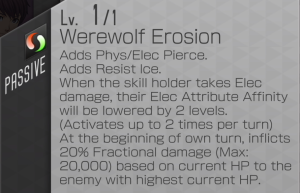
| + | [[File:Werewolf-erosion.png|300px]] | ||
| + | [[File:Lightnings-pursuit.png|300px]] | ||
| + | [[File:Rule-control.jpg|300px]] | ||
| + | [[File:Super-auto-recovery-bind.jpg|300px]] | ||
| + | |||
| + | <br><big>'''Battle 2'''</big> | ||
| + | {| class="wikitable" | ||
| + | !align="center"| | ||
| + | !align="center"| {{ElementIcon|Phys}} | ||
| + | !align="center"| {{ElementIcon|Fire}} | ||
| + | !align="center"| {{ElementIcon|Ice}} | ||
| + | !align="center"| {{ElementIcon|Elec}} | ||
| + | !align="center"| {{ElementIcon|Force}} | ||
| + | !align="center"| {{ElementIcon|Light}} | ||
| + | !align="center"| {{ElementIcon|Dark}} | ||
| + | |- | ||
| + | | '''Loup Garou''' | ||
| + | | - | ||
| + | | Rs | ||
| + | | Rs | ||
| + | | Nu | ||
| + | | - | ||
| + | | - | ||
| + | | - | ||
| + | |- | ||
| + | |} | ||
| + | |||
| + | [[File:Soul-fracture-20.jpg|300px]] | ||
| + | [[File:Fierce-thunderous-advent.png|300px]] | ||
| + | [[File:Fierce-vorpal-blade.png|300px]] | ||
| + | [[File:Werewolf-erosion.png|300px]] | ||
| + | [[File:Rule-control.jpg|300px]] | ||
| + | [[File:Super-auto-recovery-bind.jpg|300px]] | ||
| + | |||
| + | '''Notes:''' | ||
| + | * In Phase 1, be careful about bringing {{ElementIcon|Elec|name=1}} weak demons as this will trigger a follow up attack by the boss. | ||
| + | ** If you have {{DemonIcon|Demeter|size=32px}}, then you can bring them intentionally, so she can [[Bulwark]] + buff from the boss's follow-up hit. | ||
| + | ** {{DemonIcon|Orcus|size=32px}} works similarly, but he will only apply [[File:Icon ATK Buff.png|32px|link=]] ATK buffs and will disable bonus turns gained from weakness, making him a worse, but still useful, alternative. | ||
| + | * '''Werewolf Erosion''' will reduce Loup Garou's {{ElementIcon|Elec|name=1}} resistance for two levels up to twice. This will give him a weakness you can exploit for bonus damage, extra turns and free buffs with Chalk Eater, if you lack one of the affinity down demons like {{DemonIcon|Zeus|size=32px}} or {{DemonIcon|Loup Garou|size=32px}} himself. | ||
| + | |||
| + | * Liberators: | ||
| + | ** {{LiberatorIcon|Chalk Eater|name=1}} - Grants buffs or more press turns when hitting weaknesses. | ||
| + | ** {{LiberatorIcon|Shionyan|name=1}} - Grants +12 Mag for magic teams. | ||
| + | ** {{LiberatorIcon|Carbon Black|name=1}} - Crit damage and +12 Str for physical teams. | ||
| + | ** {{LiberatorIcon|Templar Dragon|name=1}} - Boost damage of demons that use {{EffectIcon|Charge|name=1}} or {{EffectIcon|Concentrate|name=1}}. | ||
| + | |||
| + | '''Recommended demons:''' | ||
| + | <br>In addition to the units detailed in the [[Demon Alliance Invasion#Useful Demons|Useful Demons]] section of this guide: | ||
| + | |||
| + | Support: | ||
| + | * {{DemonIcon|Barong|size=32px}} is notably useful for this particular event since at panel 3 he will lower Elec damage taken by the entire party, in addition to the other stuff that makes him useful. | ||
| + | |||
| + | Damage: | ||
| + | * Any Affinity lowering demon will help greatly, since they can enable Chalk Eater teams. | ||
| + | |||
| + | </div> | ||
| + | |||
| + | =="Offering of the Crow Queen" event== | ||
| + | [[https://d2-megaten-l.sega.com/en/news/detail/096248.html Official News Announcement]] | ||
| + | |||
| + | ===Normal: Suparna [[File:Suparna.jpg|32px|link=]]=== | ||
| + | <div class="toccolours mw-collapsible mw-collapsed" style="overflow:auto;"> | ||
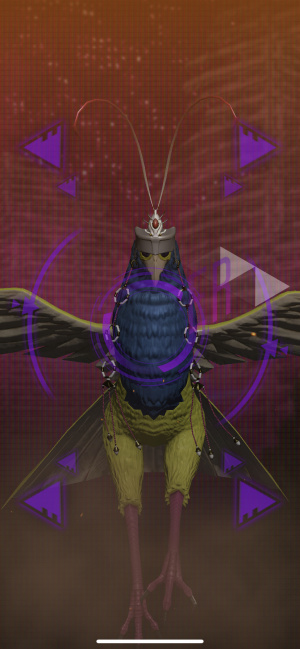
| + | [[File:encounter_suparna.jpg|thumb]] | ||
| + | <br><big>'''Battle 1'''</big> | ||
| + | {| class="wikitable" | ||
| + | !align="center"| | ||
| + | !align="center"| {{ElementIcon|Phys}} | ||
| + | !align="center"| {{ElementIcon|Fire}} | ||
| + | !align="center"| {{ElementIcon|Ice}} | ||
| + | !align="center"| {{ElementIcon|Elec}} | ||
| + | !align="center"| {{ElementIcon|Force}} | ||
| + | !align="center"| {{ElementIcon|Light}} | ||
| + | !align="center"| {{ElementIcon|Dark}} | ||
| + | |- | ||
| + | | '''Suparna''' | ||
| + | | - | ||
| + | | - | ||
| + | | - | ||
| + | | Rs | ||
| + | | - | ||
| + | | Rs | ||
| + | | Wk | ||
| + | |- | ||
| + | |} | ||
| + | |||
| + | * [[File:Elec.png|20px|link=]] [[Zio]] | ||
| + | * [[File:Phys.png|20px|link=]] [[Herculean Strike]] | ||
| + | * [[File:Icon DEF Buff.png|32px|link=]] [[Rakukaja]] | ||
| + | * [[File:super-auto-recovery-bind.jpg|300px]] | ||
| + | |||
| + | <br><big>'''Battle 2'''</big> | ||
| + | {| class="wikitable" | ||
| + | !align="center"| | ||
| + | !align="center"| {{ElementIcon|Phys}} | ||
| + | !align="center"| {{ElementIcon|Fire}} | ||
| + | !align="center"| {{ElementIcon|Ice}} | ||
| + | !align="center"| {{ElementIcon|Elec}} | ||
| + | !align="center"| {{ElementIcon|Force}} | ||
| + | !align="center"| {{ElementIcon|Light}} | ||
| + | !align="center"| {{ElementIcon|Dark}} | ||
| + | |- | ||
| + | | '''Suparna''' | ||
| + | | - | ||
| + | | - | ||
| + | | - | ||
| + | | Rs | ||
| + | | - | ||
| + | | Rs | ||
| + | | Wk | ||
| + | |- | ||
| + | |} | ||
| + | |||
| + | * [[File:Elec.png|20px|link=]] [[Zio]] | ||
| + | * [[File:Phys.png|20px|link=]] [[Herculean Strike]] | ||
| + | * [[File:Icon DEF Buff.png|32px|link=]] [[Rakukaja]] | ||
| + | * [[File:super-auto-recovery-bind.jpg|300px]] | ||
| + | * [[File:soul-fracture-20.jpg|300px]] | ||
| + | |||
| + | '''Notes''' | ||
| + | * Extremely simple fight. No gimmicks. | ||
| + | * Boss has no pierce. | ||
| + | * Simply bring your bonus demons to squeeze a few more points out of him. | ||
| + | * Hitting him with {{ElementIcon|Dark|name=1}} will make him go down even faster. | ||
| + | </div> | ||
| + | |||
| + | ===Superior: Yatagarasu [[File:Yatagarasu.jpg|32px|link=]]=== | ||
| + | <div class="toccolours mw-collapsible mw-collapsed" style="overflow:auto;"> | ||
| + | [[File:encounter_yatagarasu.png|thumb]] | ||
| + | <br><big>'''Battle 1'''</big> | ||
| + | {| class="wikitable" | ||
| + | !align="center"| | ||
| + | !align="center"| {{ElementIcon|Phys}} | ||
| + | !align="center"| {{ElementIcon|Fire}} | ||
| + | !align="center"| {{ElementIcon|Ice}} | ||
| + | !align="center"| {{ElementIcon|Elec}} | ||
| + | !align="center"| {{ElementIcon|Force}} | ||
| + | !align="center"| {{ElementIcon|Light}} | ||
| + | !align="center"| {{ElementIcon|Dark}} | ||
| + | |- | ||
| + | | '''Yatagarasu''' | ||
| + | | - | ||
| + | | Wk | ||
| + | | Wk | ||
| + | | - | ||
| + | | Wk | ||
| + | | Rs | ||
| + | | - | ||
| + | |- | ||
| + | |} | ||
| + | |||
| + | * [[Speedster]] | ||
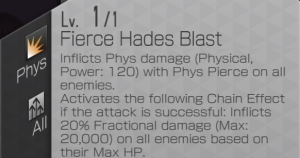
| + | [[File:fierce-hades-blast.png|300px]] | ||
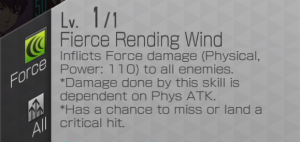
| + | [[File:fierce-rending-wind.png|300px]] | ||
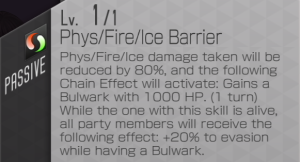
| + | [[File:phys-fire-ice-barrier.png|300px]] | ||
| + | [[File:tailwind-boost.png|300px]] | ||
| + | [[File:super-auto-recovery-bind.jpg|300px]] | ||
| + | |||
| + | <br><big>'''Battle 1'''</big> | ||
| + | {| class="wikitable" | ||
| + | !align="center"| | ||
| + | !align="center"| {{ElementIcon|Phys}} | ||
| + | !align="center"| {{ElementIcon|Fire}} | ||
| + | !align="center"| {{ElementIcon|Ice}} | ||
| + | !align="center"| {{ElementIcon|Elec}} | ||
| + | !align="center"| {{ElementIcon|Force}} | ||
| + | !align="center"| {{ElementIcon|Light}} | ||
| + | !align="center"| {{ElementIcon|Dark}} | ||
| + | |- | ||
| + | | '''Yatagarasu''' | ||
| + | | - | ||
| + | | Wk | ||
| + | | Wk | ||
| + | | - | ||
| + | | Wk | ||
| + | | Rs | ||
| + | | - | ||
| + | |- | ||
| + | |} | ||
| + | |||
| + | * [[Speedster]] | ||
| + | [[File:fierce-hades-blast.png|300px]] | ||
| + | [[File:fierce-rending-wind.png|300px]] | ||
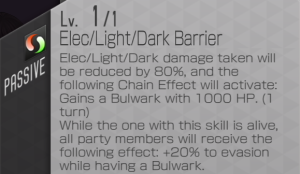
| + | [[File:elec-light-dark-barrier.png|300px]] | ||
| + | [[File:tailwind-boost.png|300px]] | ||
| + | [[File:super-auto-recovery-bind.jpg|300px]] | ||
| + | |||
| + | '''Notes''' | ||
| + | * Another simple fight. Bring your strongest {{ElementIcon|Force|name=1}} units and blow him away. | ||
| + | * While Yatagarasu is also weak to both {{ElementIcon|Fire|name=1}} and {{ElementIcon|Ice|name=1}} the 1st battle will auto cast a 1000 HP Bulwark when hit with these elements. The added 30% damage from Tailwind Boost makes this largely irrelevant since you can just punch through it, however if your demons or brands are lacking this might wall your damage somewhat. Simply utilize Force demons on the 1st fight and Fire or Ice ones on the 2nd fight. | ||
| + | |||
| + | '''Recommended demons:''' | ||
| + | <br>In addition to the units detailed in the [[Demon Alliance Invasion#Useful Demons|Useful Demons]] section of this guide: | ||
| + | |||
| + | Support: | ||
| + | * [[File:silveruniticon.png|32px|link=]] {{DemonIcon|Mahamayuri|size=32px}}: [[Blossoming Cyclone]] deals {{ElementIcon|Force|name=1}} damage, and heals the party. | ||
| + | * [[File:silveruniticon.png|32px|link=]] {{DemonIcon|Ame no Uzume|size=32px}}: If an ally triggers a healing effect, then Ame grants an [[File:Icon ATK Buff.png|32px|link=]] ATK buff (if panel 2, then also a [[File:Icon DEF Buff.png|32px|link=]] DEF buff) - this combos well with demons like {{DemonIcon|Mahamayuri|size=32px}} or {{DemonIcon|Seth|size=32px}}. | ||
| + | |||
| + | |||
| + | Damage: | ||
| + | * Any Affinity lowering demon will help greatly, since they can enable Chalk Eater teams: | ||
| + | ** {{DemonIcon|Hagen|size=32px}} (ideally phase 2) | ||
| + | ** {{DemonIcon|Tiamat A|size=32px}} (ideally phase 1) | ||
| + | ** {{DemonIcon|Zeus|size=32px}} (ideally phase 1) | ||
| + | ** [[File:silveruniticon.png|32px|link=]] {{DemonIcon|Lugh|size=32px}} | ||
| + | ** And of course [[File:golduniticon.png|32px|link=]]{{DemonIcon|Morrighan|size=32px}} herself. | ||
| + | * [[File:silveruniticon.png|32px|link=]] {{DemonIcon|Lugh|size=32px}}: crazy {{ElementIcon|Force|name=1}} damage and {{EffectIcon|Charge}} auto-[[Charge]] after hitting a weakness once per turn. | ||
| + | * [[File:silveruniticon.png|32px|link=]] {{DemonIcon|Samyaza|size=32px}}: will cast a follow up hit after any ally, including himself, casts a {{ElementIcon|Force|name=1}} (or Elec) attack. Additionally, he can lower MP cost of magic skills for the party. | ||
| + | * [[File:silveruniticon.png|32px|link=]] {{DemonIcon|Nyarlathotep|size=32px}}: will increase Magic damage taken by the enemy when under a state of {{EffectIcon|Gloom|name=1}}, as well as supplying an [[File:Icon ATK Buff.png|32px|link=]] ATK buff and [[File:Icon DEF Buff.png|32px|link=]] DEF buff with Panel 2. However, he can only apply Gloom in phase 1. | ||
| + | * [[File:silveruniticon.png|32px|link=]] {{DemonIcon|Mada|size=32px}}: Deals {{ElementIcon|Fire|name=1}} damage, {{EffectIcon|Charm|name=1}}, and grants [[Bulwark]]s for the team to aid survival. | ||
| + | * [[File:silveruniticon.png|32px|link=]] {{DemonIcon|Anahita|size=32px}}: [[Hell Stream]] deals {{ElementIcon|Ice|name=1}} damage, and grants an [[File:Icon ATK Buff.png|32px|link=]] ATK buff and [[File:Icon DEF Buff.png|32px|link=]] DEF buff with every cast. Synergizes well with {{DemonIcon|Demeter|size=32px}}'s Bulwarks to grant +30% magic damage to the team. | ||
| + | * [[File:silveruniticon.png|32px|link=]] {{DemonIcon|Baal|size=32px}}: increases {{ElementIcon|Force|name=1}} dealt by the party in addition to being a good DPS. | ||
| + | * [[File:silveruniticon.png|32px|link=]] {{DemonIcon|Susano-o|size=32px}}: [[Kusanagi]] deals {{ElementIcon|Force|name=1}} damage, and each cast grants an [[File:Icon ATK Buff.png|32px|link=]] ATK buff. | ||
| + | * [[File:silveruniticon.png|32px|link=]] {{DemonIcon|Sabaoth|size=32px}}: [[Sanction]] deals {{ElementIcon|Force|name=1}} damage, and can potentially grant an extra press turn if used in the second half of a press turn. | ||
| + | * [[File:silveruniticon.png|32px|link=]] {{DemonIcon|Seth|size=32px}}: [[Ouas]] deals physical {{ElementIcon|Force|name=1}} damage while healing the user. Can combo with {{DemonIcon|Ame no Uzume|size=32px}} to grant [[File:Icon ATK Buff.png|32px|link=]] ATK buffs. | ||
| + | * [[File:silveruniticon.png|32px|link=]] {{DemonIcon|Koga Saburo|size=32px}}: [[Soaring Blades]] deals physical {{ElementIcon|Force|name=1}} damage. Must be panel 2, or else he will run out of charges (with 2 turns, he will need 4, but without p2 he only has 3 charges). | ||
| + | </div> | ||
| + | |||
| + | ===Ultimate: Morrighan [[File:Morrighan.jpg|32px|link=]]=== | ||
| + | <div class="toccolours mw-collapsible mw-collapsed" style="overflow:auto;"> | ||
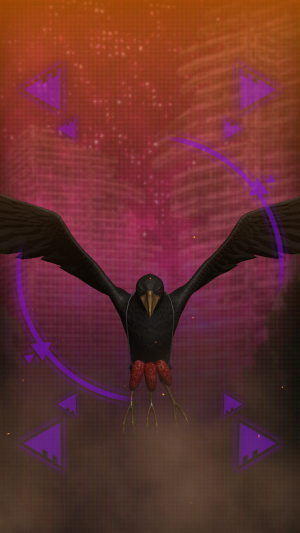
| + | [[File:encounter_morighan.png|thumb]] | ||
| + | <br><big>'''Battle 1'''</big> | ||
| + | {| class="wikitable" | ||
| + | !align="center"| | ||
| + | !align="center"| {{ElementIcon|Phys}} | ||
| + | !align="center"| {{ElementIcon|Fire}} | ||
| + | !align="center"| {{ElementIcon|Ice}} | ||
| + | !align="center"| {{ElementIcon|Elec}} | ||
| + | !align="center"| {{ElementIcon|Force}} | ||
| + | !align="center"| {{ElementIcon|Light}} | ||
| + | !align="center"| {{ElementIcon|Dark}} | ||
| + | |- | ||
| + | | '''Morrighan''' | ||
| + | | - | ||
| + | | - | ||
| + | | - | ||
| + | | - | ||
| + | | Nu | ||
| + | | Nu | ||
| + | | Rs | ||
| + | |- | ||
| + | |} | ||
| + | |||
| + | [[File:fierce-turbulent-advent.png|300px]] | ||
| + | [[File:fierce-vorpal-blade.png|300px]] | ||
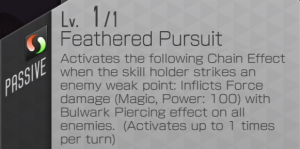
| + | [[File:feathered-pursuit.png|300px]] | ||
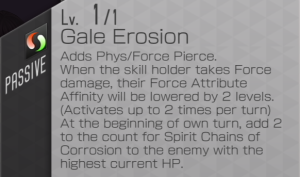
| + | [[File:gale-erosion.png|300px]] | ||
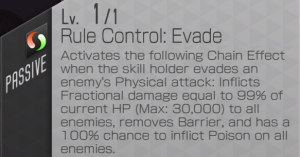
| + | [[File:rule-control-evade.png|300px]] | ||
| + | [[File:super-auto-recovery-bind.jpg|300px]] | ||
| + | |||
| + | <br><big>'''Battle 2'''</big> | ||
| + | {| class="wikitable" | ||
| + | !align="center"| | ||
| + | !align="center"| {{ElementIcon|Phys}} | ||
| + | !align="center"| {{ElementIcon|Fire}} | ||
| + | !align="center"| {{ElementIcon|Ice}} | ||
| + | !align="center"| {{ElementIcon|Elec}} | ||
| + | !align="center"| {{ElementIcon|Force}} | ||
| + | !align="center"| {{ElementIcon|Light}} | ||
| + | !align="center"| {{ElementIcon|Dark}} | ||
| + | |- | ||
| + | | '''Morrighan''' | ||
| + | | - | ||
| + | | - | ||
| + | | - | ||
| + | | - | ||
| + | | Nu | ||
| + | | Nu | ||
| + | | Rs | ||
| + | |- | ||
| + | |} | ||
| + | |||
| + | [[File:soul-fracture-20.jpg|300px]] | ||
| + | [[File:fierce-turbulent-advent.png|300px]] | ||
| + | [[File:fierce-vorpal-blade.png|300px]] | ||
| + | [[File:gale-erosion.png|300px]] | ||
| + | [[File:rule-control-evade.png|300px]] | ||
| + | [[File:super-auto-recovery-bind.jpg|300px]] | ||
| + | |||
| + | '''Notes:''' | ||
| + | * '''Missing against Morrighan is deadly''' as she will leave your party at 1 HP, remove Barriers and inflict {{EffectIcon|Poison|name=1}}. | ||
| + | ** Luckily someone forgot to give her ''any'' evasion bonuses! So this is a non-issue unless your physical demons have accuracy issues in the first place. | ||
| + | * '''Spirit Chains: Corrosion''' - Your highest-HP unit will be hit with this at the beginning of each enemy turn, lowering both their Defense stats by 80%. While this might not be an issue at first, once you hit a high enough boss level it might make a significant difference in the damage they take. | ||
| + | * In Phase 1, be careful about bringing {{ElementIcon|Force|name=1}}- or {{ElementIcon|Phys|name=1}}-weak demons as this will trigger a follow up attack by the boss. | ||
| + | ** If you have {{DemonIcon|Demeter|size=32px}}, then you can bring them intentionally, so she can [[Bulwark]] + buff from the boss's follow-up hit. | ||
| + | ** {{DemonIcon|Orcus|size=32px}} works similarly, but he will only apply [[File:Icon ATK Buff.png|32px|link=]] ATK buffs and will disable bonus turns gained from weakness, making him a worse, but still useful, alternative. | ||
| + | * '''Morrighan has no weaknesses!''' Until hit with a {{ElementIcon|Force|name=1}} attack, as Gale Erosion will drop her Force affinity by 2 stages up to twice every time she's hit with one. Use this to enable Chalk Eater teams to chew through her HP and spam free buffs. | ||
| + | ** Whoever initiates this will need to have Force pierce (she starts at Null), or you'll need a team member to reduce Force affinity first. | ||
| + | ** Unlike the previous event, {{ElementIcon|Force|name=1}} has few units that trigger a free attack at the beginning of turn to speed up the process, forcing you to take 2 turns to make her weak. {{DemonIcon|Samyaza|size=32px}} can follow up an ally's attack with [[Thunderforce]] to drop her resistance all the way down. | ||
| + | ** Your own {{DemonIcon|Morrighan|size=32px}} or {{DemonIcon|Lugh|size=32px}} can also reduce Force affinity. | ||
| + | |||
| + | * Liberators: | ||
| + | ** {{LiberatorIcon|Chalk Eater|name=1}} - Grants buffs or more press turns when hitting weaknesses. | ||
| + | ** {{LiberatorIcon|Shionyan|name=1}} - Grants +12 Mag for magic teams. | ||
| + | ** {{LiberatorIcon|Carbon Black|name=1}} - Crit damage and +12 Str for physical teams. | ||
| + | ** {{LiberatorIcon|Templar Dragon|name=1}} - Boost damage of demons that use {{EffectIcon|Charge|name=1}} or {{EffectIcon|Concentrate|name=1}}. | ||
| + | |||
| + | '''Recommended demons:''' | ||
| + | <br>In addition to the units detailed in the [[Demon Alliance Invasion#Useful Demons|Useful Demons]] section of this guide: | ||
| + | |||
| + | Support: | ||
| + | * [[File:silveruniticon.png|32px|link=]] {{DemonIcon|Mahamayuri|size=32px}}: [[Blossoming Cyclone]] deals {{ElementIcon|Force|name=1}} damage, and heals the party. | ||
| + | * [[File:silveruniticon.png|32px|link=]] {{DemonIcon|Ame no Uzume|size=32px}}: is particularly relevant for this event since she is Weak to Force, baiting the boss into using her attacks and triggering [[Demeter]] or [[Orcus]] as detailed above. Additionally, if an ally triggers a healing effect, then Ame grants an [[File:Icon ATK Buff.png|32px|link=]] ATK buff (if panel 2, then also a [[File:Icon DEF Buff.png|32px|link=]] DEF buff) - this combos well with demons like {{DemonIcon|Mahamayuri|size=32px}} or {{DemonIcon|Seth|size=32px}}. | ||
| + | ** {{DemonIcon|Hecatoncheires|size=32px}} fills a similar niche, baiting with his Force weakness and lowering {{TargetingIcon|All|name=1}} / {{TargetingIcon|Random|name=1}} attacks. | ||
| + | |||
| + | Damage: | ||
| + | * Any Affinity lowering demon will help greatly, since they can enable Chalk Eater teams: | ||
| + | ** {{DemonIcon|Hagen|size=32px}} | ||
| + | ** {{DemonIcon|Tiamat A|size=32px}} | ||
| + | ** {{DemonIcon|Zeus|size=32px}}: He and other {{ElementIcon|Elec|name=1}} users tend to be weak to Force, so they synergize well with Demeter to generate buffs in phase 1. | ||
| + | ** And of course [[File:golduniticon.png|32px|link=]]{{DemonIcon|Morrighan|size=32px}} herself. | ||
| + | * [[File:silveruniticon.png|32px|link=]] {{DemonIcon|Lugh|size=32px}}: crazy {{ElementIcon|Force|name=1}} damage and {{EffectIcon|Charge}} auto-[[Charge]] after hitting a weakness once per turn. He will also lower Force affinity to make the boss Weak faster. | ||
| + | * [[File:silveruniticon.png|32px|link=]] {{DemonIcon|Samyaza|size=32px}}: will cast a follow up hit after any ally, including himself, casts a {{ElementIcon|Force|name=1}} (or {{ElementIcon|Elec|name=1}}) attack. Additionally, he can lower MP cost of magic skills for the party. Samyaza can guarantee a Force weakness after only one attack. | ||
| + | * [[File:silveruniticon.png|32px|link=]] {{DemonIcon|Nyarlathotep|size=32px}}: will increase Magic damage taken by the enemy when under a state of {{EffectIcon|Gloom|name=1}}, as well as supplying an [[File:Icon ATK Buff.png|32px|link=]] ATK buff and [[File:Icon DEF Buff.png|32px|link=]] DEF buff with Panel 2. However, he can only apply Gloom in phase 1. | ||
| + | * [[File:silveruniticon.png|32px|link=]] {{DemonIcon|Mada|size=32px}}: Deals {{ElementIcon|Fire|name=1}} damage, {{EffectIcon|Charm|name=1}}, and grants [[Bulwark]]s for the team to aid survival. | ||
| + | * [[File:silveruniticon.png|32px|link=]] {{DemonIcon|Anahita|size=32px}}: [[Hell Stream]] deals {{ElementIcon|Ice|name=1}} damage, and grants an [[File:Icon ATK Buff.png|32px|link=]] ATK buff and [[File:Icon DEF Buff.png|32px|link=]] DEF buff with every cast. Synergizes well with {{DemonIcon|Demeter|size=32px}}'s Bulwarks to grant +30% magic damage to the team. | ||
| + | * [[File:silveruniticon.png|32px|link=]] {{DemonIcon|Baal|size=32px}}: increases {{ElementIcon|Force|name=1}} dealt by the party in addition to being a good DPS. | ||
| + | * [[File:silveruniticon.png|32px|link=]] {{DemonIcon|Susano-o|size=32px}}: [[Kusanagi]] deals {{ElementIcon|Force|name=1}} damage, and each cast grants an [[File:Icon ATK Buff.png|32px|link=]] ATK buff. Be careful that he cannot pierce until panel 4 though, so you may need another Force caster to hit the boss first. | ||
| + | * [[File:silveruniticon.png|32px|link=]] {{DemonIcon|Sabaoth|size=32px}}: [[Sanction]] deals {{ElementIcon|Force|name=1}} damage, and can potentially grant an extra press turn if used in the second half of a press turn. | ||
| + | * [[File:silveruniticon.png|32px|link=]] {{DemonIcon|Seth|size=32px}}: [[Ouas]] deals physical {{ElementIcon|Force|name=1}} damage while healing the user. Can combo with {{DemonIcon|Ame no Uzume|size=32px}} to grant [[File:Icon ATK Buff.png|32px|link=]] ATK buffs. | ||
| + | * [[File:silveruniticon.png|32px|link=]] {{DemonIcon|Koga Saburo|size=32px}}: [[Soaring Blades]] deals physical {{ElementIcon|Force|name=1}} damage. Must be panel 2, or else he will run out of charges (with 2 turns, he will need 4, but without p2 he only has 3 charges). | ||
| + | </div> | ||
| + | |||
| + | |||
| + | =="Ravaging Bull Soaked in Blood" event== | ||
| + | [[https://d2-megaten-l.sega.com/en/news/detail/095789.html Official News Announcement]] | ||
| + | |||
| + | ===Normal: Horkos [[File:Horkos.jpg|32px|link=]]=== | ||
| + | <div class="toccolours mw-collapsible mw-collapsed" style="overflow:auto;"> | ||
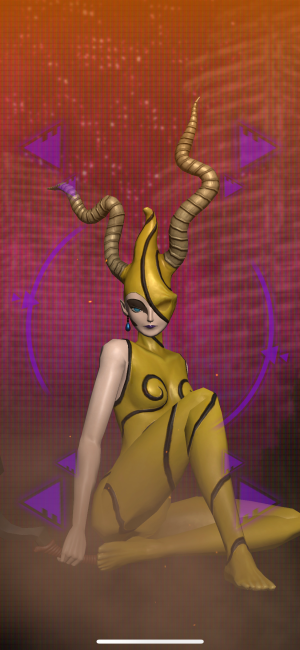
| + | [[File:encounter_horkos.png|thumb]] | ||
| + | <br><big>'''Battle 1'''</big> | ||
| + | {| class="wikitable" | ||
| + | !align="center"| | ||
| + | !align="center"| {{ElementIcon|Phys}} | ||
| + | !align="center"| {{ElementIcon|Fire}} | ||
| + | !align="center"| {{ElementIcon|Ice}} | ||
| + | !align="center"| {{ElementIcon|Elec}} | ||
| + | !align="center"| {{ElementIcon|Force}} | ||
| + | !align="center"| {{ElementIcon|Light}} | ||
| + | !align="center"| {{ElementIcon|Dark}} | ||
| + | |- | ||
| + | | '''Horkos''' | ||
| + | | Rs | ||
| + | | - | ||
| + | | Wk | ||
| + | | - | ||
| + | | - | ||
| + | | Wk | ||
| + | | - | ||
| + | |- | ||
| + | |} | ||
| + | |||
| + | * [[File:Icon DEF Buff.png|32px|link=]] [[Auto-Rakuka]] | ||
| + | * [[File:Fire.png|20px|link=]] [[Hellfire]] | ||
| + | [[File:soul-fracture-20.jpg|300px]] | ||
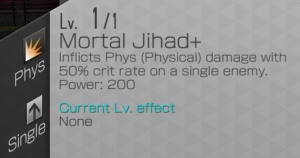
| + | [[File:mortal-jihad+.jpg|300px]] | ||
| + | [[File:super-auto-recovery-bind.jpg|300px]] | ||
| + | |||
| + | <br><big>'''Battle 2'''</big> | ||
| + | {| class="wikitable" | ||
| + | !align="center"| | ||
| + | !align="center"| {{ElementIcon|Phys}} | ||
| + | !align="center"| {{ElementIcon|Fire}} | ||
| + | !align="center"| {{ElementIcon|Ice}} | ||
| + | !align="center"| {{ElementIcon|Elec}} | ||
| + | !align="center"| {{ElementIcon|Force}} | ||
| + | !align="center"| {{ElementIcon|Light}} | ||
| + | !align="center"| {{ElementIcon|Dark}} | ||
| + | |- | ||
| + | | '''Horkos''' | ||
| + | | Rs | ||
| + | | - | ||
| + | | Wk | ||
| + | | - | ||
| + | | - | ||
| + | | Wk | ||
| + | | - | ||
| + | |- | ||
| + | |} | ||
| + | |||
| + | Same as the first battle, but replaces Auto-Rakuka with [[File:Icon ATK Buff.png|32px|link=]] [[Auto-Taruka]]. | ||
| + | |||
| + | '''Notes''' | ||
| + | * Boss has no pierce. | ||
| + | * Just hit him with {{ElementIcon|Ice|name=1}} or {{ElementIcon|Light|name=1}} and he should go down quickly. | ||
| + | * Some form of [[File:Icon DEF Debuff.png|32px|link=]] DEF debuff to neutralize his [[File:Icon DEF Buff.png|32px|link=]] Auto-Rakuka may be helpful. | ||
| + | </div> | ||
| + | |||
| + | ===Superior: Anat [[File:Anat.jpg|32px|link=]]=== | ||
| + | <div class="toccolours mw-collapsible mw-collapsed" style="overflow:auto;"> | ||
| + | [[File:encounter_anat.png|thumb]] | ||
| + | <br><big>'''Battle 1'''</big> | ||
| + | {| class="wikitable" | ||
| + | !align="center"| | ||
| + | !align="center"| {{ElementIcon|Phys}} | ||
| + | !align="center"| {{ElementIcon|Fire}} | ||
| + | !align="center"| {{ElementIcon|Ice}} | ||
| + | !align="center"| {{ElementIcon|Elec}} | ||
| + | !align="center"| {{ElementIcon|Force}} | ||
| + | !align="center"| {{ElementIcon|Light}} | ||
| + | !align="center"| {{ElementIcon|Dark}} | ||
| + | |- | ||
| + | | '''Anat''' | ||
| + | | - | ||
| + | | Wk | ||
| + | | - | ||
| + | | Rs | ||
| + | | Wk | ||
| + | | Nu | ||
| + | | Rs | ||
| + | |- | ||
| + | |} | ||
| + | |||
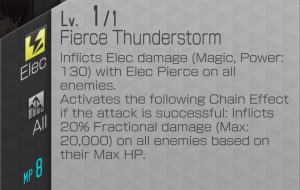
| + | [[File:fierce-thunderstorm.png|300px]] | ||
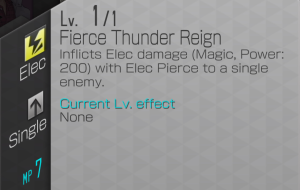
| + | [[File:fierce-thunder-reign.png|300px]] | ||
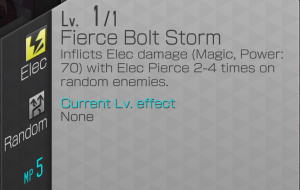
| + | [[File:fierce-bolt-storm.png|300px]] | ||
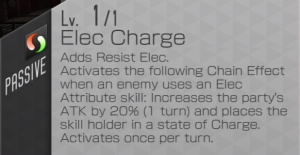
| + | [[File:elec-charge.jpg|300px]] | ||
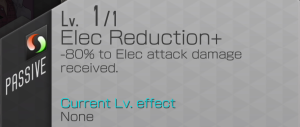
| + | [[File:elec-reduction+.png|300px]] | ||
| + | [[File:super-auto-recovery-bind.jpg|300px]] | ||
| + | |||
| + | <br><big>'''Battle 2'''</big> | ||
| + | {| class="wikitable" | ||
| + | !align="center"| | ||
| + | !align="center"| {{ElementIcon|Phys}} | ||
| + | !align="center"| {{ElementIcon|Fire}} | ||
| + | !align="center"| {{ElementIcon|Ice}} | ||
| + | !align="center"| {{ElementIcon|Elec}} | ||
| + | !align="center"| {{ElementIcon|Force}} | ||
| + | !align="center"| {{ElementIcon|Light}} | ||
| + | !align="center"| {{ElementIcon|Dark}} | ||
| + | |- | ||
| + | | '''Anat''' | ||
| + | | - | ||
| + | | Wk | ||
| + | | - | ||
| + | | Dr | ||
| + | | Wk | ||
| + | | Nu | ||
| + | | Rs | ||
| + | |- | ||
| + | |} | ||
| + | |||
| + | * [[Drain Pierce]] | ||
| + | [[File:fierce-thunderstorm.png|300px]] | ||
| + | [[File:fierce-thunder-reign.png|300px]] | ||
| + | [[File:fierce-bolt-storm.png|300px]] | ||
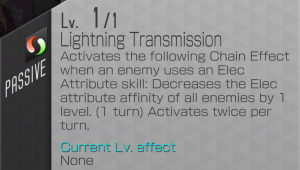
| + | [[File:lightning-transmission.png|300px]] | ||
| + | [[File:super-auto-recovery-bind.jpg|300px]] | ||
| + | |||
| + | '''Notes''' | ||
| + | * Punishes using {{ElementIcon|Elec|name=1}} damage in both phases: | ||
| + | ** Phase 1 reduces Elec damage by 80%. | ||
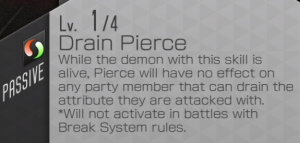
| + | ** Phase 2 blocks Elec with Elec Drain + Drain Pierce, unless Elec affinity is reduced. If you use Elec attacks, she then lowers your team's Elec affinity. | ||
| + | * Has consistent weaknesses to {{ElementIcon|Fire|name=1}} and {{ElementIcon|Force|name=1}} in both phases. | ||
| + | * {{ElementIcon|Phys|name=1}} can have {{DemonIcon|Hagen|size=32px}} open up a weakness in either phase. | ||
| + | * Liberators: | ||
| + | ** {{LiberatorIcon|Chalk Eater|name=1}} - Grants buffs or more press turns when hitting weaknesses. | ||
| + | ** {{LiberatorIcon|Shionyan|name=1}} - Grants +12 Mag for magic teams. | ||
| + | ** {{LiberatorIcon|Carbon Black|name=1}} - Crit damage and +12 Str for physical teams. | ||
| + | ** {{LiberatorIcon|Templar Dragon|name=1}} - Boost damage of demons that use {{EffectIcon|Charge|name=1}} or {{EffectIcon|Concentrate|name=1}}. | ||
| + | |||
| + | '''Recommended demons''' | ||
| + | |||
| + | Support: | ||
| + | * {{DemonIcon|Demeter|size=32px}}: Helps team survival with [[Bulwark]]s, team offense with extra MP, and casts buffs during the boss's turn. Also a [[File:silveruniticon.png|32px|link=]] bonus unit. | ||
| + | * {{DemonIcon|Demiurge|size=32px}}: Combine with allies that have Drain Elec, to get team-wide healing and MP recovery. | ||
| + | ** Good Elec Drain partners include: | ||
| + | ** {{DemonIcon|Mara|size=32px}}: Panel 3 repeatedly grants {{EffectIcon|Charge|name=1}} as long with each use of [[Hell Thrust]]. Also a [[File:silveruniticon.png|32px|link=]] bonus unit for the second half of the event. | ||
| + | ** {{DemonIcon|Ardha|size=32px}}: [[Ruin and Grace]] deals damage and grants a team-wide heal with each use. | ||
| + | ** Teal {{ArchIcon|arch=Teal|size=15px}}{{DemonIcon|Susano-o|size=32px}}: (see section below) | ||
| + | * panel 2 {{DemonIcon|Orcus|size=32px}}: Casts an [[File:Icon ATK Buff.png|32px|link=]] ATK buff whenever the boss hits his or an ally's weaknesses. He comes with an Elec weakness by default. Also reduces AoE damage taken by the party, depending on how many weaknesses the party has. | ||
| + | |||
| + | Damage: | ||
| + | * {{DemonIcon|Elohim|size=32px}}: [[Solar Flare]] deals {{ElementIcon|Fire|name=1}} damage, and grants an [[File:Icon ATK Buff.png|32px|link=]] ATK buff with every cast. Also a [[File:silveruniticon.png|32px|link=]] bonus unit. | ||
| + | * {{DemonIcon|Mada|size=32px}}: Deals {{ElementIcon|Fire|name=1}} damage, {{EffectIcon|Charm|name=1}}, and grants [[Bulwark]]s for the team to aid survival. Also a [[File:silveruniticon.png|32px|link=]] bonus unit. | ||
| + | * {{DemonIcon|Mahakala|size=32px}}: Automatically attacks the boss with {{ElementIcon|Fire|name=1}} if your team goes first, and again at the start of your second turn, getting in some extra weakness rolls for Chalk Eater. If panel 3, each cast of [[Wrathful Flame]] also grants an [[File:Icon ATK Buff.png|32px|link=]] ATK buff and [[File:Icon DEF Buff.png|32px|link=]] DEF buff. To top it off, he gives himself {{EffectIcon|Concentrate|name=1}} at the start of the first and second turn. | ||
| + | * {{DemonIcon|Mithras|size=32px}}: [[Mark of Punishment]] can deal {{ElementIcon|Fire|name=1}} damage, he boosts the team's Fire damage, and he automatically casts a follow-up attack (that also heals him) when an ally uses Fire. Also a [[File:silveruniticon.png|32px|link=]] bonus unit for the second half of the event. | ||
| + | * panel 4 {{DemonIcon|Cybele|size=32px}}: Grants an [[File:Icon ATK Buff.png|32px|link=]] ATK buff whenever she casts [[Trisagion]]. | ||
| + | * {{DemonIcon|Susano-o|size=32px}}: [[Kusanagi]] deals {{ElementIcon|Force|name=1}} damage, and each cast grants an [[File:Icon ATK Buff.png|32px|link=]] ATK buff. | ||
| + | * {{DemonIcon|Sabaoth|size=32px}}: [[Sanction]] deals {{ElementIcon|Force|name=1}} damage, and can potentially grant an extra press turn if used in the second half of a press turn. | ||
| + | * {{DemonIcon|Mahamayuri|size=32px}}: [[Blossoming Cyclone]] deals {{ElementIcon|Force|name=1}} damage, and heals the party. Be careful of his {{ElementIcon|Elec|name=1}} weakness, though! | ||
| + | * {{DemonIcon|Seth|size=32px}}: [[Ouas]] deals physical {{ElementIcon|Force|name=1}} damage while healing the user. | ||
| + | * {{DemonIcon|Ame no Uzume|size=32px}} grants [[File:Icon ATK Buff.png|32px|link=]] ATK buffs when a healing effect is cast, such as from {{DemonIcon|Demiurge|size=32px}}, {{DemonIcon|Mithras|size=32px}}, {{DemonIcon|Seth|size=32px}}, or {{DemonIcon|Mahamayuri|size=32px}}. | ||
| + | * {{DemonIcon|Koga Saburo|size=32px}}: [[Soaring Blades]] deals physical {{ElementIcon|Force|name=1}} damage. Must be panel 2, or else he will run out of charges (with 2 turns, he will need 4, but without p2 he only has 3 charges). Also a [[File:silveruniticon.png|32px|link=]] bonus unit for the first half of the event. | ||
| + | * {{DemonIcon|Hagen|size=32px}}: Open up a {{ElementIcon|Phys|name=1}} weakness. | ||
| + | * panel 3 {{DemonIcon|Zaou-Gongen|size=32px}}: Can grant infinite {{EffectIcon|Might|name=1}} to the team, ensuring they always crit to spend half-turns. Also a [[File:silveruniticon.png|32px|link=]] bonus unit. Be careful of his {{ElementIcon|Elec|name=1}} weakness, though! | ||
| + | * {{DemonIcon|Flauros|size=32px}}: [[Iron Fist]] grants an [[File:Icon ATK Buff.png|32px|link=]] ATK buff and [[File:Icon EVAC Buff.png|32px|link=]] EVAC buff with every cast. Also a [[File:silveruniticon.png|32px|link=]] bonus unit for the first half of the event. | ||
| + | </div> | ||
| + | |||
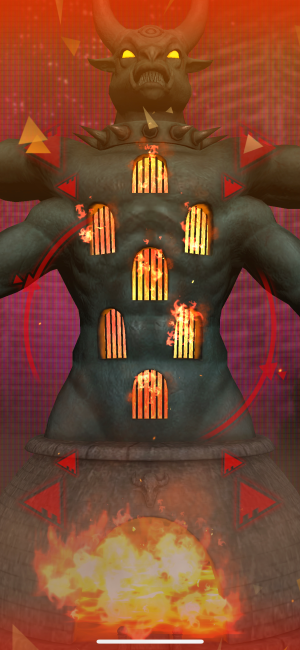
| + | ===Ultimate: Moloch [[File:Moloch.jpg|32px|link=]]=== | ||
| + | <div class="toccolours mw-collapsible mw-collapsed" style="overflow:auto;"> | ||
| + | [[File:encounter_moloch.png|thumb]] | ||
| + | <br><big>'''Battle 1'''</big> | ||
| + | {| class="wikitable" | ||
| + | !align="center"| | ||
| + | !align="center"| {{ElementIcon|Phys}} | ||
| + | !align="center"| {{ElementIcon|Fire}} | ||
| + | !align="center"| {{ElementIcon|Ice}} | ||
| + | !align="center"| {{ElementIcon|Elec}} | ||
| + | !align="center"| {{ElementIcon|Force}} | ||
| + | !align="center"| {{ElementIcon|Light}} | ||
| + | !align="center"| {{ElementIcon|Dark}} | ||
| + | |- | ||
| + | | '''Moloch''' | ||
| + | | - | ||
| + | | Rp | ||
| + | | Wk | ||
| + | | Rs | ||
| + | | - | ||
| + | | - | ||
| + | | - | ||
| + | |- | ||
| + | |} | ||
| + | |||
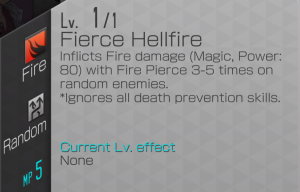
| + | [[File:fierce-hellfire.png|300px]] | ||
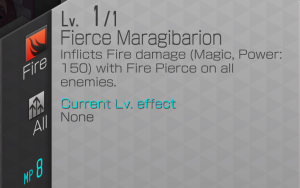
| + | [[File:fierce-maragibarion.png|300px]] | ||
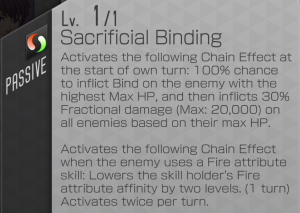
| + | [[File:sacrificial-binding.png|300px]] | ||
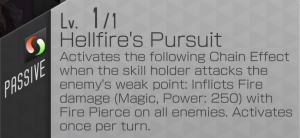
| + | [[File:hellfires-pursuit.png|300px]] | ||
| + | [[File:rule-control.jpg|300px]] | ||
| + | [[File:super-auto-recovery-bind.jpg|300px]] | ||
| + | |||
| + | <br><big>'''Battle 2'''</big> | ||
| + | {| class="wikitable" | ||
| + | !align="center"| | ||
| + | !align="center"| {{ElementIcon|Phys}} | ||
| + | !align="center"| {{ElementIcon|Fire}} | ||
| + | !align="center"| {{ElementIcon|Ice}} | ||
| + | !align="center"| {{ElementIcon|Elec}} | ||
| + | !align="center"| {{ElementIcon|Force}} | ||
| + | !align="center"| {{ElementIcon|Light}} | ||
| + | !align="center"| {{ElementIcon|Dark}} | ||
| + | |- | ||
| + | | '''Moloch''' | ||
| + | | - | ||
| + | | Rp | ||
| + | | Wk | ||
| + | | Rs | ||
| + | | - | ||
| + | | - | ||
| + | | - | ||
| + | |- | ||
| + | |} | ||
| + | |||
| + | [[File:fierce-hellfire.png|300px]] | ||
| + | [[File:fierce-maragibarion.png|300px]] | ||
| + | [[File:sacrificial-binding.png|300px]] | ||
| + | [[File:soul-fracture-20.jpg|300px]] | ||
| + | [[File:rule-control.jpg|300px]] | ||
| + | [[File:super-auto-recovery-bind.jpg|300px]] | ||
| + | |||
| + | '''Notes:''' | ||
| + | * Do NOT bring revives. | ||
| + | * Your unit with the most HP in the team should have a way to prevent {{EffectIcon|Bind|name=1}} on themselves. | ||
| + | ** Methods include: Ward brands, [[Null Bind]], setting up {{DemonIcon|Demeter|size=32px}}'s [[Bulwark]]s before the enemy turn, etc. | ||
| + | ** You can also use Life brands to bait Bind onto a specific unit, if they don't have the highest HP in the team already. | ||
| + | * In Phase 1, be careful about bringing {{ElementIcon|Fire|name=1}}-weak demons. | ||
| + | ** If you have {{DemonIcon|Demeter|size=32px}}, then you can bring fire-weak demons intentionally, so she can [[Bulwark]] + buff from the boss's follow-up hit. | ||
| + | * There are several opportunities to hit weakness here: | ||
| + | ** {{ElementIcon|Ice|name=1}} - Weakness is open by default. | ||
| + | ** {{ElementIcon|Fire|name=1}} - Bring at least one Fire-pierce attacker to hit past the boss's Repel Fire. Hitting the boss with Fire reduces his resistance by 2 stages, leading to Weakness after 2 triggers. Note you will need to do this at the start of every player turn. | ||
| + | ** {{ElementIcon|Phys|name=1}}, {{ElementIcon|Elec|name=1}}, and {{ElementIcon|Dark|name=1}} - These can use [[attribute affinity down]] to open up a weakness. | ||
| + | |||
| + | * Liberators: | ||
| + | ** {{LiberatorIcon|Chalk Eater|name=1}} - Grants buffs or more press turns when hitting weaknesses. | ||
| + | ** {{LiberatorIcon|Shionyan|name=1}} - Grants +12 Mag for magic teams. | ||
| + | ** {{LiberatorIcon|Carbon Black|name=1}} - Crit damage and +12 Str for physical teams. | ||
| + | ** {{LiberatorIcon|Templar Dragon|name=1}} - Boost damage of demons that use {{EffectIcon|Charge|name=1}} or {{EffectIcon|Concentrate|name=1}}. | ||
| + | |||
| + | '''Recommended demons:''' | ||
| + | |||
| + | Support: | ||
| + | * {{DemonIcon|Demeter|size=32px}}: Prevents ailments on the team, as long as [[Bulwark]]s are active before the enemy turn starts. Helps team survival with [[Bulwark]]s, team offense with extra MP, and casts buffs during the boss's turn. Also a [[File:silveruniticon.png|32px|link=]] bonus unit. | ||
| + | * {{DemonIcon|Demiurge|size=32px}}: Combine with allies that have Drain Fire (several Fire attackers have this), to get team-wide healing and MP recovery. | ||
| + | * panel 2 {{DemonIcon|Orcus|size=32px}}: Casts an [[File:Icon ATK Buff.png|32px|link=]] ATK buff whenever the boss hits his or an ally's weaknesses. He comes with a Fire weakness by default. Also reduces AoE damage taken by the party, depending on how many weaknesses the party has. | ||
| + | |||
| + | Damage: | ||
| + | * {{DemonIcon|Rahab|size=32px}}: {{ElementIcon|Ice|name=1}} damage, casts an [[File:Icon ATK Buff.png|32px|link=]] ATK buff + {{EffectIcon|Might|name=1}} (for himself) any time your team or the boss hits a weak point. Also a [[File:silveruniticon.png|32px|link=]] bonus unit for the first half of the event. | ||
| + | * {{DemonIcon|Anahita|size=32px}}: [[Hell Stream]] deals {{ElementIcon|Ice|name=1}} damage, and grants an [[File:Icon ATK Buff.png|32px|link=]] ATK buff and [[File:Icon DEF Buff.png|32px|link=]] DEF buff with every cast. Synergizes well with {{DemonIcon|Demeter|size=32px}}'s Bulwarks to grant +30% magic damage to the team. | ||
| + | * {{DemonIcon|Elohim|size=32px}}: [[Solar Flare]] deals piercing {{ElementIcon|Fire|name=1}} damage with [[Remnants]], and grants an [[File:Icon ATK Buff.png|32px|link=]] ATK buff with every cast. His high Agi and Remnants makes him perfect for setting up Fire weakness on the boss. Also a [[File:silveruniticon.png|32px|link=]] bonus unit. | ||
| + | * {{DemonIcon|Mada|size=32px}}: Deals piercing {{ElementIcon|Fire|name=1}} damage, and grants [[Bulwark]]s for the team to aid survival. Also a [[File:silveruniticon.png|32px|link=]] bonus unit. | ||
| + | ** His {{EffectIcon|Charm|name=1}} may have synergy with units such as {{DemonIcon|Tiamat A|size=32px}}, as well. | ||
| + | * {{DemonIcon|Mahakala|size=32px}}: Automatically attacks the boss with {{ElementIcon|Fire|name=1}} if your team goes first, and again at the start of your second turn - doing half of the Fire weakness setup for you. If panel 3, each cast of [[Wrathful Flame]] also grants an [[File:Icon ATK Buff.png|32px|link=]] ATK buff and [[File:Icon DEF Buff.png|32px|link=]] DEF buff. To top it off, he gives himself {{EffectIcon|Concentrate|name=1}} at the start of the first and second turn. | ||
| + | * {{DemonIcon|Mithras|size=32px}}: [[Mark of Punishment]] can deal piercing {{ElementIcon|Fire|name=1}} damage, he boosts the team's Fire damage, and he automatically casts a follow-up attack (that also heals him) when an ally or the enemy uses Fire. Also a [[File:silveruniticon.png|32px|link=]] bonus unit for the second half of the event. | ||
| + | ** The heal can chain into {{DemonIcon|Ame no Uzume|size=32px}} for [[File:Icon ATK Buff.png|32px|link=]] ATK buffs. | ||
| + | * {{DemonIcon|Quetzalcoatl A|size=32px}}: [[Aztec Pulse]] deals piercing {{ElementIcon|Fire|name=1}} damage, and also has [[Remnants]] after the first use (if panel 2, this skill always has Remnants). Also a [[File:silveruniticon.png|32px|link=]] bonus unit. | ||
| + | ** However, be careful to make sure he doesn't die, as he will revive himself - triggering Rule Control's effects. | ||
| + | * {{DemonIcon|Adramelech|size=32px}}: [[Sacrificial Inferno]] deals piercing {{ElementIcon|Fire|name=1}} damage, and grants an [[File:Icon ATK Buff.png|32px|link=]] ATK buff with every cast. Also a [[File:silveruniticon.png|32px|link=]] bonus unit for the first half of the event. | ||
| + | * {{DemonIcon|Zeus|size=32px}}: Open up an {{ElementIcon|Elec|name=1}} weakness. | ||
| + | ** Pairs well with {{DemonIcon|Botis|size=32px}}, who is a [[File:silveruniticon.png|32px|link=]] bonus unit for the first half of the event. | ||
| + | * {{DemonIcon|Tiamat A|size=32px}}: Open up a {{ElementIcon|Dark|name=1}} weakness. | ||
| + | * {{DemonIcon|Hagen|size=32px}}: Open up a {{ElementIcon|Phys|name=1}} weakness. | ||
| + | * panel 3 {{DemonIcon|Zaou-Gongen|size=32px}}: Can grant infinite {{EffectIcon|Might|name=1}} to the team, ensuring they always crit to spend half-turns. Also a [[File:silveruniticon.png|32px|link=]] bonus unit. | ||
| + | * {{DemonIcon|Flauros|size=32px}}: [[Iron Fist]] grants an [[File:Icon ATK Buff.png|32px|link=]] ATK buff and [[File:Icon EVAC Buff.png|32px|link=]] EVAC buff with every cast. Also a [[File:silveruniticon.png|32px|link=]] bonus unit for the first half of the event. | ||
| + | * {{DemonIcon|Tokisada|size=32px}}: [[Amakusa Uprising]] grants an [[File:Icon ATK Buff.png|32px|link=]] ATK buff and [[File:Icon EVAC Buff.png|32px|link=]] EVAC buff with every cast. If panel 2, also grants himself {{EffectIcon|Might|name=1}} with every cast. | ||
| + | </div> | ||
| + | |||
| + | |||
=="Otherworldly Primordial Mother" event== | =="Otherworldly Primordial Mother" event== | ||
[[https://d2-megaten-l.sega.com/en/news/detail/095500.html Official News Announcement]] | [[https://d2-megaten-l.sega.com/en/news/detail/095500.html Official News Announcement]] | ||
Latest revision as of 12:04, 17 November 2024
Contents
- 1 "Tale of the Primordial Goddess" event
- 2 "Hell's Hunter Takes Aim" event
- 3 "The Wolf and the Blood Banquet" event
- 4 "Offering of the Crow Queen" event
- 5 "Ravaging Bull Soaked in Blood" event
- 6 "Otherworldly Primordial Mother" event
- 7 "Chaos Dragon of the Abyss" event
- 8 "Revival of the Mantra's Leader" event
"Tale of the Primordial Goddess" event
Normal: Scathach 
Battle 1
| Scathach | - | - | - | Wk | Nu | Rs | - |
Battle 2
| Scathach | - | - | - | Wk | Nu | Rs | - |
Notes
- Trivial fight, just bring your SP units to squeeze as many points from it as possible.
Superior: Pallas Athena 
Battle 1
| Pallas Athena | Rs | - | - | Wk | - | Nu | Rs |
Battle 2
| Pallas Athena | Rs | - | - | Wk | - | Nu | Rs |
Notes
- Another simple fight, the main concern is 80% damage reduction + a 1000 HP Bulwark if you use certain elements, depending on the phase:
- Phase 1 penalizes
 Phys or
  Light damage.
 - Phase 2 penalizes
 Dark or
  Almighty damage.
  Elec damage is safe on either phase.
- The Bulwark is actually a non-issue, as 1,000 HP is practically nothing for the boss in this mode. As long as your main damage dealers aren't getting 80% reduced, you should be able to punch through the Bulwarks no problem.
- Phase 1 penalizes
- Athena is weak to Elec the whole time, as opposed to Inanna, who needs setup. This means you can earn extra turns with cheap non-piercing
 Zio transfers on supports, if needed.
Recommended demons:
In addition to the units detailed in the Useful Demons section of this guide:
Support:
Damage:
Ultimate: Inanna 
Battle 1
| Inanna | - | Nu | Nu | Nu | Nu | - | Rs |
Battle 2
| Inanna | - | Nu | Nu | Nu | Nu | - | Rs |
Notes:
- Avoid having your demons pass, as that'll trigger Rule Control, which will most likely KO your party.
- This shouldn't happen on auto, since the boss does not have Nu/Dr/Rp Phys, and your demons will try to use their standard attack when at low MP.
- Underworld Corrosion reduces the boss's
 Elec and
  Force resistance by 2 levels, up to twice. She starts at Null, so attack with piercing Elec/Force damage twice to get her down to Weak. This can then get you more damage, more turns, and Chalk Eater synergy for buffs + more turns.
- Alternatively, someone with Attribute affinity down can work as a more-direct solution that doesn't need as much setup.
- Note that both resistances go down regardless of which one you used, so you can use a piercing Elec attacker to open the way for a Force attacker.
- The damage of skills that aren't Elec/Force are reduced by 15%. This is only a minor annoyance, but really pushes you to use the correct elements if you can.
- Devil Connector skills unfortunately do not count for triggering Corrosion.
- In phase 2, she swaps Underworld Corrosion for Hell Corrosion, which does the same thing but for
 Fire and
  Ice.
Ice. - The boss gives your team a 50% damage boost when using an
 All Targets attack, meaning those can be viable.
 - The boss triggers a lot of
 DEF Debuffs on her turn, so having a demon that can trigger
  DEF Buffs during the enemy turn can help combat this. For example:
  Demeter.
- Liberators:
 Chalk Eater - Grants buffs or more press turns when hitting weaknesses.
 Shionyan - Grants +12 Mag for magic teams. If paired with Idun, can offer extra MP occasionally.
 Carbon Black - Crit damage and +12 Str for physical teams.
 Templar Dragon - Boost damage of demons that use
  Charge or
  Concentrate.
Recommended demons:
In addition to the units detailed in the Useful Demons section of this guide:
Support:
 Demeter: counteracts the boss's
  DEF Debuff spam during the enemy turn, as well as providing plenty of Luster Candy buffs overall.
 Ame no Uzume: pairs well with
  Seth or
  Mahamayuri, since they deal Force damage and heal, triggering Ame's
  ATK Buff.
 Barong: Luster Candy buffs from Barong Dance.
Damage for phase 1 (![]() Elec and
Elec and ![]() Force)
Force)

 Loup-Garou: Elec affinity down, Elec damage aura for the party, and reduces party's Elec skill MP costs.
 Zeus: Elec affinity down, grants an extra press turn.
 Odin A: Sets up
  Zenith and
  Gloom, grants Phys/Elec damage and crit rate aura to the party, and doesn't consume press turns when he hits weakness.
 Indrajit: Damage and
  ATK Buff from Lightning Shower.
 Queen Mab: Automatic Fire/Elec attack every time an ally acts, an Elec/Fire damage aura for the party, and an
  ATK Buff every player turn.
 Botis: Automatic follow-up when an ally uses Elec, and applies Elec anti-damage reduction to the boss. If panel 2, then Accursed Lightning also grants an
  ATK Buff with every cast.
 Izanami: Elec damage aura for the party, and reduces party's Elec skill MP costs.
 Morrighan: Force affinity down,
  Spirit Chains of Corrosion, and Luster Candy buff from Ruthless Death Gale.
 Lugh: Force (and Light) affinity down, grants weakness damage aura to the party, gives himself
  Charge, and has high crit rate.
 Kumbhanda: Force affinity down (first turn only, does not refresh),
  Spirit Chains of Corrosion, and generates a press turn.
 Susano-o: Damage and
  ATK Buff from Kusanagi. Note that he uses PATK but his skill outputs magic damage, so this may make synergies awkward. Also be careful that he does not have pierce until panel 4.
 Nyarlathotep: Sets up
  Gloom and makes the enemy take more magic damage while Gloomed.
 Seth: Damage and self-heal from Ouas to trigger Ame no Uzume's buffs.
 Pendragon: Deals a Force (or Ice) follow-up every time an ally hits a weakness.
 Krishna: Generates a press turn.
 Sabaoth: Potentially grants an extra press turn, if he uses Sanction while in the second half of a press turn.
 Mahamayuri: Damage and party heal from Blossoming Cyclone to trigger Ame no Uzume's buffs.
Damage (![]() Fire and
Fire and ![]() Ice)
Ice)

 Adramelech: Fire affinity down, and an
  ATK Buff every time he uses Sacrificial Inferno.
 Lost Name:
  ATK Buff every time he acts, grants an extra press turn, gives himself
  Charge, and has high crit rate.
 Elohim: Damage and
  ATK Buff from Solar Flare.
 Queen Mab: Automatic Fire/Elec attack every time an ally acts, an Elec/Fire damage aura for the party, and an
  ATK Buff every player turn.
 Mahakala:
  ATK Debuff and
  DEF Debuff from Wrathful Flame, as well as automatic
  Concentrate for himself. If panel 3, Wrathful Flame also applies
  ATK Buff and
  DEF Buff.
 Mithras: Automatic follow-up when an ally uses Fire (or Light), and applies Fire/Light anti-damage reduction to the boss.
 Moloch: Fire damage aura for the team.
 Mada: Damage and Bulwarks for the team, if needed.
 Sukuna-Hikona A: Ice affinity down,
  ATK Buff +
  DEF Debuff + MP regen when an ally hits a weakness.
 Vivian:
  ATK Buff every time she casts Teardrop, and applies anti-damage reduction to the boss.
 Anahita: Damage and
  ATK Buff from Hell Stream, as well as Bulwarks if needed. If panel 2, also has a magic damage aura for the party.
 Rahab:
  ATK Buff when an ally or the enemy hits a weakness. Also gives himself
  Might alongside this effect.
 Kuzuryu: Luster Candy +
  DEF Debuff +
  Concentrate for himself every time he casts Roaring Torrent.
 Kumbhanda:
  Spirit Chains of Corrosion, and generates a press turn.
 Frost Ace: Ice damage aura for the party (especially if panel 2) and party-wide
  Might every time he uses Vengeful Frost Fist.
 Pendragon: Deals a Force (or Ice) follow-up every time an ally hits a weakness.
"Hell's Hunter Takes Aim" event
Normal: Ose 
Battle 1
| Ose | - | - | - | - | Wk | - | Rs |
 Hades Blast
 Mazionga
- Force Defect (changes Force affinity to Weak)
Battle 2
| Ose | - | - | - | - | Wk | - | Rs |
 Hades Blast
 Mazionga
- Force Defect (changes Force affinity to Weak)
Notes
- Trivial fight, just bring your SP units to squeeze as many points from it as possible.
Superior: Dantalian 
Battle 1
| Dantalian | - | Rs | Rs | Rs | Wk | Rs | Rs |
Battle 1
| Dantalian | - | Rs | Rs | Rs | Wk | Rs | Rs |
Notes
- Another simple fight, the main concern is 80% damage reduction + a 1000 HP Bulwark if you use certain elements, depending on the phase:
- Phase 1 penalizes
 Phys,
Phys,  Fire or
  Ice damage.
 - Phase 2 penalizes
 Elec,
Elec,  Light or
  Dark damage.
  Force damage is safe on either phase.
- The Bulwark is actually a non-issue, as 1,000 HP is practically nothing for the boss in this mode. As long as your main damage dealers aren't getting 805 reduced, you should be able to punch through the Bulwarks no problem.
- Phase 1 penalizes
- Dantalian is weak to Force the whole time, as opposed to Barbatos, who needs setup. This means you can earn extra turns with cheap non-piercing
 Zan transfers on supports, if needed.
Recommended demons:
In addition to the units detailed in the Useful Demons section of this guide:
Support:
Damage:
Ultimate: Barbatos 
Battle 1
| Barbatos | - | - | - | Rs | Nu | Rs | Rs |
Battle 2
| Barbatos | - | - | - | Rs | Nu | Rs | Rs |
Notes:
- Avoid using Intimidating Stance-like effects, as that'll trigger Rule Control, which will most likely KO your party.
- Fallen Angel's Corrosion reduces the boss's
 Force resistance by 2 levels, up to twice. He starts at Null, so attack with piercing Force damage twice to get him down to Weak. This can then get you more damage, more turns, and Chalk Eater synergy for buffs + more turns.
- Alternatively, someone with Attribute affinity down can work as a more-direct solution that doesn't need as much setup.
- Devil Connector skills unfortunately do not count for triggering Corrosion.
- In Phase 1, be careful about bringing
 Force weak demons, as this will trigger a follow up attack by the boss.
- If you have
 Demeter, then you can bring them intentionally, so she can Bulwark + buff from the boss's follow-up hit.
  Orcus works similarly, but he will only apply
  ATK buffs and will disable bonus turns gained from weakness, making him a worse, but still useful, alternative.
- Other options for the weakness-tanking strategy:
 Rahab,
  Gogmagog (also heals for Ame),
  Barong (also heals for Ame),
  Ananta.
  Zeus is weak to Force, and so are most
  Elec attackers - his attribute affinity down can open the door for them to attack, while their Force weaknesses synergize with the tank strategy.
- If you have
- Liberators:
 Chalk Eater - Grants buffs or more press turns when hitting weaknesses.
 Shionyan - Grants +12 Mag for magic teams. If paired with Idun, can offer extra MP occasionally.
 Carbon Black - Crit damage and +12 Str for physical teams.
 Templar Dragon - Boost damage of demons that use
  Charge or
  Concentrate.
 Meat Balloon - 10% chance to cast a
  DEF buff when hit by magic. Helpful if running a tanky buff engine that eats lots of hits, such as Demeter/Orcus + Ame no Uzume + Barong + Ananta.
Recommended demons:
In addition to the units detailed in the Useful Demons section of this guide:
Support:
 Ame no Uzume's Force weakness makes her synergize with the Demeter tank strategy in phase 1. Consider pairing her with
  Seth or
  Mahamayuri, since they deal Force damage and heal, triggering Ame's
  ATK buff.
 Gogmagog also has a Force weakness, and Final Opposition heals himself, triggering Ame's buff.
 Barong has a Force weakness, plus he heals + buffs with Barong Dance.
 Idun offers bulk and MP regen to the team, like Demeter. The variety of ailments on Goddess's Prank can also help trigger Shionyan's MP recovery effects against Poisoned/Charmed/Muted enemies.
- Side note: be careful about using
 Narcissus. His Force chain effect and team bulwarks seem promising, but the event's stacked buffs can get so high that he will kill his own party members (his gimmick is that he bulwarks the team, Merciless Love slaps teammates for tiny damage since he's charmed, then his chains hit the enemy for big damage).
- Narcissus' standard attack (the thing he hits allies with) sometimes deals much less damage to allies than it should. It's unclear what causes this (tends to happen in team 2, but not always, etc), but due to this it's fairly safe to use him in the Dantalian fight. It's still not a good idea to use him in the Barbatos fight, though.
Damage:

 Morrighan: Damage and Luster Candy buff from Ruthless Death Gale.
 Susano-o: Damage and
  ATK buff from Kusanagi. Note that he uses PATK but his skill outputs magic damage, so this may make synergies awkward. Also be careful that he does not have pierce until panel 4.
 Lugh: Force (and Light) affinity down, grants weakness damage aura to the party.
 Rahab:
  ATK buff when an ally or the enemy hits a weakness. This can synergize with the Demeter tank strat in phase 1, especially since Rahab himself is also weak to Force. Even though the enemy's not weak to Ice, Rahab gives himself
  Might alongside this effect, so he can therefore crit reliably for extra turns.
 Pendragon: Deals a Force (or Ice) follow-up every time an ally hits a weakness.
 Sabaoth: Potentially grants an extra press turn, if he uses Sanction while in the second half of a press turn.
 Seth: Damage and self-heal from Ouas to trigger Ame no Uzume's buffs.
 Mahamayuri: Damage and party heal from Blossoming Cyclone to trigger Ame no Uzume's buffs.
 Nyarlathotep: Sets up
  Gloom (but only in phase 1!) and makes the enemy take more magic damage while Gloomed.
- Any Affinity lowering demon will help greatly, since they can enable Chalk Eater teams.
"The Wolf and the Blood Banquet" event
Normal: Ammut 
Battle 1
| Ammut | - | - | Wk | Wk | - | - | - |
 Deathtouch
 Madness Nails
- Elec Defect (changes Elec affinity to Weak)
Battle 2
| Ammut | - | - | Wk | Wk | - | - | - |
 Deathtouch
 Madness Nails
- Elec Defect (changes Elec affinity to Weak)

 War Cry
Notes
- Reduce boss hp to zero.
- Non-issue fight, just bring your SP units to squeeze as many points from it as possible.
Superior: Man Eater 
Battle 1
| Maneater | - | Wk | - | Wk | - | Rs | Rp |
Battle 1
| Maneater | - | Wk | - | Wk | - | Rs | Rp |
Notes
- Another simple fight, no real gimmicks outside of bulwark spam.
- To avoid triggering Bulwark, ensure your first team has no
 Phys,
Phys,  Fire or
  Ice damage, while your second team should avoid
  Force,
  Light and
  Dark damage.
  Elec damage is safe on either phase.
Recommended demons:
In addition to the units detailed in the Useful Demons section of this guide:
Support:
Damage:
Ultimate: Loup-Garou 
Battle 1
| Loup Garou | - | Rs | Rs | Nu | - | - | - |
Battle 2
| Loup Garou | - | Rs | Rs | Nu | - | - | - |
Notes:
- In Phase 1, be careful about bringing
 Elec weak demons as this will trigger a follow up attack by the boss.
- Werewolf Erosion will reduce Loup Garou's
 Elec resistance for two levels up to twice. This will give him a weakness you can exploit for bonus damage, extra turns and free buffs with Chalk Eater, if you lack one of the affinity down demons like
  Zeus or 32px Loup Garou himself.
- Liberators:
 Chalk Eater - Grants buffs or more press turns when hitting weaknesses.
 Shionyan - Grants +12 Mag for magic teams.
 Carbon Black - Crit damage and +12 Str for physical teams.
 Templar Dragon - Boost damage of demons that use
  Charge or
  Concentrate.
Recommended demons:
In addition to the units detailed in the Useful Demons section of this guide:
Support:
 Barong is notably useful for this particular event since at panel 3 he will lower Elec damage taken by the entire party, in addition to the other stuff that makes him useful.
Damage:
- Any Affinity lowering demon will help greatly, since they can enable Chalk Eater teams.
"Offering of the Crow Queen" event
Normal: Suparna 
Battle 1
| Suparna | - | - | - | Rs | - | Rs | Wk |
Battle 2
| Suparna | - | - | - | Rs | - | Rs | Wk |
Notes
- Extremely simple fight. No gimmicks.
- Boss has no pierce.
- Simply bring your bonus demons to squeeze a few more points out of him.
- Hitting him with
 Dark will make him go down even faster.
Superior: Yatagarasu 
Battle 1
| Yatagarasu | - | Wk | Wk | - | Wk | Rs | - |
Battle 1
| Yatagarasu | - | Wk | Wk | - | Wk | Rs | - |
Notes
- Another simple fight. Bring your strongest
 Force units and blow him away.
 - While Yatagarasu is also weak to both
 Fire and
  Ice the 1st battle will auto cast a 1000 HP Bulwark when hit with these elements. The added 30% damage from Tailwind Boost makes this largely irrelevant since you can just punch through it, however if your demons or brands are lacking this might wall your damage somewhat. Simply utilize Force demons on the 1st fight and Fire or Ice ones on the 2nd fight.
Recommended demons:
In addition to the units detailed in the Useful Demons section of this guide:
Support:

 Mahamayuri: Blossoming Cyclone deals
  Force damage, and heals the party.
 Ame no Uzume: If an ally triggers a healing effect, then Ame grants an
  ATK buff (if panel 2, then also a
  DEF buff) - this combos well with demons like
  Mahamayuri or
  Seth.
Seth.
Damage:
- Any Affinity lowering demon will help greatly, since they can enable Chalk Eater teams:

 Lugh: crazy
  Force damage and
  auto-Charge after hitting a weakness once per turn.
 Samyaza: will cast a follow up hit after any ally, including himself, casts a
  Force (or Elec) attack. Additionally, he can lower MP cost of magic skills for the party.
 Nyarlathotep: will increase Magic damage taken by the enemy when under a state of
  Gloom, as well as supplying an
  ATK buff and
  DEF buff with Panel 2. However, he can only apply Gloom in phase 1.
 Mada: Deals
  Fire damage,
  Charm, and grants Bulwarks for the team to aid survival.
 Anahita: Hell Stream deals
  Ice damage, and grants an
  ATK buff and
  DEF buff with every cast. Synergizes well with
  Demeter's Bulwarks to grant +30% magic damage to the team.
 Baal: increases
  Force dealt by the party in addition to being a good DPS.
 Susano-o: Kusanagi deals
  Force damage, and each cast grants an
  ATK buff.
 Sabaoth: Sanction deals
  Force damage, and can potentially grant an extra press turn if used in the second half of a press turn.
 Seth: Ouas deals physical
  Force damage while healing the user. Can combo with
  Ame no Uzume to grant
  ATK buffs.
 Koga Saburo: Soaring Blades deals physical
  Force damage. Must be panel 2, or else he will run out of charges (with 2 turns, he will need 4, but without p2 he only has 3 charges).
Ultimate: Morrighan 
Battle 1
| Morrighan | - | - | - | - | Nu | Nu | Rs |
Battle 2
| Morrighan | - | - | - | - | Nu | Nu | Rs |
Notes:
- Missing against Morrighan is deadly as she will leave your party at 1 HP, remove Barriers and inflict
 Poison.
- Luckily someone forgot to give her any evasion bonuses! So this is a non-issue unless your physical demons have accuracy issues in the first place.
- Spirit Chains: Corrosion - Your highest-HP unit will be hit with this at the beginning of each enemy turn, lowering both their Defense stats by 80%. While this might not be an issue at first, once you hit a high enough boss level it might make a significant difference in the damage they take.
- In Phase 1, be careful about bringing
 Force- or
  Phys-weak demons as this will trigger a follow up attack by the boss.
- Morrighan has no weaknesses! Until hit with a
 Force attack, as Gale Erosion will drop her Force affinity by 2 stages up to twice every time she's hit with one. Use this to enable Chalk Eater teams to chew through her HP and spam free buffs.
- Whoever initiates this will need to have Force pierce (she starts at Null), or you'll need a team member to reduce Force affinity first.
- Unlike the previous event,
 Force has few units that trigger a free attack at the beginning of turn to speed up the process, forcing you to take 2 turns to make her weak.
  Samyaza can follow up an ally's attack with Thunderforce to drop her resistance all the way down.
 - Your own
 Morrighan or
  Lugh can also reduce Force affinity.
- Liberators:
 Chalk Eater - Grants buffs or more press turns when hitting weaknesses.
 Shionyan - Grants +12 Mag for magic teams.
 Carbon Black - Crit damage and +12 Str for physical teams.
 Templar Dragon - Boost damage of demons that use
  Charge or
  Concentrate.
Recommended demons:
In addition to the units detailed in the Useful Demons section of this guide:
Support:

 Mahamayuri: Blossoming Cyclone deals
  Force damage, and heals the party.
 Ame no Uzume: is particularly relevant for this event since she is Weak to Force, baiting the boss into using her attacks and triggering Demeter or Orcus as detailed above. Additionally, if an ally triggers a healing effect, then Ame grants an
  ATK buff (if panel 2, then also a
  DEF buff) - this combos well with demons like
  Mahamayuri or
  Seth.
Seth.
 Hecatoncheires fills a similar niche, baiting with his Force weakness and lowering
  All Targets /
  Random Targets attacks.
Damage:
- Any Affinity lowering demon will help greatly, since they can enable Chalk Eater teams:

 Lugh: crazy
  Force damage and
  auto-Charge after hitting a weakness once per turn. He will also lower Force affinity to make the boss Weak faster.
 Samyaza: will cast a follow up hit after any ally, including himself, casts a
  Force (or
  Elec) attack. Additionally, he can lower MP cost of magic skills for the party. Samyaza can guarantee a Force weakness after only one attack.
 Nyarlathotep: will increase Magic damage taken by the enemy when under a state of
  Gloom, as well as supplying an
  ATK buff and
  DEF buff with Panel 2. However, he can only apply Gloom in phase 1.
 Mada: Deals
  Fire damage,
  Charm, and grants Bulwarks for the team to aid survival.
 Anahita: Hell Stream deals
  Ice damage, and grants an
  ATK buff and
  DEF buff with every cast. Synergizes well with
  Demeter's Bulwarks to grant +30% magic damage to the team.
 Baal: increases
  Force dealt by the party in addition to being a good DPS.
 Susano-o: Kusanagi deals
  Force damage, and each cast grants an
  ATK buff. Be careful that he cannot pierce until panel 4 though, so you may need another Force caster to hit the boss first.
 Sabaoth: Sanction deals
  Force damage, and can potentially grant an extra press turn if used in the second half of a press turn.
 Seth: Ouas deals physical
  Force damage while healing the user. Can combo with
  Ame no Uzume to grant
  ATK buffs.
 Koga Saburo: Soaring Blades deals physical
  Force damage. Must be panel 2, or else he will run out of charges (with 2 turns, he will need 4, but without p2 he only has 3 charges).
"Ravaging Bull Soaked in Blood" event
Normal: Horkos 
Battle 1
| Horkos | Rs | - | Wk | - | - | Wk | - |
Battle 2
| Horkos | Rs | - | Wk | - | - | Wk | - |
Same as the first battle, but replaces Auto-Rakuka with ![]() Auto-Taruka.
Auto-Taruka.
Notes
- Boss has no pierce.
- Just hit him with
 Ice or
  Light and he should go down quickly.
 - Some form of
 DEF debuff to neutralize his
  Auto-Rakuka may be helpful.
Superior: Anat 
Battle 1
| Anat | - | Wk | - | Rs | Wk | Nu | Rs |
Battle 2
| Anat | - | Wk | - | Dr | Wk | Nu | Rs |
Notes
- Punishes using
 Elec damage in both phases:
- Phase 1 reduces Elec damage by 80%.
- Phase 2 blocks Elec with Elec Drain + Drain Pierce, unless Elec affinity is reduced. If you use Elec attacks, she then lowers your team's Elec affinity.
- Has consistent weaknesses to
 Fire and
  Force in both phases.
  Phys can have
  Hagen open up a weakness in either phase.
- Liberators:
 Chalk Eater - Grants buffs or more press turns when hitting weaknesses.
 Shionyan - Grants +12 Mag for magic teams.
 Carbon Black - Crit damage and +12 Str for physical teams.
 Templar Dragon - Boost damage of demons that use
  Charge or
  Concentrate.
Recommended demons
Support:
 Demeter: Helps team survival with Bulwarks, team offense with extra MP, and casts buffs during the boss's turn. Also a
  bonus unit.
 Demiurge: Combine with allies that have Drain Elec, to get team-wide healing and MP recovery.
- Good Elec Drain partners include:
 Mara: Panel 3 repeatedly grants
  Charge as long with each use of Hell Thrust. Also a
  bonus unit for the second half of the event.
 Ardha: Ruin and Grace deals damage and grants a team-wide heal with each use.
- Teal

 Susano-o: (see section below)
- panel 2
 Orcus: Casts an
  ATK buff whenever the boss hits his or an ally's weaknesses. He comes with an Elec weakness by default. Also reduces AoE damage taken by the party, depending on how many weaknesses the party has.
Damage:
 Elohim: Solar Flare deals
  Fire damage, and grants an
  ATK buff with every cast. Also a
  bonus unit.
 Mada: Deals
  Fire damage,
  Charm, and grants Bulwarks for the team to aid survival. Also a
  bonus unit.
 Mahakala: Automatically attacks the boss with
  Fire if your team goes first, and again at the start of your second turn, getting in some extra weakness rolls for Chalk Eater. If panel 3, each cast of Wrathful Flame also grants an
  ATK buff and
  DEF buff. To top it off, he gives himself
  Concentrate at the start of the first and second turn.
 Mithras: Mark of Punishment can deal
  Fire damage, he boosts the team's Fire damage, and he automatically casts a follow-up attack (that also heals him) when an ally uses Fire. Also a
  bonus unit for the second half of the event.
- panel 4
 Cybele: Grants an
  ATK buff whenever she casts Trisagion.
  Susano-o: Kusanagi deals
  Force damage, and each cast grants an
  ATK buff.
 Sabaoth: Sanction deals
  Force damage, and can potentially grant an extra press turn if used in the second half of a press turn.
 Mahamayuri: Blossoming Cyclone deals
  Force damage, and heals the party. Be careful of his
  Elec weakness, though!
 Seth: Ouas deals physical
  Force damage while healing the user.
 Ame no Uzume grants
  ATK buffs when a healing effect is cast, such as from
  Demiurge,
  Mithras,
  Seth, or
  Mahamayuri.
 Koga Saburo: Soaring Blades deals physical
  Force damage. Must be panel 2, or else he will run out of charges (with 2 turns, he will need 4, but without p2 he only has 3 charges). Also a
  bonus unit for the first half of the event.
 Hagen: Open up a
  Phys weakness.
- panel 3
 Zaou-Gongen: Can grant infinite
  Might to the team, ensuring they always crit to spend half-turns. Also a
  bonus unit. Be careful of his
  Elec weakness, though!
  Flauros: Iron Fist grants an
  ATK buff and
  EVAC buff with every cast. Also a
  bonus unit for the first half of the event.
Ultimate: Moloch 
Battle 1
| Moloch | - | Rp | Wk | Rs | - | - | - |
Battle 2
| Moloch | - | Rp | Wk | Rs | - | - | - |
Notes:
- Do NOT bring revives.
- Your unit with the most HP in the team should have a way to prevent
 Bind on themselves.
- In Phase 1, be careful about bringing
 Fire-weak demons.
- There are several opportunities to hit weakness here:
 Ice - Weakness is open by default.
 Fire - Bring at least one Fire-pierce attacker to hit past the boss's Repel Fire. Hitting the boss with Fire reduces his resistance by 2 stages, leading to Weakness after 2 triggers. Note you will need to do this at the start of every player turn.
 Phys,
Phys,  Elec, and
  Dark - These can use attribute affinity down to open up a weakness.
- Liberators:
 Chalk Eater - Grants buffs or more press turns when hitting weaknesses.
 Shionyan - Grants +12 Mag for magic teams.
 Carbon Black - Crit damage and +12 Str for physical teams.
 Templar Dragon - Boost damage of demons that use
  Charge or
  Concentrate.
Recommended demons:
Support:
 Demeter: Prevents ailments on the team, as long as Bulwarks are active before the enemy turn starts. Helps team survival with Bulwarks, team offense with extra MP, and casts buffs during the boss's turn. Also a
  bonus unit.
 Demiurge: Combine with allies that have Drain Fire (several Fire attackers have this), to get team-wide healing and MP recovery.
- panel 2
 Orcus: Casts an
  ATK buff whenever the boss hits his or an ally's weaknesses. He comes with a Fire weakness by default. Also reduces AoE damage taken by the party, depending on how many weaknesses the party has.
Damage:
 Rahab:
  Ice damage, casts an
  ATK buff +
  Might (for himself) any time your team or the boss hits a weak point. Also a
  bonus unit for the first half of the event.
 Anahita: Hell Stream deals
  Ice damage, and grants an
  ATK buff and
  DEF buff with every cast. Synergizes well with
  Demeter's Bulwarks to grant +30% magic damage to the team.
 Elohim: Solar Flare deals piercing
  Fire damage with Remnants, and grants an
  ATK buff with every cast. His high Agi and Remnants makes him perfect for setting up Fire weakness on the boss. Also a
  bonus unit.
 Mada: Deals piercing
  Fire damage, and grants Bulwarks for the team to aid survival. Also a
  bonus unit.
 Mahakala: Automatically attacks the boss with
  Fire if your team goes first, and again at the start of your second turn - doing half of the Fire weakness setup for you. If panel 3, each cast of Wrathful Flame also grants an
  ATK buff and
  DEF buff. To top it off, he gives himself
  Concentrate at the start of the first and second turn.
 Mithras: Mark of Punishment can deal piercing
  Fire damage, he boosts the team's Fire damage, and he automatically casts a follow-up attack (that also heals him) when an ally or the enemy uses Fire. Also a
  bonus unit for the second half of the event.
- The heal can chain into
 Ame no Uzume for
  ATK buffs.
- The heal can chain into
 Quetzalcoatl A: Aztec Pulse deals piercing
  Fire damage, and also has Remnants after the first use (if panel 2, this skill always has Remnants). Also a
  bonus unit.
- However, be careful to make sure he doesn't die, as he will revive himself - triggering Rule Control's effects.
 Adramelech: Sacrificial Inferno deals piercing
  Fire damage, and grants an
  ATK buff with every cast. Also a
  bonus unit for the first half of the event.
 Zeus: Open up an
  Elec weakness.
- Pairs well with
 Botis, who is a
  bonus unit for the first half of the event.
- Pairs well with
 Tiamat A: Open up a
  Dark weakness.
 Hagen: Open up a
  Phys weakness.
- panel 3
 Zaou-Gongen: Can grant infinite
  Might to the team, ensuring they always crit to spend half-turns. Also a
  bonus unit.
  Flauros: Iron Fist grants an
  ATK buff and
  EVAC buff with every cast. Also a
  bonus unit for the first half of the event.
 Tokisada: Amakusa Uprising grants an
  ATK buff and
  EVAC buff with every cast. If panel 2, also grants himself
  Might with every cast.
"Otherworldly Primordial Mother" event
Normal: Anzu 
Battle 1
| Anzu | - | - | - | Nu | Wk | - | - |
Battle 2
| Anzu | - | - | - | Nu | Wk | - | - |
Same as the first battle, but now also has Bolt Storm.
Notes
- Boss has no pierce.
- Just hit him with
 Force (or at least make sure you don't hit his null Elec) and he should go down quickly.
Superior: Pazuzu 
Battle 1
| Pazuzu | - | Rp | - | Rp | - | Rp | Wk |
Battle 2
| Pazuzu | Rp | - | Rp | - | Rp | - | Wk |
Notes
- The boss's repel resistances are unpiercable due to Repel Pierce.
- The boss is weak to
 Dark in both phases, so bring Dark attackers.
- In phase 1, crits from
 Phys attackers can help with spending only half-press turns.
 - In either phase, crits from elemental physical attackers can work too.
- In phase 1, crits from
 Chalk Eater can easily farm buffs due to the consistent weakness.
Recommended demons
 Demeter: Provides survival and Luster Candy buffs during the boss's turn.
 Zeus: opens up an
  Elec weakness, expanding team options.
 Izanami: Team-wide Elec/Dark damage aura. If
  Red, she also comes with Hell Gaze. Panel 4 can also ease the team's MP management with -1 MP cost. Innate Drain Dark can chain into
  Demiurge for additional HP + MP recovery. Also a
  bonus unit.
 Lucifuge: Light Devourer deals good damage as well as a self-heal, chaining into
  Ame no Uzume for
  ATK buffs. Innate Drain Dark can also chain into
  Demiurge for additional HP + MP recovery. Lucifuge also grants a team-wide damage aura for Tyrants, which are
  bonus units in the second half of the event.
Ultimate: Tiamat A 
Battle 1
| Tiamat A | - | Rs | Rs | Rs | - | Rs | - |
Battle 2
| Tiamat A | - | Rs | Rs | Rs | - | Rs | - |
Notes
- Do NOT use Bulwarks.
- Certain demons only cast Bulwarks when they are paneled, such as
 Barong. If they don't have their Bulwark-granting panel unlocked, they should be safe to use.
- Certain demons only cast Bulwarks when they are paneled, such as
- Boss has no weaknesses.
- Getting extra turns will require: getting crits, using attribute affinity down to open a weakness, or using attacks with Remnants.
- If opening a weakness, use
 Chalk Eater to farm buffs.
- Boss auto-casts poison at the start of your turn, and her attacks deal double damage if you are poisoned.
- She does not break barriers though, so Ward Brands can handle this in place of a cleanser.
- The poison procs after
 Mahamayuri's auto-cure, so he is NOT effective for dealing with this.
- Primordial Sea casts Luster Candy on your party, not on the boss. So even though you take a lot of damage from it, you get that round of buffs as consolation.
- Phase 1 must use magic attacks.
 Shionyan is a good default damage-booster, with her +12 Mag.
- Phase 2 must use physical attacks.
 Carbon Black is effective for damage, if you can consistently crit.
 Templar Dragon can boost the damage of
  Chargers, such as
  Mara or
  Ose Hallel.
- Phase 2 spams an Almighty magic AoE. If this is too much damage pressure,
 Repel Almighty Magic or some kind of Almighty/AoE damage reduction can help keep the team alive. Alternatively, an auto-reviver such as
  Maria may help.
 Meat Balloon can boost the team's bulk with his +12 Vit, as well as a chance to cast a
  DEF buff when the boss uses magic.
Recommended demons:
- Phase 1 (gist: magic, handle ailments.)
 Elohim: His Solar Flare has Remnants and grants an
  ATK buff (plus
  DEF debuff) with every cast.
 Kalki: His Ratnamaru has Remnants, and casts Luster Candy + healing (combo-ing into
  Ame no Uzume for another
  ATK buff) with every use. He also increases everyone's MP recovery by 1 MP, and grants Drain Pierce + Repel Pierce. Also a
  bonus unit.
- However, be careful to make sure nobody dies - if someone does, then Ratnamaru will revive them and give them a Bulwark, which will trigger the boss's revenge.
 Ananta: Free Luster Candy on every player turn and every boss turn.
 Susano-o: His Kusanagi grants an
  ATK buff with every use.
 Indrajit: His Lightning Shower grants an
  ATK buff and a
  DEF buff with every use.
- Phase 2 (gist: physical crits, handle ailments. Consider repel almighty magic.)
- panel 3
 Zaou-Gongen: can grant infinite
  Might to the team to ensure they always crit. Panel 4 is ideal for the discount on God's Hand.
 - panel 3
 Mara: has infinite
  Charge when using Hell Thrust. Panel 4 gives him Charge before his first use of Hell Thrust, as well. For MP management, it's highly recommended to have Hell Thrust's level maxed. Also a
  bonus unit for the second half of the event.
  Futsunushi: Helps get the ball rolling for Zaou-Gongen.
 Flauros: Gives an
  ATK buff and
  EVAC buff with every cast of Iron Fist.
 Tokisada: Gives an
  ATK buff and
  EVAC buff with every cast of Amakusa Uprising. If panel 2, also grants himself
  Might with every cast.
 Chi You: Takes -40% damage from AoEs (-80% if in
  Charge), letting him survive the boss's attacks easily. He also deals big damage when his team's turn ends, entering
  Charge for more damage on the next hit. Also a
  bonus unit for the second half of the event.
- However, a downside is that he can't crit without support. Consider pairing him with Zaou-Gongen and/or Futsunushi.
 Odin A: Grants all your allies +40% Phys/Elec damage when under
  Zenith.
 Asura Lord: Team-wide critical rate and critical damage aura.
 Orcus: Reduce damage taken from the boss's AoEs, 5% for each weakness on the team (at least 10% due to Orcus' own weaknesses). Also a
  bonus unit for the first half of the event.
 Huang Long:
  Repel Almighty Magic blocks the boss's AoE, forcing her to lose turns. At panel 3, he also reduces
  Almighty damage taken by the team by 15%.
- panel 3
- Either phase:
 Zeus: Opens up an
  Elec weakness, which pairs well with
  Chalk Eater. If you have other Elec-physical demons, such as
  Odin A, run Zeus in phase 2. If you don't, then run him in phase 1 with some Elec magic attackers.
 Tiamat A: Similar idea to Zeus, but she opens up a
  Dark weakness.
 Izanami's is a great partner for Zeus or Tiamat A, as she offers an Elec/Dark damage aura to the team. If panel 4, she also offers -1 MP cost to the team's Elec/Dark spells.
 Maria: Immune to ailments, can cleanse ailments + heal the team, and provides +1 MP recovery to the team. If the boss manages to kill anyone other than Maria herself, Maria will automatically revive them at the end of the boss's turn.
"Chaos Dragon of the Abyss" event
Tiamat 
First and easiest battle you will encounter.
Battle 1
| Tiamat | - | Nu | Nu | Wk | - | - | Rs |
Battle 2
| Tiamat | - | Nu | Nu | Wk | - | - | Rs |
Exactly the same as the first battle, even has the same skills.
Notes
- Boss has no pierce.
- Just hit her with
 Elec (or at least make sure you don't hit her nulls) and she should go down quickly.
Ym 
Battle 1
| Ym | - | - | Nu | - | Wk | - | Rs |
Battle 2
| Ym | - | - | Nu | - | Wk | - | Rs |
Notes:
- Boss has no pierce.
- In phase 2, bringing a single NDR ice demon will cancel the boss's automatic Debilitate, which requires his automatic Ice AoE to land. After that, NDR will make him lose a turn when casting Mabufudyne, reducing his total AoE casts per turn from 4 to 3.
- Phase 1 inflicts ailments, and reduces Physical damage.
- Phase 2 no longer applies ailments (aside from Pass Punisher), but reduces Magic damage. A Hell Gongen team to spam crits is effective.
- To get around Pass Punisher, you should be hitting weakness (or using Remnants) repeatedly in phase 1, and hitting weakness or critting in phase 2.
- Run
 Chalk Eater in phase 1, since you'll want to hit weakness a lot anyway.
 - Run
 Carbon Black in phase 2, for more crit damage.
- Run
Recommended Demons:
- Phase 1 (gist: 1 ailment cleanser/blocker or ward brands on everyone + 3 magic attackers with
 Force or Remnants to avoid needing to pass):
 Demeter: Prevents ailments entirely when Bulwarks are up, and her skill to cast Bulwarks has Remnants. She can also squeeze in some more buffs during the boss's turn.
 Mahamayuri: Cleanses without using a press turn, and comes with Force magic as well as healing. Good synergy with
  Ame no Uzume to generate
  ATK buffs.
 Okuninushi: Cleanser with Remnants to compensate for no Force magic. He gives himself
  Concentrate after a cleanse for a bit more damage, and grants one
  ATK buff at the start of his team's turn. Also a
  bonus unit.
 Daisoujou: Cleanser, though will take 1 whole press turn to cleanse. Also a
  bonus unit. However, if only 2 teammates are ailmented instead of all 3, his AI won't cleanse them. He also will not cleanse if you give him an attack skill, so DO NOT give him an attack skill.
 Sabaoth: Careful turn ordering can grant you an extra press turn, plus he has Force magic to hit weakness.
 Susano-o: Force magic that also grants an
  ATK buff with every use.
 Elohim: Solar Flare is magic with Remnants that also grants an
  ATK buff and
  DEF Debuff with every use.
 Vishnu: Has Drain Ice to make the boss lose turns. He will need a Force skill transfer, though. Also a
  bonus unit.
- Could be combo'd with
 Demiurge for a team heal and MP recovery, if the boss happens to hit Vishnu. Demiurge is also a
  bonus unit, but only for part 1 of the event.
 - The heal can further combo into
 Ame no Uzume to generate
  ATK buffs.
- Could be combo'd with
- Phase 2 (gist: 1 defender + 3 physical attackers, physical force if possible. Crit spam to avoid needing to pass. NDR ice to prevent boss's debilitate.)
 Ananta: panel 3 can decrease Ice damage taken by the team. Also has Null Ice. However, note that the boss will remove all buffs/debuffs from the field at the start of the boss turn, and this happens after Ananta's chain effects.
 Demeter: Bulwarks help the team live through Ice AoEs, and she also casts buffs every time the boss casts an AoE.
 Barong: panel 4's bulwarks help the team to live through the Ice AoEs, though it's not as effective as Demeter.
 Seth: Ouas is a strong physical force attack with a high crit rate and self-heal. Since he's able to hit weakness, he doesn't actually need to crit to use only half a press turn. He's also a
  bonus unit, but only for part 1 of the event.
 Tokisada: Grants an
  ATK buff
  EVAC buff with every use of Amakusa Uprising, plus he can give himself infinite
  Rebellion if panel 2. Also a
  bonus unit.
 Kali: Grants herself
  Rebellion with every cast of Violent Dance. Also a
  bonus unit, but only for part 2 of the event. Be careful about her Ice weakness, though - have an NDR ice demon on the team to ensure the boss doesn't get turns off her.
 Zaou-Gongen: Infinite team-wide
  Rebellion to guarantee crits, if he's panel 3.
 Futsunushi: Gets the ball rolling for Zaou-Gongen, since Auto-Rebellion doesn't work in phase 2. Also increases the team's crit damage when in
  Rebellion.
 Gogmagog: Repel Ice to make the boss lose a turn, while still offering phys damage.
- Extra notes
 Frost Ace: Repel Ice is helpful, and Vengeful Frost Fist gives him
  Rebellion with every use. However, he MUST be panel 3 to have Ice Pierce!
Rahab 
Battle 1
| Rahab | Nu | Rs | Wk | Rs | Rs | Wk | Rs |
Battle 2
| Rahab | Nu | Wk | Wk | Rs | Rs | Rs | Rs |
Notes:
- Do NOT try to revive spam with this guy.
- Phase 1 forces you to use
 Light or
  Ice.
Ice. - Phase 2 forces you to use
 Fire or
  Ice.
Ice. - When you hit a weak point in phase 1, the boss casts Luster Candy on you and gives your team 2 MP. This should make MP costs irrelevant in this phase, so bring your heaviest-hitting ice/light attackers.
- Chain effects in phase 1 count as separate weakness hits from skill casts. This can allow you to grind out more buffs and MP from the boss if you use chain-effect-heavy demons like
 Sukuna-Hikona or
  Mithras.
- Chain effects in phase 1 count as separate weakness hits from skill casts. This can allow you to grind out more buffs and MP from the boss if you use chain-effect-heavy demons like
- Hitting weakness in phase 2 at least once is important, to remove the boss's
 Charge before he can use it.
 - Phase 2's reaction AoE upon using a non-Fire/Ice attack can be exploited by
 Demeter to generate buffs.
- However, you should NOT attempt this in phase 1, where the punishment for an off-ele attack is a 50% fractional AoE, which Demeter's Bulwarks are not enough to stop.
 Chalk Eater performs well in both phases, since the main gimmick of this fight is hitting weakness as much as possible.
- He should probably go in phase 1, to make use of any chain effect attacks. If you're not triggering chains, then put him on whichever team you expect to deal more damage - that way you benefit more from any extra press turns that are generated.
- The other team can use a standard damage booster, such as
 Shionyan for magic.
Recommended Demons:
- Phase 1 (gist:
 Light/
 Ice spam, bring chain effect attacks if possible)
 Sukuna-Hikona: Chain effect attack upon an ally gaining
  Might,
  Charge, or
  Concentrate, and grants an
  ATK buff and
  EVAC buff on top of that (once per effect, per turn). He gives Might to himself as well, assuring you get at least one proc of this effect per team turn.
 Mithras: Chain effect attack upon any ally using a light attack, letting you farm buffs and deal more damage. Also a
  bonus unit.
 Tokisada: Gives an
  ATK buff and
  EVAC buff with every cast of Amakusa Uprising. Also a
  bonus unit.
 Vishnu: Comes with Light and Ice spells, as well as Drain Ice to make the boss lose turns. Also a
  bonus unit.
- Phase 2 (gist:
 Fire/
Fire/ Ice spam)
 Elohim: High damage and an
  ATK buff (plus
  DEF Debuff) with every cast of Solar Flare.
 Demeter: Intentionally baiting out the Ice AoE to generate more buffs.
 Cybele: Good damage, and an aura that improves team Fire damage. If panel 4, she grants an
  ATK buff at the start of her team's turn, and whenever she uses her innate Fire skills. Also a
  bonus unit, but only for part 2 of the event.
- Either phase:
 Anahita: Grants an
  ATK buff and
  DEF buff with every cast of Hell Stream. Also a
  bonus unit.
 Frost Ace: Good damage, gives himself
  Might with every cast of Vengeful Frost Fist after the first, and has an aura to improve team Ice damage. Also a
  bonus unit.
 Vasuki: Halahala is a random-targets attack, which does good damage against the lone boss, as well as repeatedly rolling Chalk Eater's effects. Also a
  bonus unit, but only for part 2 of the event.
 Seraph: Good damage, and an aura that improves team damage against weaknesses.
"Revival of the Mantra's Leader" event
Oni 
First and easiest battle you will encounter.
This enemy, just like regular Oni is weak to Elec attacks.
Battle 1
| Oni | - | - | - | Wk | - | - | - |
Battle 2
| Oni | - | - | - | Wk | - | - | - |
The second fight is exactly the same, except for the addition of the skill below.

Notes
- Phys Anti-Pierce is possible, but since Oni has single target attacks and, on the second fight, a fractional move, he will likely not attack into repel/drain reliably.
- Very easy, very simple fight. No gimmicks, no insane HP, just hit him a few times and he should be dead.
Thor 
The second boss. Considerably more dangerous, this is where you need to start understanding the event mechanics.
Battle 1
| Thor | Rs | Nu | - | Dr | Wk | Rs | - |
Battle 2
| Thor | Rs | Nu | - | Rs | Wk | Rs | - |
Notes:
- Phase 1 has both Drain Elec and Drain Pierce. This means he's completely immune to
 Elec attacks (unless you use
  Zeus to change his resistances). In addition, he takes -50% damage from all non-Elec skills and attacks.
 - Thor will counter any non-Elec skills you throw at him. The damage from these counters is not big, but it will add up, especially if you're abusing his
 Force weakness. You can use these counters to trigger skills on your own demons, for example
  Demeter,
  Demiurge, or
  Orcus.
 - However, he's still weak to
 Force attacks, and thus will take more damage from them, which should offset the damage reduction.
 - Phase 2 will no longer Drain Pierce, but will take -90% damage from non-Elec attacks. This makes anything other than
 Elec simply not worth using.
 - Regarding
 Chalk Eater:
- If you have
 Zeus, then use him with Chalk Eater in phase 2 (Zeus makes the boss weak to Elec).
 - If no Zeus, use Chalk Eater with Force casters in phase 1.
- If you have
Recommended Demons:
- Phase 1 (gist: Force spam and/or crits. Need something like reduction, bulwarks, and/or healing to weather the boss's Elec counter attacks.)
 Susano-o: Kusanagi is a very strong Force attack that also casts
  Tarukaja, to increase your attack % on subsequent fights. If
  Teal, he also has Drain Elec to synergize with
  Demiurge.
 Mahamayuri: solid Force attacker which will also heal your party when used. However, be careful of his Elec weakness.
 Sabaoth: careful turn order management might be necessary, but Sanction provides a bonus press turn every turn on top of hitting Thor's weak spot.
 Ame no Uzume: casts
  Tarukaja when a skill with a healing effect is used. Has good synergy with Force users that heal by attacking or automatically, such as
  Seth and
  Mahamayuri.
- Good Drain Elec partners for Demiurge include:
 Ardha: crits for extra turns, on top of a team heal due to Ruin and Grace.
 Mara: multiple hits from Hell Thrust to roll crits, as well as high damage output from
  Charge if panel 3 or 4.
- Phase 2 (gist: Elec spam)
 Thor: Mjolnir deals solid damage across multiple hits. If Zeus enables Elec weakness, then each of Mjolnir's separate hits has its own chance of triggering Chalk Eater's passives for buffs, more press turns, etc.
 Izanami: Team-wide Elec damage aura, and Bolt Storm synergizes with Zeus and Chalk Eater in the same way Thor's Mjolnir does. If panel 1, Bolt Storm costs only 4 MP, so Divines allow her to always cast it - if panel 4, it only costs 3 MP, allowing for Spell Brands instead. Panel 4 can also ease MP management on the party with -1 MP cost.
- Either Phase
 Barong: Panel 3 will make your whole party take -20% Elec damage, and another -70% for himself. In addition, Barong Dance is not only a good healing move, it will also cast and recast Luster Candy which will stack your buff % for future fights. Can be used on either team.
 Zeus: will of course lower Thor's Elec resistance and keep it down through multiple uses of Keraunos. This lets you bypass the Elec immunity on phase 1 and do big damage to him, ignoring the damage reduction to other elements. He also has high value for phase 2, where you're essentially forced to use Elec.
 Orcus: when your team uses a non-Elec attack, Thor will counter with an Elec AoE. This will hit Orcus, who's weak to Elec himself, triggering his passives, most notably his Panel 2 which casts a free
  Tarukaja when a weakness is exploited. He will also prevent bonus turns when Thor uses his regular AoE attack.
Gozu-Tennoh 
The Main Man. Featured demon, rarest and toughest boss.
Battle 1
| Gozu-Tennoh | Dr | Nu | Nu | Nu | Nu | Rs | Rs |
Battle 2
| Gozu-Tennoh | Dr | Nu | Nu | Nu | Nu | Rs | Rs |
Notes:
- Do NOT try to revive spam with this guy.
- If you bring an Intimidating-Stance-like effect to remove enemy press turns, then Restrain and Release causes the boss to lose 3 more press turns and Debilitate himself. If you bring
 Gozu-Tennoh, then you can trigger this on all 3 turns, completely cancelling the Boss's ability to attack you, while also debuffing him for free.
- Due to how low the boss's AGI is, it's not really feasible to set up normal Intimidating Stance effects - you can't out-slow him. But even if you did, most IS effects only activate on the first turn, while Gozu's activates on all 3 turns.
- No weaknesses on either phase, so you will need pure, raw damage. Unless you have
 Zeus and you can abuse that
  Elec weakness.
 - Phase 1 will reduce magic damage by 90%, in addition to punishing you with a 200 BP attack every time you attack him with magic. Do not bring magic units in phase 1.
- Your best bet here is to bring a physical team and spam crits for extra turns.
 Carbon Black is helpful for extra damage.
- Your best bet here is to bring a physical team and spam crits for extra turns.
- Phase 2 does not take reduced damage from physical attacks, but it does counter them with an AoE Phys. Note that while the skills say Phys, they in fact mean Physical, so any skill that can crit or miss will trigger a counter move.
- Due to having no weaknesses and heavily punishing physical moves (and thus crits), bonus turns are hard to come by. Skills like Solar Flare or Sword of Izumo can help provide extra turns through their Remnants attribute. Turn generators like
 Vishnu A can also help.
  Shionyan is a good default choice for phase 2, due to her +12 MAG.
- Due to having no weaknesses and heavily punishing physical moves (and thus crits), bonus turns are hard to come by. Skills like Solar Flare or Sword of Izumo can help provide extra turns through their Remnants attribute. Turn generators like
- The boss will crit. A lot. The damage he does will add up quickly, so you want a healer on phase 2.
Recommended Demons:
- Phase 1 (gist: physical attacks, crit spam)
 Gozu-Tennoh completely cancels the boss's first turn, while also casting Debilitate the boss for 3 turns, due to Restrain and Release. Gozu will also remove one press turn from each of boss turns 2 and 3. However, since Mantra and Crushing Force are HP-based, this means spending 2 or 3 BP will not increase their damage, as those only boost PAtk and MAtk. It may be better to have him use standard attacks instead.
- Panel 3
 Zaou-Gongen provides infinite
  Might to ensure you get crits. Panel 4 is ideal for the discounted God's Hand.
 - Panel 3
 Mara has infinite
  Charge when spamming Hell Thrust, providing great damage output. Panel 4 gives him Charge before his first use of Hell Thrust, as well. For MP management, it's highly recommended to have Hell Thrust's level maxed.
  Futsunushi will counter every attack the boss does, making the damage add up. Also sets up
  Might to get Panel 3
  Zaou-Gongen started without need of Auto-Rebellion.
 Chi You will also deal big damage when the boss's turn ends, entering
  Charge for more damage on the next hit.
 Odin A grants all your allies +40% Phys/Elec damage when under
  Zenith.
 Asura Lord will boost your allies' crit damage.
 Gogmagog can help allies weather the boss's Phys attacks with panel 2, and reduce the chance of boss crits with panel 3. His usual issue of missing shouldn't apply, since the boss's AGI is effectively nothing. Note that he won't have natural Phys Pierce unless panel 4 though, so consider running him alongside
  Zaou-Gongen. Spending 2 or 3 BP will also not increase the damage of Earthquake or Muscle Punch, as those are PDef-based, but BP boosts only PAtk and MAtk. As a result, his standard attack would be his strongest attack.
- Phase 2 (gist: magic attacks, Remnants if possible)
 Elohim is a peak choice for phase 2 thanks to Remnants and Offensive Cry when casting Solar Flare, as well as the large damage numbers.
- Panel 3
 Mahakala can keep offensive buffs up, and gets auto
  Concentrate at the start of the second turn for increased damage.
  Vishnu A and
  Sabaoth can generate extra press turns, to help alleviate the lack of bonus turns from crits. Vishnu also provides attack buffs.
 Demeter is helpful for buffs and Bulwarks as usual. In phase 1 she won't be able to cast My Harvest! without triggering a retaliation, but in phase 2 she can cast it no problem.
